Super fun technique today – faux metal! All you need is silver (or gold) embossing powder, VersaMark, and a heat gun! It doesn’t get easier than this, people, and it’s cool – bonus! And I apologize for the pictures – I did this in the night time and the lighting in my kitchen is terrible for pictures!

The Supplies
Pretty simple – you need VersaMark (or some other sticky embossing ink), a Heat Tool, silver embossing powder, and stamps.
First, press VersaMark onto some cardstock, then cover with silver embossing powder.

Silver Embossing Powder
Next, heat it up! There are a couple of ways to do the next few steps, but this is my way. After the first layer, let the powder cool for a moment, ink the embossed surface with VersaMark again, add more powder, and heat. For the next layer, as soon as the powder melts and the surface is still hot, pour embossing powder over it and heat again. Follow this melt, sprinkle, emboss series until you have 4-5 layers of embossing powder. You will notice that the more layers you add, the faster it melts, and the smoother the surface becomes.

4 layers of embossing powder
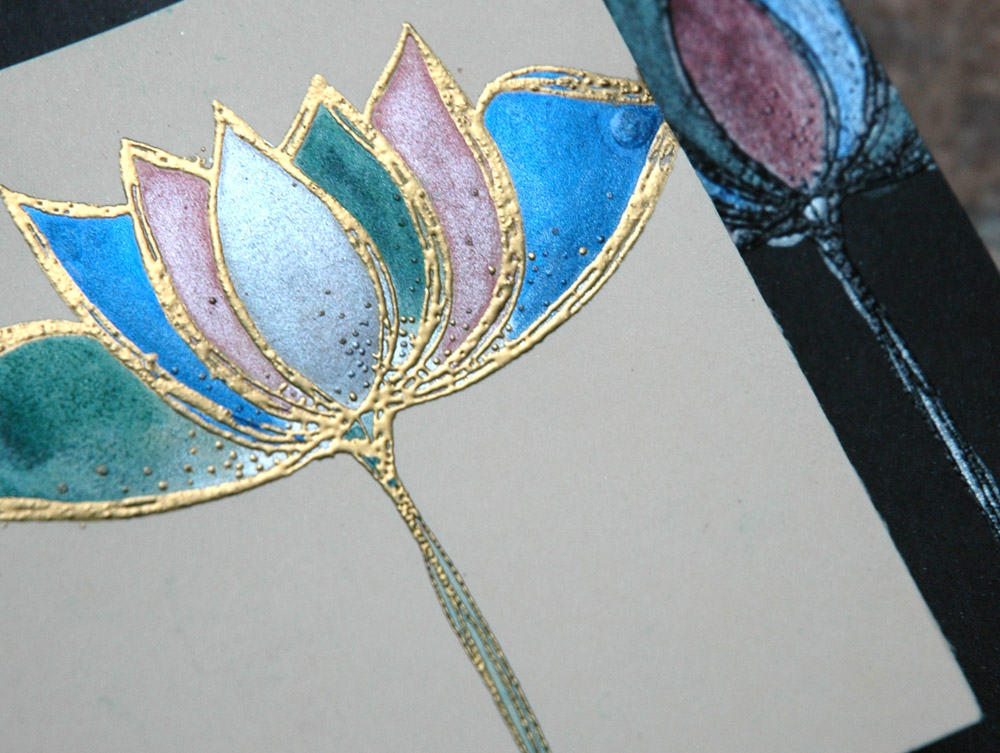
For the final step, take a stamp and ink it up with VersaMark, then set it aside. Melt the final layer of powder and the immediately lay the stamp in the pool of silver. Let it sit for a moment until the powder cools, then lift it off. The VersaMark should allow it to release very easily.
If your image doesn’t stamp correctly, no worries! That’s why this is the easiest, most fool proof technique out there – simply reheat the powder, let it melt again, and re stamp. You can do that over and over and over and… You get the drift!

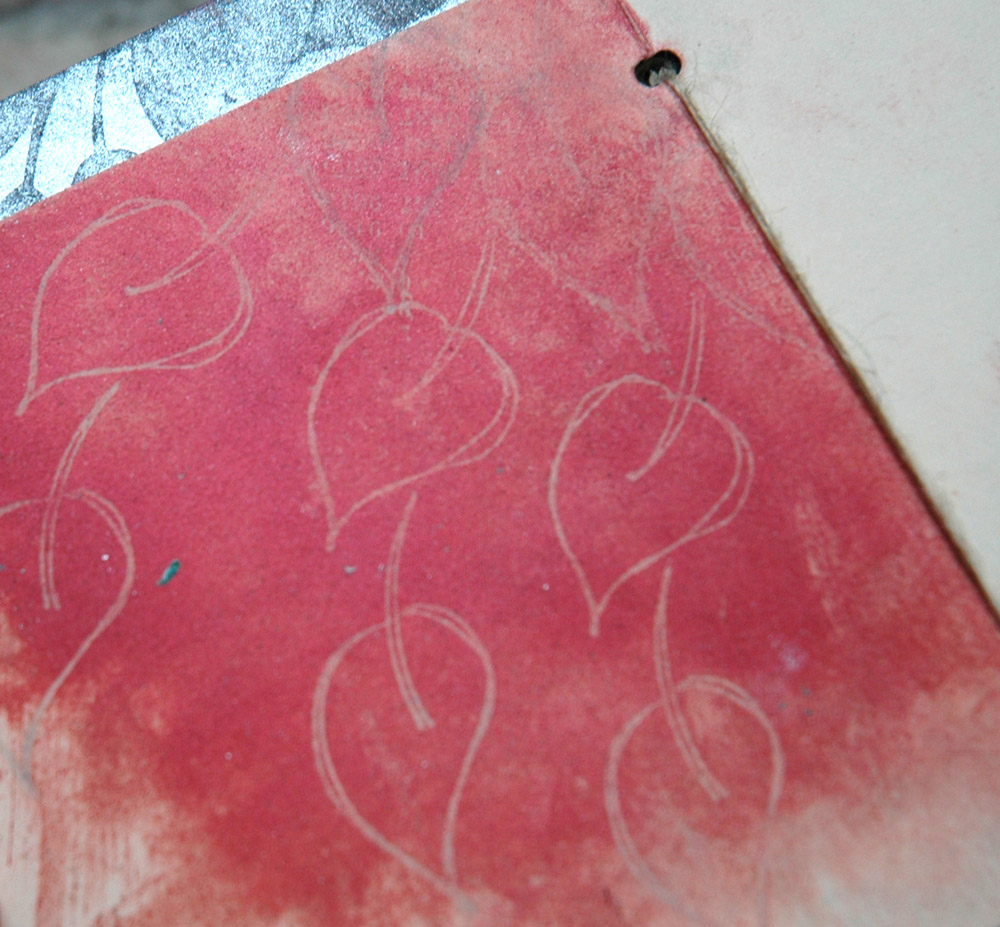
Heart Trio

Heart
Another thing you can do is to apply these same steps to heat embossing a chipboard letter. The difference is at the very end. After stamping a pattern on the letter, heat the powder again. The stamp design will disappear, but will leave behind a streaky, almost black residue. This will add to the faux metal look, especially on a letter or small, solid embellishment.
I punched and cut my shapes out, so you still get the pattern, but not the debossed look. If you cut out a square, or cut the shapes outside the stamp line, you’ll get more of a stamped metal look. That heart trio would look awesome cut into a rectangle and left as a simple embellishment on a card front!

Heart Trio Embellishment
See the flecks of black, how it looks like a more aged metal? That’s what you get when you re heat!
You do want to be careful when cutting as, once cooled, the layers of powder can be brittle, especially if you have lots of layers, and they can crack easily. This is a cool look, if that’s what you’re going for (maybe we’ll do that next week!), but if you want a smooth surface, take your time.
Once you’re happy, make your project!

Completed Tag with Faux Metals Embellishments

Closeup
Look at the texture! And a stamp did that! That’s what I call super cool!
Now, you know you’re just itching to try this out for yourself so go do it! What are you waiting for?
Oh, you’re waiting for this…

Scrap Space - during
OK, so maybe you don’t see a big change but let me tell you, since Friday, a lot (a *lot*) of work has been done in this space – you can actually see the floor now! Wish me luck on the rest of it!
And, as always, when you try this technique I’d love to see your results, so post a pic somewhere and leave a link in the comments!
S.

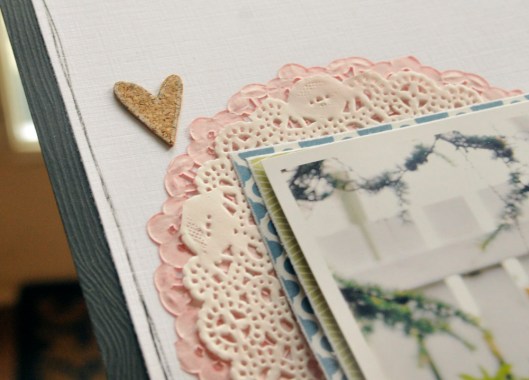
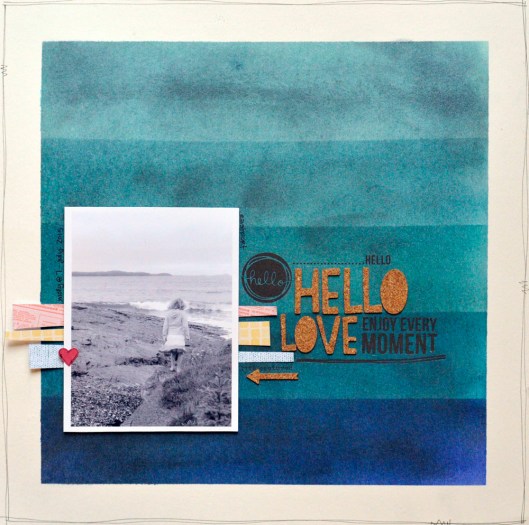 I love how the ombre turned out on this one! Molly’s favourite colour these days is blue and since the Distress line has so many incredible blues, I decided to use a bunch! What better way than ombre? You can’t see it, my photography skills are just not up to the challenge, but the shimmer of Perfect Pearls over the Distress Ink is amazing!
 The second LO is the exact same technique but with a different shape, ink colour, and Perfect Pearl colour.
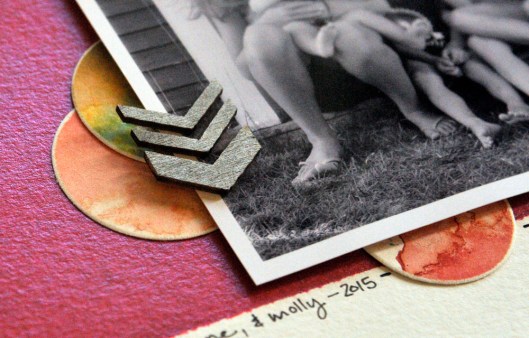
 Still more cork and rub-ons for the title and journaling work – I love how those pieces all came together!
 We also mixed a few colours together on this one; you can see the blend if you look closely. It added great depth without breaking up the visual of one colour tone.