• About

sarathings

~ my art, my family, my life, my stuff…

sarathings

Category Archives: Techniques

The Best!

25 Wednesday Nov 2015

Posted by Sara in ScrapBook, Techniques

≈ Leave a comment

Tags

Distress Ink, Perfect Pearls Mist, Ranger, Stampendous Embossing Enamel

Just before I headed off to Vancouver to see my brother I went to a four-day scrapbooking retreat at The Wilds. The Paperie hosts these twice a year and they are a must-do! I admit, I planned my trip around it!

I was actually super productive this time around, something that usually doesn’t happen for me and to be honest, I don’t really care. For me, it’s more about the break and having an awesome girls weekend while doing something we all love! To get lots done this time was a huge bonus!

Two of my favourite LO’s came about due to a challenge I took part in. I used a couple of Halloween pics so I’m going to share these now before we get too far past that time and into full-blown Christmas!

the best
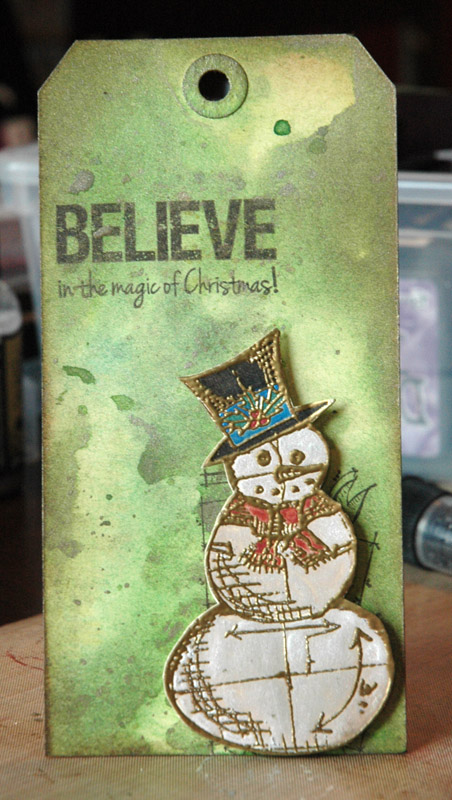
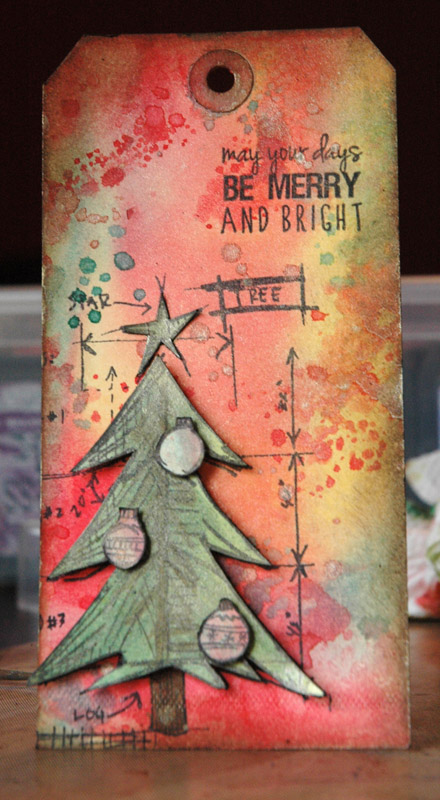
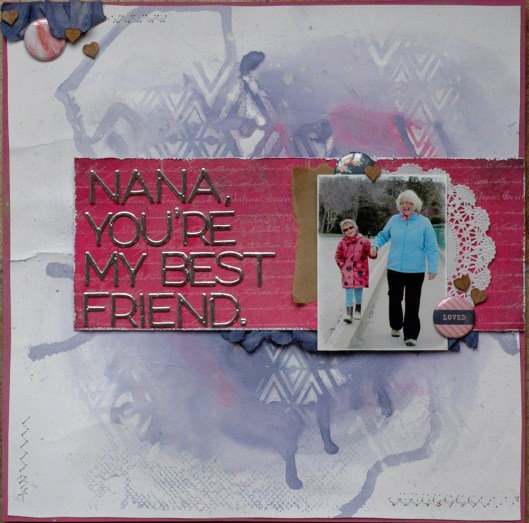
I bought some foam Thicker words at the Retreat and they were perfect for these LO’s:

the best title
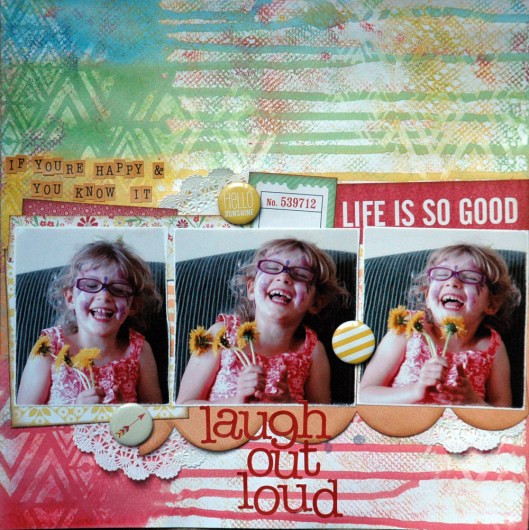
To make both LO’s, I picked three different colours of Distress Ink and blended them to get an ombre look, starting with the lightest and working my way up. I used the small round ink blending tool from Ranger, I like it better than the large one, and went over the colours a lot to get a seamless and smooth colour blend. I find that if you start light and keep adding colour, you are less likely to get lines from both the tool and between colours. If you look carefully, it seems that I have more than three colours on the page but that’s because of the overlap while blending.

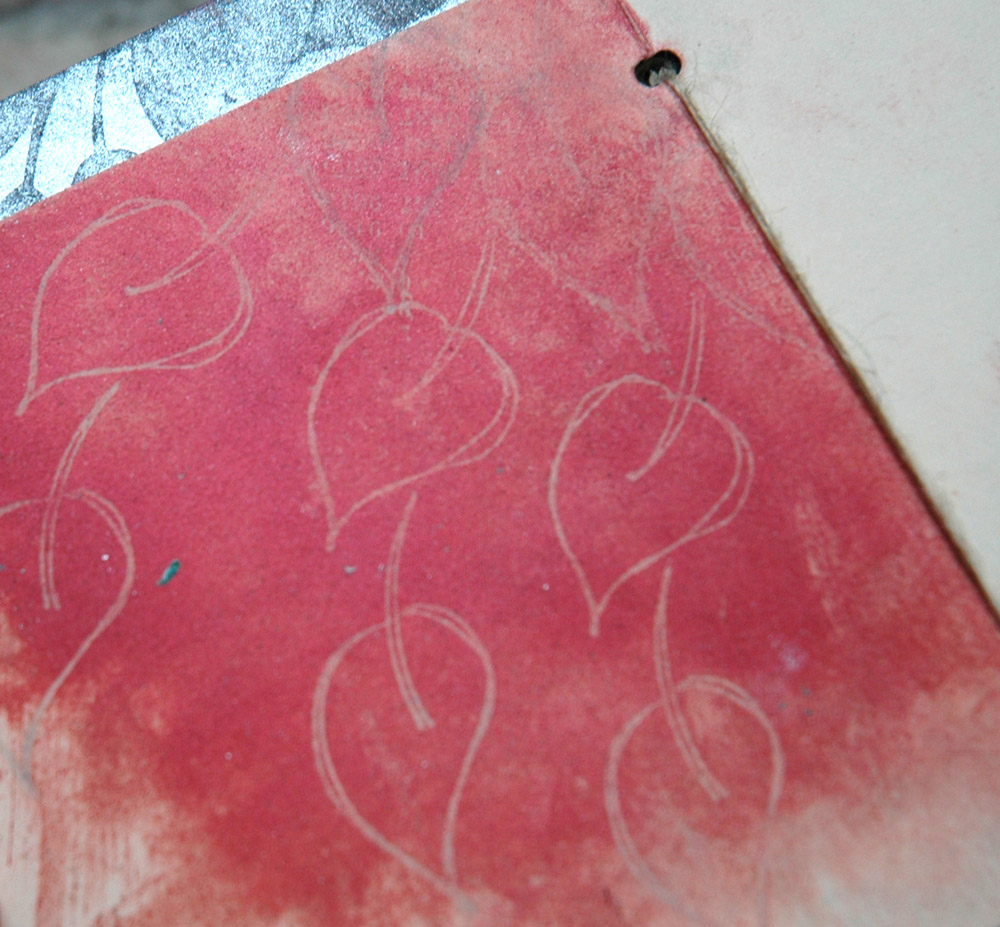
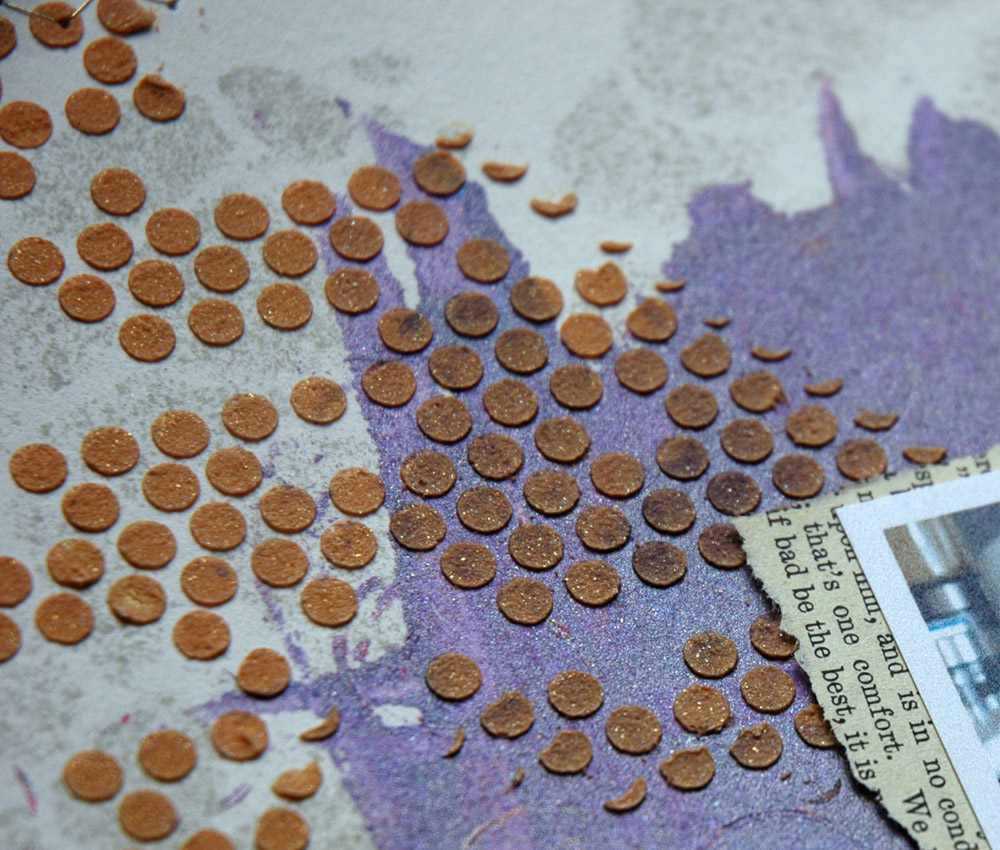
To get the shimmery, bleached out dots I simply sprayed Biscotti Perfect Pearls Mist in my hand, flicked it onto the background and after a few seconds, rolled my paper towels over the top to pick up the excess mist.

my fave
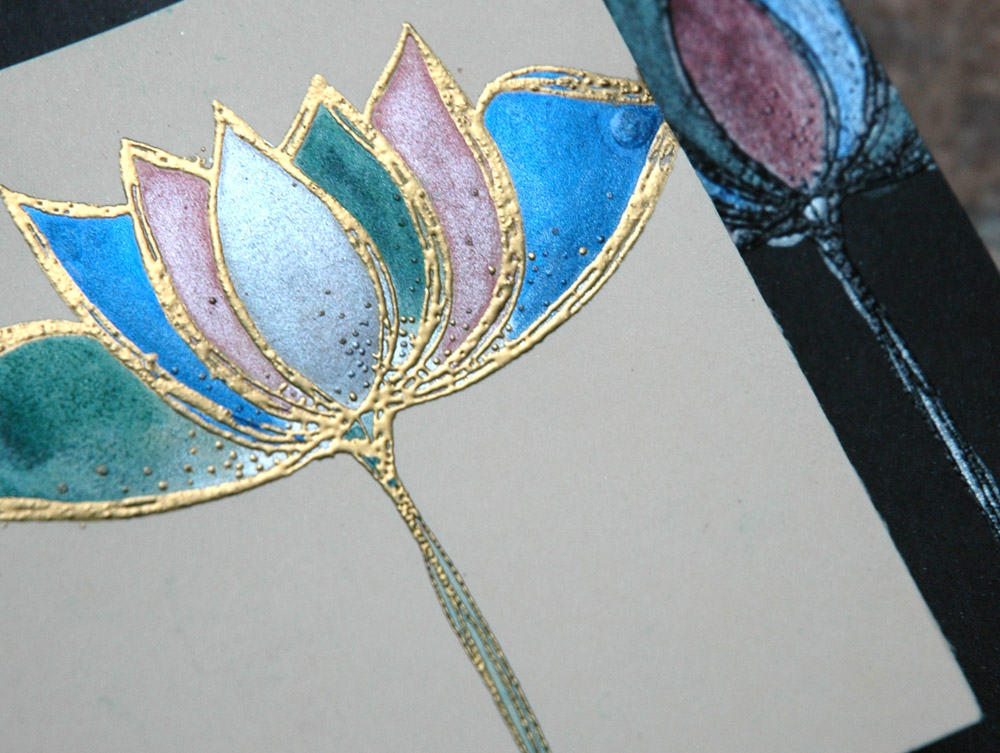
I used the exact same technique for Gabe’s picture, with cool  colours instead of warm.

my fave stars
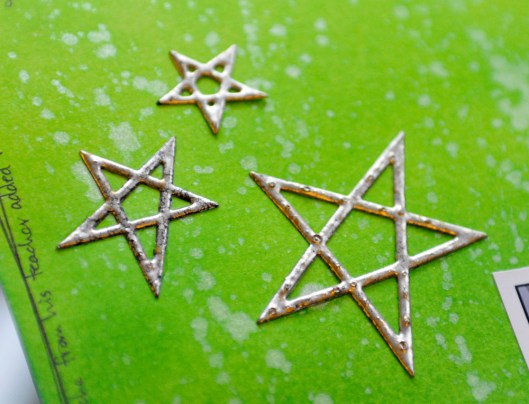
For the stars on both pages I used either diecut cardstock stars or wood veneer. I covered them with VersaMark and then sprinkled on Aged Silver Embossing Enamel from Stampendous. It’s the best antique silvery colour and is my fave lately, along with the Aged Gold.

Distress Ink techniques are by far my favourite – these inks can seriously do almost anything, I think they have magic powers! Let me know if you try this out and have another fun technique to share with me, I’m always looking for new ones!

Cheers!

S.

Share this:

  • Click to share on Twitter (Opens in new window)
  • Click to share on Facebook (Opens in new window)
  • Click to email a link to a friend (Opens in new window)
  • Click to share on Pinterest (Opens in new window)
  • Click to share on LinkedIn (Opens in new window)
  • Click to print (Opens in new window)
  • Click to share on Tumblr (Opens in new window)
  • Click to share on Reddit (Opens in new window)
  • Click to share on Pocket (Opens in new window)

Like this:

Like Loading...

What a Charmer| My Favourite Things 2015

01 Wednesday Apr 2015

Posted by Sara in Classes, Mixed Media, My Favourite Things, ScrapBook, Techniques

≈ 5 Comments

Tags

Alcohol ink, Classes, Mixed media, Ranger

I stuck with my plan and used Ranger alcohol inks for this month’s Favourite Things class. These inks are made for use on non-porous and slick surfaces where they move and blend beautifully. Although I do like using that technique, my favourite is to use the inks on porous elements, like watercolour paper and sticky back canvas.

The first LO was simple blending of colours to make a striped effect. I love the intensity of the colours – I can’t get such richness with any other product I’ve found yet!

03 - loved

There were some awesome colour combos used in class for this! Although I generally use black and white photos when doing mixed media and/or colourful backgrounds so I can go with whatever colours I want at the time, many people brought colour photos and picked inks to work with them. I love seeing all the different preferences and ideas!

Once the majority of our background was done, we used Alcohol Blending Solution and extra ink to add some splatter and texture:

03 - texture

We finished it off by inking enamel chevron stickers to use as embellishments:

03 - altered epoxy chevrons

The second LO was made by using the alcohol inks over a stencil:

04 - charmer

We brought the chevrons back in on this LO but with wood veneer instead. We still coloured them with the alcohol inks and then added some shimmer because I’m obsessed, lol!

04 - stickers and wood veneer

I’m sorry I’ve been a terrible blogger lately – I know I’ve been totally AWOL! – but I can’t seem to get around my own self lately; I think winter is taking its toll! I do have posts for tomorrow (some fabulous “guest artists” will be featured!) and on Friday I have something fun to share so come back and check out all the eye candy!

Cheers!

S.

Share this:

  • Click to share on Twitter (Opens in new window)
  • Click to share on Facebook (Opens in new window)
  • Click to email a link to a friend (Opens in new window)
  • Click to share on Pinterest (Opens in new window)
  • Click to share on LinkedIn (Opens in new window)
  • Click to print (Opens in new window)
  • Click to share on Tumblr (Opens in new window)
  • Click to share on Reddit (Opens in new window)
  • Click to share on Pocket (Opens in new window)

Like this:

Like Loading...

Totally Dylusional….

05 Thursday Jun 2014

Posted by Sara in Cards, Classes, Mixed Media, ScrapBook, Techniques

≈ 4 Comments

Tags

Classes, Dylusions Ink Spray, Mixed Media Layout, The Paperie

A while back I blogged about a new class series I was teaching called Distress Renewed. This is going to be bimonthly and a few weeks ago we had our second class. This one was all about Dylusions Ink Spray – one of my most fave products!

hangin out

Our first LO was all about using Dylusions to make a watercolour background with resist, complete with misted ghosting and bleach out clouds:

hanging out bleached cloud

The second layout was showing the blendability and fun properties of the sprays:

colourful life

Love how water ghosting works on these!

colourful life water ghostingI also had fun with my new-to-me vintage typewriter and the alpha stickers included in the class for the title work on this one:

colourful life title

Finally, we made card fronts using a bunch of techniques:

water ghosting

water ghosting

bleachout and colouring

bleachout and colouring

gel medium and crayon resist

gel medium and crayon resist

watercolour painting and scribble

watercolour painting and scribble

white gesso pastel

white gesso pastel

black gesso magic

black gesso magic

And that’s it – fun times getting messy and inky! Next class will be all about Distress Paints and I can’t wait to play!

S.

Share this:

  • Click to share on Twitter (Opens in new window)
  • Click to share on Facebook (Opens in new window)
  • Click to email a link to a friend (Opens in new window)
  • Click to share on Pinterest (Opens in new window)
  • Click to share on LinkedIn (Opens in new window)
  • Click to print (Opens in new window)
  • Click to share on Tumblr (Opens in new window)
  • Click to share on Reddit (Opens in new window)
  • Click to share on Pocket (Opens in new window)

Like this:

Like Loading...

Fussy Cutting | Scrapbook Steals

17 Tuesday Dec 2013

Posted by Sara in Scrapbook Steals, Techniques, Tutorials

≈ 4 Comments

Tags

fussy cutting, Scrapbook Steals, Tutorial

scrapbook steals

I love fussy cutting! I love cutting out all those little tiny shapes and building something up. I know, most of you think I’m crazy – but I’m going to show you how to do it and not hate it!

Go check out the Scrapbook Steals Blog for my post full of tips and techniques!

3

S.

Related articles
  • Distress Ink Backgrounds | Scrapbook Steals (sarathings.com)
  • Welcome Scrapbook Steals Blog Hoppers! (paperandmusings.wordpress.com)

Share this:

  • Click to share on Twitter (Opens in new window)
  • Click to share on Facebook (Opens in new window)
  • Click to email a link to a friend (Opens in new window)
  • Click to share on Pinterest (Opens in new window)
  • Click to share on LinkedIn (Opens in new window)
  • Click to print (Opens in new window)
  • Click to share on Tumblr (Opens in new window)
  • Click to share on Reddit (Opens in new window)
  • Click to share on Pocket (Opens in new window)

Like this:

Like Loading...

Distress Ink Backgrounds | Scrapbook Steals

12 Tuesday Nov 2013

Posted by Sara in Scrapbook Steals, Techniques, Tutorials

≈ 1 Comment

Tags

Distress Ink, Scrapbook Steals, Tutorial

Remember back when I used to do a Tuesday Technique? They were fun, right?

Well, I didn’t have time to keep doing those each week but luckily for you, Scrapbook Steals does one each and every Tuesday on their blog!designteam-fallwinter

Today, and once every month, I’ll be the How To-sday blogger over there and today is my first post – Distress Ink backgrounds.

photo 7

Go take a look and try it out – fun times will ensue, I promise!

S.


Share this:

  • Click to share on Twitter (Opens in new window)
  • Click to share on Facebook (Opens in new window)
  • Click to email a link to a friend (Opens in new window)
  • Click to share on Pinterest (Opens in new window)
  • Click to share on LinkedIn (Opens in new window)
  • Click to print (Opens in new window)
  • Click to share on Tumblr (Opens in new window)
  • Click to share on Reddit (Opens in new window)
  • Click to share on Pocket (Opens in new window)

Like this:

Like Loading...

Playtime!

15 Tuesday Oct 2013

Posted by Sara in Classes, Mini Album, Techniques

≈ 1 Comment

Tags

Classes, Perfect Pearls

I have a brand new class debuting this weekend at The Paperie – Perfect Pearls Playtime!

perfect pearls - cover

I’ve had lots of people ask me what else they could do with Perfect Pearls so I designed a tag mini album with space left for pictures or technique practice.

perfect pearls - stamp off

We’ll be working on black and manila Ranger tags and using the holiday release of powders from Ranger – Celebration. Plus, everyone gets a Celebration kit to take home with them, as well as full instructions for each of the seven (yes, 7!) techniques we’ll be doing.

perfect pearls - flick

To make the day even better, the Paperie is following up the class with a crop night. So you can take the class and then stay and play some more until midnight! And since class doesn’t start until 2, you have the morning to do all those other weekend things that need doing.

perfect pearls - paint

Can’t make it to class? We can get you a kit and you can still go to the crop night anyway!

This album is specifically designed for people who own a bunch of powders and also for those who don’t even know what they are so don’t feel intimidated – come play with us!

Hope to see you Saturday!

S.

Share this:

  • Click to share on Twitter (Opens in new window)
  • Click to share on Facebook (Opens in new window)
  • Click to email a link to a friend (Opens in new window)
  • Click to share on Pinterest (Opens in new window)
  • Click to share on LinkedIn (Opens in new window)
  • Click to print (Opens in new window)
  • Click to share on Tumblr (Opens in new window)
  • Click to share on Reddit (Opens in new window)
  • Click to share on Pocket (Opens in new window)

Like this:

Like Loading...

I just love me some Primary Elements!

03 Wednesday Jul 2013

Posted by Sara in Mixed Media, ScrapBook, Techniques

≈ Leave a comment

Tags

Luminarte, Mixed Media Layout, Primary Elements

I’ve mentioned here, just once or twice before, how much I love Luminarte products – Silks, Twinkling H2O’s, Modeling Creme. And I have something else to add to that list: Primary Elements.

Primary Elements are artist quality paint pigment, with the expected Luminarte shimmer. There are so many different ways to use them and I demonstrated several at the last Paperie Retreat, but I’m only going to highlight two here.

I made this first LO to promote the demo at the retreat:

colorful life

I went fairly basic, just one colour of Primary Elements mixed into Clear Medium, then painted on the cardstock to make a photo mat. The Clear Medium is acrylic paint base, with a built-in binder so you don’t lose any of that fabulous shine! It’s completely colourless until you add your pigment. You can mix your own colours and intensity of colours, and how much or how little you want, totally customizable!

I then blended a bunch of colours together and mixed that into some light molding paste which I smeared over the 6×6 Heart Confetti stencil:

colorful life - molding paste

It made a great purply/silvery colour which looks awesome.

During the demo I showed how to mix the Primary Elements into the Clear Medium or Molding Paste, how to dilute or intensify the colour, and how to mix your own shades. These next two LO were the scratch papers I used and then decided to finish off.

The first one has a photo base of mixed colours:

fablious fairy

and then one colour for the paste:

fablious fairy - molding paste

This final LO was actually the first demo page I made, showing how vibrant the base colours can be on their own:

buddies

I love the texture of the molding paste on this one!

buddies - molding paste

There are tons of colours in the Primary Elements line and they can all be mixed to make hundreds of other colours. The Paperie carries both the pigments and the Clear Medium plus they can order any colours you might like so go check out the website and then get some and go play!

If you want to see and touch these LO’s in person, I’ll be bringing them to the Paperie to display so pop by to check out their brand new location at 10 Pippy Place and take a look.

S.

Share this:

  • Click to share on Twitter (Opens in new window)
  • Click to share on Facebook (Opens in new window)
  • Click to email a link to a friend (Opens in new window)
  • Click to share on Pinterest (Opens in new window)
  • Click to share on LinkedIn (Opens in new window)
  • Click to print (Opens in new window)
  • Click to share on Tumblr (Opens in new window)
  • Click to share on Reddit (Opens in new window)
  • Click to share on Pocket (Opens in new window)

Like this:

Like Loading...

ICAD 2013 | June 23: infinity

29 Saturday Jun 2013

Posted by Sara in ICAD, Mixed Media, Techniques

≈ Leave a comment

Tags

ICAD, Index card, Mixed media

A while back I made this card and said that the back was so cool I was going to  make another one and use the back as the front.

So I did!

Once again I used the Aboriginal Stencil but I pulled out the 6×6 this time. I stuck with the Graphite Ferro and used different colours of mist. Here’s the back:

infinity - back

Yes. Gorgeous and yummy and sparkly, though you can’t see that very well in the pics. And here’s the front:

infinity

Isn’t that the coolest? Love how this technique works; I think it’s going to have to be part of a class sometime soon.

I printed the sentiment on Sticky Back Canvas then stapled it to the card, the texture is awesome:

infinity - wordsBasically, you need molding paste, water reactive mist, and lots & lots of water. Another upside of this card? Fabulous paper towels to use on upcoming cards!

S.

Share this:

  • Click to share on Twitter (Opens in new window)
  • Click to share on Facebook (Opens in new window)
  • Click to email a link to a friend (Opens in new window)
  • Click to share on Pinterest (Opens in new window)
  • Click to share on LinkedIn (Opens in new window)
  • Click to print (Opens in new window)
  • Click to share on Tumblr (Opens in new window)
  • Click to share on Reddit (Opens in new window)
  • Click to share on Pocket (Opens in new window)

Like this:

Like Loading...

YLA 2013 | June class

26 Wednesday Jun 2013

Posted by Sara in Classes, Project Life, ScrapBook, Simple Scrapper, Techniques, Tutorials, Yearlong Album

≈ 1 Comment

Tags

Gel Medium Resist, Ranger Distress Paint, Simple Scrapper

A few days ago I showed you how I had an idea for these pages, went through an epic failure, and then found redemption on better and bigger paper.

Today, you get the final product!

The rainbow page is my favourite – I love the colours and the pictures so much:

May - laugh out loud

I first sponged glossy gel medium through a stencil, then added puddles of Distress Paint to the edge. I misted until I ran out of water (that’s only a slight exaggeration!) and let the colours run down the page. The texture is from rolling paper towels over to blot up the excess water. How cool is that?!?!

june - laugh out loud texture

This second page is based on a Simple Scrapper template from the July 2013 Premium Member templates:

May - best friend

Once again you start with glossy gel medium through a stencil, then add puddles of paint to the middle of the page. Mist with water and tip the paper to allow the paint to blend and then run in different directions.

The resist is fabulous and has a great shine in real life:

june - best friend resist

I used some Heidi Swapp fabric that I died with the paint and some new Studio Calico wood veneer to add dimension and layers to the top:

june - best friend top layers

So there you have it – a class LO all the way from idea to final product, with a mini tutorial to boot! Hope you enjoyed, I’ll be back later this week with more ICAD’s and the final LO’s from the June/July Paperie Card Kit.

S.

Share this:

  • Click to share on Twitter (Opens in new window)
  • Click to share on Facebook (Opens in new window)
  • Click to email a link to a friend (Opens in new window)
  • Click to share on Pinterest (Opens in new window)
  • Click to share on LinkedIn (Opens in new window)
  • Click to print (Opens in new window)
  • Click to share on Tumblr (Opens in new window)
  • Click to share on Reddit (Opens in new window)
  • Click to share on Pocket (Opens in new window)

Like this:

Like Loading...

YLA2013 | May class, part 1

28 Tuesday May 2013

Posted by Sara in Classes, ScrapBook, Techniques, Yearlong Album

≈ Leave a comment

Tags

Mixed Media Layout, Yearlong Album, YLA2013

This past Sunday was another Yearlong Album class and we played with gesso, Dylusions Ink Spray, and modeling paste.

may  - if you believeIt was fun to see how much the gesso could change not only the look of the background page but also how it reacted to and played with inks.

I also showed how fun certain mists are when they interact with molding paste:

May - wordsMine was very subtle but I love how the paste picks up the mist colour as it dries! And look at the shimmery spots – Luminarte Radiant Rain mist is *so* shiny!

Of course, to finish it all off I used lots of layers of tissue, book print, stickers, stamping, and buttons – love the dimension!

May - layers

I’ll be back tomorrow with the second page – I started it in the class as a demo of sorts so even the class peeps haven’t seen this one completed yet!

S.

Share this:

  • Click to share on Twitter (Opens in new window)
  • Click to share on Facebook (Opens in new window)
  • Click to email a link to a friend (Opens in new window)
  • Click to share on Pinterest (Opens in new window)
  • Click to share on LinkedIn (Opens in new window)
  • Click to print (Opens in new window)
  • Click to share on Tumblr (Opens in new window)
  • Click to share on Reddit (Opens in new window)
  • Click to share on Pocket (Opens in new window)

Like this:

Like Loading...
← Older posts

This is me!

  • Sara

RSS Feed RSS - Posts

Enter your email address to follow this blog and receive notifications of new posts by email.

Join 997 other subscribers
Simple Scrapper Design Team

Simple Scrapper Creative Team

  • Alexa Gill
  • Allie Trumpower
  • Amy Melniczenko – Team Leader
  • Ann Tamimi
  • Arielle Gordon
  • Cathy Caines
  • Christy Strickler
  • Crystal Livesay
  • Delanie Wood
  • Jamie Leija
  • Jan Sowder
  • Jen Conlon – Social Media Manager
  • Jennifer Johnson
  • Jennifer Wilson – Owner/Editor
  • Jenny Larson
  • Kathryn Quintana
  • Kelly Sroka
  • Kimberly Kalil
  • Lisa Corbin-Polak
  • Lisa Hausman
  • Melanie Ritchie – Graphic Designer
  • Neisha Sykes – Graphic Designer
  • Nicole LeBlanc
  • Sandy Henderson
Scrapbook Steals Design Team

Flickr Photos

i ami am wordsfunny things title
More Photos

Twitter Updates

  • @berncoad @VOCMNEWS @PeterCBC @NTVNewsNL @KellyAnneNTV @CMOH_NL Drives me crazy!The moderator should put a stop to it. 1 year ago
  • #mistergabe repping the rainbow all around today and stealing my @target #targetpride hoodie. #pride🌈❤️🧡💛💚💙💜 @ Moun… twitter.com/i/web/status/1… 3 years ago
  • Flowers from Evan. 😍 #awesomeevan #sarathings robertpmendoza @ Mount Pearl, Newfoundland and Labrador instagram.com/p/BzF9AVDh37d/… 3 years ago
Follow @saracees
Follow Me on Pinterest pinterest-5ef5b.html

Categories

Ronda Palazzari Designs
Balzer Designs

Blogroll

  • Artist Wanna Be
  • Confessions of a Twenty Something Artist
  • Darrell Strickland
  • day jobs and the night life..
  • driven to ink
  • For The Love Of Art
  • Gone to the Dogs
  • Graham Case
  • Graham Case Photography
  • It's About Time…
  • pieces of my everyday life…
  • Sit, Scrap, and Relax
  • The Paperie
  • with Coffee in Hand
  • {Every Day}
Art Class Workshop
Balzer Designs Stencil 101
UberMedia Canvas Class
UberMedia Gesso

Archives

  • April 2016
  • February 2016
  • December 2015
  • November 2015
  • October 2015
  • July 2015
  • June 2015
  • May 2015
  • April 2015
  • March 2015
  • February 2015
  • January 2015
  • December 2014
  • November 2014
  • October 2014
  • September 2014
  • August 2014
  • July 2014
  • June 2014
  • May 2014
  • April 2014
  • March 2014
  • February 2014
  • January 2014
  • December 2013
  • November 2013
  • October 2013
  • September 2013
  • August 2013
  • July 2013
  • June 2013
  • May 2013
  • April 2013
  • March 2013
  • February 2013
  • January 2013
  • December 2012
  • November 2012
  • October 2012
  • September 2012
  • August 2012
  • July 2012
  • June 2012
  • May 2012
  • April 2012
  • March 2012
  • February 2012
  • January 2012

Create a free website or blog at WordPress.com.

Privacy & Cookies: This site uses cookies. By continuing to use this website, you agree to their use.
To find out more, including how to control cookies, see here: Cookie Policy
  • Follow Following
    • sarathings
    • Join 317 other followers
    • Already have a WordPress.com account? Log in now.
    • sarathings
    • Customize
    • Follow Following
    • Sign up
    • Log in
    • Report this content
    • View site in Reader
    • Manage subscriptions
    • Collapse this bar
 

Loading Comments...
 

    %d bloggers like this: