Just in case you thought I only had one cute kiddie:

Yeah. She melts me too.
See the split second change from grumpy to laughing? That’s my girl.
S.

19 Friday Dec 2014
Posted in Family
17 Wednesday Dec 2014
Posted in Cards, Family, Kid's Crafts
You know how you always love your kids but some days it just really overwhelms you? He just slayed me today.
 I mean, really. My heart, people, right there. Look at that curl sticking off.
And check out his talent:

So in love with this boy.
S.
15 Monday Dec 2014
Posted in 12 on Twelve, Day in the Life
Tags
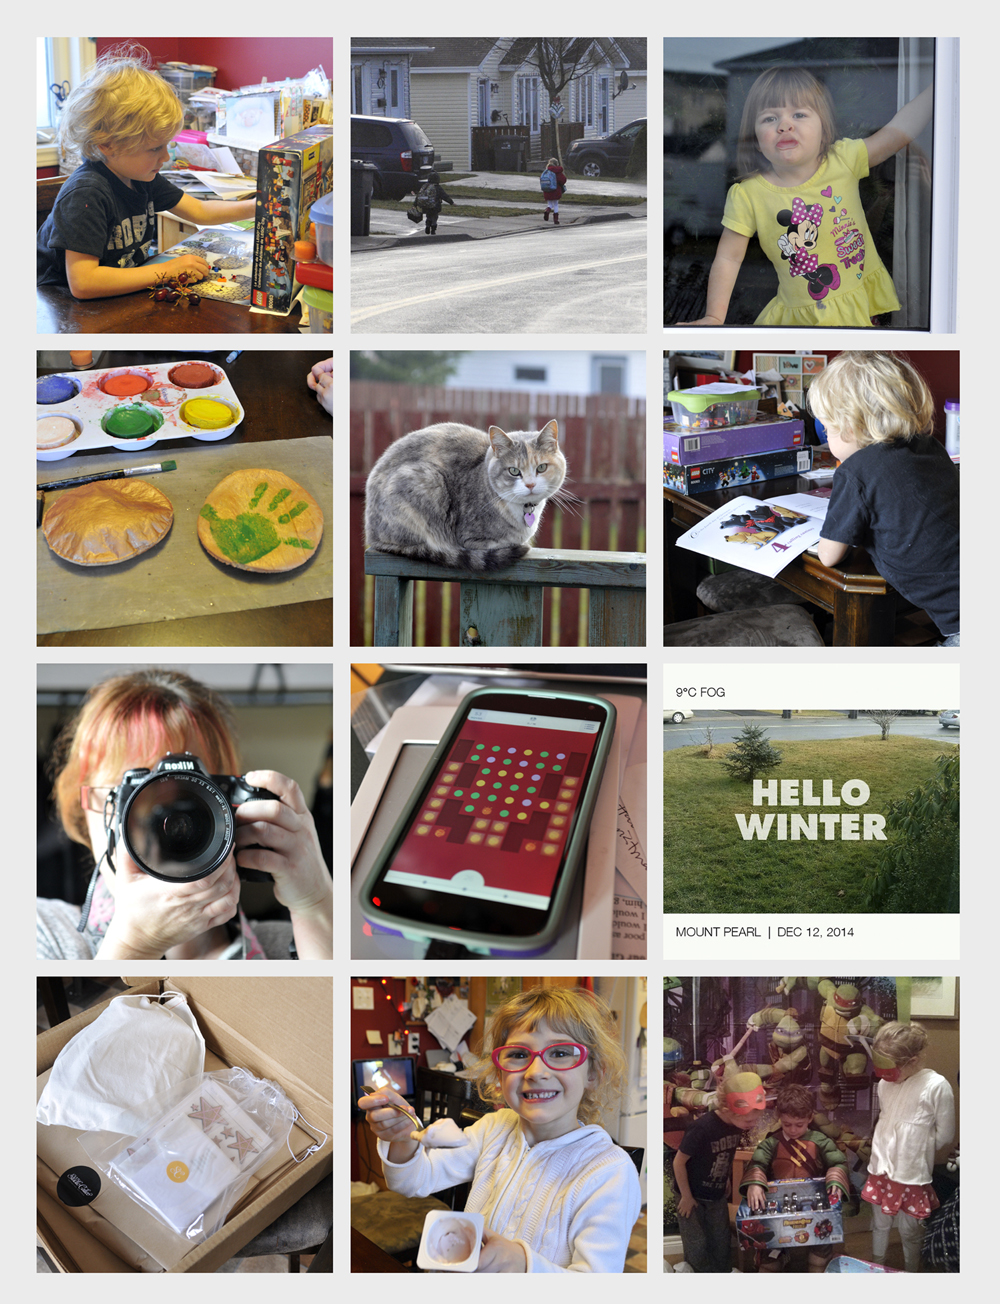
1. opening the advent calendar – Lego, as usual.
2. running to Emma’s van to get a ride to school.
3. watching out the window.
4. making Christmas crafts!
5. Ella.
6. reading a new book – A Puffin Playing by the Sea (to the tune of The Twelve Days of Christmas).
7. selfie.
8. My new addiction, Two Dots.
9. warm and wet today.
10. Studio Calico Black Friday buys showed up!
11. after school snacks.
12. JT’s birthday party.
Cheers!
S.
09 Tuesday Dec 2014
Posted in Family, Kid's Crafts
It’s that time of year again friends – crafty kids time! I’ve got a couple to show you today, for a couple of different age ranges.
First up is our reindeer, inspired by my friend Krista. This is great fun for the older kids who can help each other trace out their hands and forearms and then cut them out. For the younger ones you’ll have to do the cutting and assembling but they think it’s funny when you tickle them by tracing!
I used black construction paper for the “antlers” and made sure to trace their forearms so we have room to stick them onto the head:

The face was just brown construction paper cut into a wonky oval shape:

Add some googly eyes, a glitter nose, and a mouth and you’re done!

We also made snowmen. I bought a bunch of styrofoam cups for Halloween a couple of years ago to make ghosts and I thought they would be great for snowmen too!
For Heidi, who’s two and a little bit impatient 🙂 I simply drew a line around the top of the cup and told her to colour it in for his hat (she picked out all the colours):

Then she we added eyes, a nose, and a mouth to call him good (I poked a hole in the top of the cup to thread string so we could hang him).

For the older kids, I strung three cups together, separating them with buttons tied on the string to hold them apart.

They added the hat to the top cup, then eyes, nose, mouth, arms, and buttons.

Isn’t he fun? He wiggles around when a breeze hits him, lol! This happens to be the prototype that I made with glitter glue so you can see that you can really add all sorts of fun stuff if you feel so inclined – my two added real buttons down his front! It just occurred to me that you could colour the lip of the top cup to make a scarf too.
Anyone else out there making crafts this Christmas? Link me up – I’m running out of ideas!
Cheers!
S.
03 Wednesday Dec 2014
Posted in ScrapBook, Simple Scrapper
Wow. Another year done at Simple Scrapper and the templates this month are some of my favourites. Also, if you’re a member, have you checked out this month’s Spark magazine? It’s gorgeous! If you’re not a member, you’re missing out this month, truly, but you can still see all the Creative Team work and get inspired over at the Team Gallery!
My template LO this month has a fun pic of Molly and I at the beach:
 There’s a bunch of shine here too – gold buttons and shimmer mist:

And of course, lots of layers with paper, doilies, and stitching:

My Story Starter Layout is one of my favourites. The photo of Gabe is from a visit to Lester’s Farm with my brother and his family while they were home for a visit this fall:
 I love using songs for titles and I really love mixing up alphas, especially when I can pull out the gold ones!

I finished this one off with a bunch of die cuts:

When you go check out the Team Gallery make sure you scroll down. All the Team bios and links are there, along with a few recent LO’s – lots of eye candy! Plus you can get even more at our Pinterest board for Team Layouts.
Cheers!
S.
The Premium Membership at Simple Scrapper provides skills and shortcuts to help you simplify and find more meaning in your memory keeping.\

02 Tuesday Dec 2014
Posted in December Daily, Mini Album
I have tons and tons of pics of my foundation pages but I promise you, they’re not all going to be posted here – you’re welcome! 🙂
I’ll give you an overview and post everything on my Flickr page so those of you who are interested can check it all out. Of course, let me know if you have any questions! It’s all pretty simple – I’d never make it through the whole month otherwise – but there are some fun elements that I’ll share here.
Once again this year I got the Ali Edwards kit (it was sold through Studio Calico last year) and I made the splurge again because 2013 was the only time I’ve ever finished it! I’ve tried four other times and it was a disaster! The kit idea definitely works for me. I also added the Freckled Fawn Very Merry embellishment kit this year (I must have been feeling rich or something!) and I was altogether too excited when I discovered they matched perfectly! Seriously people, I squealed like a little girl and clapped my hands, sad….

I love my album! I went with the off white instead of red (two options were offered this year) and I’m so glad I did! I misted the fabric cover with Tarnished Brass Distress Spray Stain and flicked Heidi Swapp Gold ColorShine over that. The tree, star gems, and washi tape are Freckled Fawn while the rubber banners are from the DD kit. I did love Ali’s idea of using the huge gold letters are part of her cover but I moved that element to the inside along with the DD printed masking tape, FF washi and cork sticker:

I also added a fun present to the spine. I’ll be honest, when I saw these two presents in my FF kit I really didn’t think i would use them, just not my thing normally. However, when I gold embossed the white one I loved it!

For Day 1 I used a whole sheet of the DD patterned paper, added some Wink of Stella shimmer to the bulbs, and the wood veneer 1 plus a heart puffy sticker to the out side of the page protector. I gold sparkle embossed all the numbers but I have changed some to silver already. I still think Christmas albums should be all gold and silver – love overloading on the bling!

For Day 4 I used some of the striped patterned paper and stamped all over it with the DD stamps:

Day 5 I used a trick of Ali’s from last year – I stapled a gold 5 to a scrap od page protector I cut up and slid it in the pocket:
 You can see I stole an idea from her this year as well and cut the included transparencies in half – I love that ombre circle one! The star and heart combo you see is the back of day 6. Again, it’s a gold number and it’s all attached to a page protector scrap.
For Day 10 I simply added some FF washi, the DD velvet rickrack ribbon and a number on a gold diecut over some patterned paper. Simple but I love how it looks. The papers in this year’s kit are gorgeous so I don’t really want to cover them up very much!
 Day 12 is by far my favourite! I thought Ali’s idea of using the chipboard piece with the twelve holes was genius but I used one of my funnest (that’s a real word, I swear!) techniques to cover it – sprinkles of gold, silver, glitter, and ultra thick embossing powders. Then I backed the page with a thin sheet of acetate so I could stick elements on and still get a peek of the next pages:
 Day 24 was an old tag I had with some stamping and embossing. You can see I used the big gold foil “25” page for Christmas Day because it’s awesome:
 I also filled a pocket with paper confetti and two of the plastic words for the 25th:
 And that’s it for now! I have lots more in my December Daily album if you want to check out Flickr.
So how about all of you? Anyone doing a December Daily or something similar? Link me up so I can see!
Cheers!
S.
