An Awesome Giveaway!

Tags

, ,

BPC_Logo_Colorsm

I really do have a most excellent giveaway today – you can win a spot in the Big Picture Classes Home Blessings workshop with Courtney Walsh!

courtneyw

Seriously, my friends, this is going to be one great workshop! BPC does incredible classes and I’m thrilled to be doing this one in January!

Here’s the class description:

BPC Home blessings banner

Wouldn’t you love to be surrounded by beautiful, subtle expressions of your deepest beliefs? To reflect your gratitude and love of life on the walls, shelves, and refrigerator fronts of your home?

In this four-week workshop, you’ll learn to create mixed-media wall art, collaged frames, and dimensional decor to bless your home with your own unique touch. Along the way, you’ll discover meaningful ways to bring blessing into your everyday and then create tangible elements to reflect these blessings.

Can you think of a better way to put your paper-crafting products (and skills) to use?

You’ll also uncover new ways to incorporate your whole family in the blessing process, helping yourself (and them) remember that life itself is the greatest blessing of all.

read rest of description here

http://www.bigpictureclasses.com/homeblessings.php

New to Big Picture Classes? Learn more here


And look at a couple of the projects!

BPC Home image1-horz

Yeah, so excited to start this – what an awesome way for 2013 to begin!

Leave a comment on this post by Sunday, December 16, 2012 at midnight and I’ll draw a winner Monday morning. If you don’t follow me, sign up to follow my blog and/or twitter feed and you’ll get extra ballots! Already follow me? Let me know and you’ll get the extra ballots too!

S.

And the exciting news is….

Tags

,

…I’ve been asked to be a part of the Simple Scrapper Design Team!

See the badge over there? ————>  🙂

I’m super excited and can’t wait to get started with Jennifer and her team! As a little preview, here’s a new LO using one of the Premium Member Templates from December:

Say Cheese! - this life everyday

Super easy with a Paperie kit and Simple Scrapper sketch – I was done in no time! Seriously, I set up, scrapped, and cleaned away in less than an hour! Those of you who know me know that’s a miracle!

I stamped and popped up the “this” circle and stamped the words directly on the photo:

Say Cheese! - this life everyday closeup

I hope you’ll come join the fun over at Simple Scrapper and see what the rest of the Design Team and I do every month – they’re an awesome group of talented ladies!

Oh, and it’s definitely worth your while to stop back here tomorrow. There just may be a very awesome giveaway – hint, hint!

S.

More cards…

Tags

, , ,

…for the last Paperie class of the season!Christmas Card Class - grey mitten

I used an Impression Obsession die set, and three different stamps with a kissing technique. For these first two I used the mitten and the knit background.

Christmas Card Class - red mitten


For the last one, I used the mitten and the Nordic Stripes background

Christmas Card Class - brown mittenThe holly die is from Papertrey Ink – it’s the largest in the set.

I love shaped cards and this one was so fun and easy to do – plus it looks like real mittens. Now, if only Impression Obsession would do trigger mitts I’d be all set here in NL!

The last card for tonight is the finished sneak I showed in the original post.

Christmas Card Class - Popup Card closedIt’s a pop-up card so the first picture is when it’s closed, and this next picture is once it’s opened!

Christmas Card Class - Popup CardCute, huh? Lots of Elizabeth Craft Designs here and fine detail glitter, with Copics – I love the sparkle!

For those of you coming tonight, we’re going to have fun, I can’t wait to see you all! And for those of you who can’t make it, I’m sorry – you’re missing out. 🙂

I think there’s one spot left in class so if you want in, call The Paperie ASAP!

S.


My last Paperie Class…

Tags

,

… of 2012 is Wednesday night and its going to be an awesome one!

We’ll be doing at least 3 cards, maybe 4 if time allows, and they aren’t your regular everyday cards either!

We’ll being making a flip gift card holder:

Christmas Card Class - Flip CardChristmas Card Class - Flip Card, inside

A window card (excuse the smudgy interior, little fingers grabbed it before the ink dried):Christmas Card Class - window card

Christmas Card Class - window card, inside

A pop-up card (that’s still under construction!):

Christmas Card Class - Popup Card sneak

and if we get time, I have another simpler one up my sleeve as well!

Plus, we’ll be playing with paper piecing, stamping on acetate, using Copics, and learning how to make two interactive cards.

I’m kitting this class tomorrow night so make sure you call the Paperie before then to sign up. I think there’s a spot or two still available, but I know a lot went today so hurry if you want in!

S.

Party Drink Menus

Tags

, ,

So, remember the other day I told you I was busy this week? Well it was brought to my attention that I might feel like I’m busy because I’m teaching 5 classes in 10 days.

5.

In 10 days.

I just want to make sure you got that!

That means a bunch of instructions (which I hate doing and always put off until the last possible second), 5 lots of kits, 5 lots of prep, a zillion pictures to edit, and all sorts of last minute things to tie up.

There are two day-long classes mixed in here (though I’m only a small part of one of those) and what’s going to be a very fast paced and intense mini album class tonight. We’re cutting and putting together an entire 10 page protector mini in 3 hours – drink your coffee girls, you’re going to need it! 🙂

Anyway, this morning I get a text from a friend who is throwing a bachelorette party tomorrow night – can I make a couple of drink menus?

I had to laugh.

But they only had to be white and silver, and it was a New Year’s Eve theme. Ok, easy. And since I am obviously on a crafting roll this week, why not?

Here’s what I did:

Drink menus

Super simple – printed in black on smooth white cardstock and embossed the image and edges with silver powder. Easy but effective and they were a hit with the friend who requested them.

Sometimes I need to remind myself, keep it simple silly!

Oh, and I totally forgot to draw a winner for the Technique Tag from last Tuesday – sorry! The random number generator picked edyB! Yay! Email me your mailing info at sarathings(at)gmail(dot)com and I’ll send the card out to you!

S.

Project Life – Weeks 7&8

Tags

Still going strong and still loving this project!

(As always, click on any photo to make it larger.)

Week 7:

A couple of weeks before Halloween but it’s definitely making itself known in our world! We bought pumpkins, went to Sunday School, played in the park…

…and made yummy brownies. Our city also got fancy new garbage cans that can be picked up by the truck itself – big excitement for 3-year-old boys!

M also drew a bunch of “Underwater Things.” Since she almost always draws people, or people holding people-shaped balloons, I had to keep this one!

Another week of fabulous weather and I’m hanging onto it as long as I can!

Week 8:

More Halloween lead up; we decorated little pumpkins, got M to agree to braids, and she drew trees on a picture:

We had lunch at the Harbour Front Park, I took a “make your own kit” class with Krista and designed my own page kit for the Retreat. The big deal this week was Marvin the Monkey – he lost an arm. It was repaired and a sling put on – can’t have a missing arm replaced without some fanfare after all!

The space at the bottom is for a pic of the LO I made from the kit I put together in Krista’s class. I’m having Photoshop issues so it will have to wait a little!

S.


Busy, busy, busy!

Tags

, , , ,

This week is already getting away from me! I spent yesterday writing instructions, getting together class supply lists, and doing my day job too! Last night was kitting classes and finishing up the Neon Card Class (I’ve updated that post with all 4 cards!).

Tonight I’m teaching and this weekend is the big Holiday Hoopla at The Paperie. I’m teaching the December Album featuring Bazzill Lickety Slippers and Simple Stories Handmade Holiday paper and stickers:

And on Saturday each of the Creative Team members will be teaching a mini class where you’ll end up going home with 6 completed gifts/home decor pieces and lots of additional ideas! I’ll be back tomorrow hopefully with a picture of the felt brooch I’m teaching – it’s made with the same poinsettia die from Tim Holtz that’s on the album cover above!

The album class is sold out but there are a couple of spots left in the Saturday classes – it’s well worth the time and money, trust me!

All that being said, I’m going to be pretty quiet around here this week, lots on my plate!

Hope to see some of you at the classes this week and remember, we can always do a kit if you can’t make it in person!

S.

Project Life – Weeks 5 & 6

Tags

,

I’m still going, still keeping up, and still loving Project Life. Here are weeks 5 & 6. as always, click any pictures to see them up close and personal!

We headed into October this week and so the kiddies got new winter hats they had to wear, even though we still were having summer temps.

I also managed to get downtown to see a reunion of Critical List, a local band I love, and met up with some old friends who I hadn’t seen in ages. The end of the week brought my trip to Orlando for the Collins Rep Show and the beginning of some fabulous classes!

My favourite part of this week’s LO was the insert:

M drew a picture of “mama and daddy, with flowers and fireworks, because I’m having a good day!”

Onto Week 6:

M’s Thanksgiving poster in one insert and my October 12 on Twelve in the other.

The end of the week me back home again, doing self timer pics with the camera – the kiddies favourite thing – M getting her regular 3 month eye check and a new prescription, and G getting a hair cut.

The beginning of the week was more Orlando and scrapbooking fun!

My favourite picture of the whole week was this one with Dyan Reaveley:

S.

Mixed Media Guest Post!

Tags

, , , ,

I’m guest posting over at Krista’s blog today – go check out how I made this beauty!

Happy Memories

S.

Tuesday Techniques and Tutorials – Embossed Edges, Tin Cans, and Dirty, Faded Ribbon

Tags

, , , ,

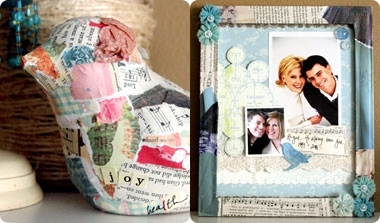
Are you interested yet? 😉

I had the thought to put people in the car from Road Trip (thanks Krista, for that idea!) and wanted to use the phrase “Enjoy the journey.” And all of that led me to thinking this would make a great wedding card.

The only problem? I have no weddings coming up – nada. zip. zilch. So, I’m going to give it to one of you – hopefully someone else can make use of it! 🙂

If you want to make one of your own, here are the supplies:

Start by inking up a background stamp with Pumice Stone Distress Ink and stamp onto a manilla tag. Then use the ink blending tool with the same colour to ink the edges and soften the stamped image by blending over it.

Now, stamp some flourished with the same ink. Because we’ve blended and soften the background colour, the new stamped image will show up well.

Set this aside to dry – we’ll be doing some heat embossing later and we don’t want the powder to stick to the entire tag.

Ink up the car stamp with black Archival and stamp onto a spare manilla tag, then cut it out.

Using a craft knife and cutting mat, trim out the windows of the car, then use an ink blending tool to colour the edges with Gathered Twigs Distress Ink. If you want, use the Ranger Fine Detail Nib Water Brush to pull the ink from the edges into the centre of the car.

Now, use the Distress Markers in Broken China and Barn Door to colour two small wood veneer people (or whatever colours you want to go with the couple being hitched!). Add a little Glossy Accents and attach them to the back of the car, in the windows, with the coloured side facing out.

The next step is to make tin cans – what’s a wedding car without a little tacky happening? 🙂

Cut three narrow strips from the scrap manilla tag and ink them with Iced Spruce, Faded Jeans, and Aged Mahogany Distress Inks. Add a dot of Glossy Accents to the back on one end and add a piece of twine.

Wrap the paper around the twine until you get the size you want, then trim the end and adhere with Glossy Accents.

Use a piece of tape to stick the three “tin cans on strings” to the back of the car.

Set the car aside for later and get out the stamped tag.

I saw Tammy Tutterow do something similar on the edges of a tag she had on her blog and fell in love with it – now I’m addicted! Here’s how I do it, changed up a bit from Tammy’s:

Add embossing ink to the edges and cover with clear embossing powder.

As you can see, I wasn’t precise about it, it makes it look better this way.

Now flick the tag to knock off a lot of the powder and then heat set the rest. Use an ink blending tool with Gathered Twigs to ink over the embossed areas, then repeat the powder step again. Next, ink with a darker brown, like Walnut Stain. You should see light areas under the powder and dark areas in between where parts of the powder were licked off then inked over. It’s a neat, aged look and effect.

The darker you ink the top and the lighter you leave the base, the more interesting it looks. I left it pretty subtle for this tag but it was a bit more pronounced on last week’s.

You’re going to need ribbon to finish off the tag so run the Aged Mahogany ink pad over some Crinkle Ribbon, then spritz with water to blend. Crumple into a ball and dab with Gathered Twigs. Let dry or heat set – the two colours should give an aged and faded look to the ribbon.

Now, let’s put it all together! Add foam adhesive to the back of the car and adhere it to the left of the stamped and embossed tag. Get some word stickers and add them to the top right corner of the tag. Thread the ribbon through the hole in the tag. If you want, adhere the tag to a card and go party at a wedding!

I really love this tag and it makes me sad that I have no weddings that I can bring it to. So, leave me a comment and I’ll randomly pick someone to get it – if you’re lucky and have a wedding on the horizon, the card will already be done for you (and I will add it to a card before sending it off)!

Link me up if you try out the embossing technique, I’d love to see how it turns out for you!

S.