Life…

Tags

…is just a bit busy right now!

It’s actually warm and sunny here in Newfoundland and when that happens we take full advantage – trust me, it won’t last very long! 🙂

I have a bunch of projects in the works and am trying to fit those into the times when we’re not enjoying the sun. I promise some eye candy and blog posts but they may be as guest posts on other blogs; I’m afraid my little spot here is going to be neglected until at least July is over.

The first guest blog post I did for this month went live this morning over at the Simple Scrapper site so check that out – it’s a very personal one for me and I’d love to hear your feedback.

I hope you are all having a wonderful summer (or winter, as the case may be!) and are having some great adventures – I know we are!

salmon cove - july7

Salmon Cove Sands

S.

I’d like to be….

Tags

, ,

….under the sea.

One of my favourite projects from the April Paperie Retreat – actually, one of my favourite projects ever – was a canvas I did just as we were gearing down to go home. I had the base done, had demoed on it for previous canvas classes, and it needed to be finished.

I painted the base texture with Silks and Primary Elements with no idea of where I was heading. Once the colour was on all I could see was the ocean.

So I stole a bit of moss from Tina, an old compass transparency from Cathie, stuck on a bit of cheesecloth (a personal texture making fave!) and played around with Dyan Reaveley’s Ruby Rainbow set to make myself a mermaid in the sea.

Ruby has crazy hair in the stamp set so I cut it off, moved it all around, then painted it, and some cheesecloth, with Orange Peel Twinks. And made her hair even a bit more crazy than before!

under the sea - hair

Her tail is a shimmery bit of awesomeness made possible by Primary Elements mixed into Old Silver Inka Gold. I then etched the scales with a pencil. It’s hard to photograph but the colour starts pink and fades into purple – it’s just gorgeous:

under the sea - scales

I printed the words on some Martha Stewart Avery labels (love those kraft self-adhesive labels for quotes like this!) and stuck them down:

under the sea - words

I wish you could all see this in person because the shimmer and dimension and texture and subtle colour variation is fab! Yes, I’m patting my own back! 🙂

I hope you like her as much as I do, she sits on the wall over my computer where I can enjoy her everyday:

under the sea

I’m offline for a few days now; I have a very special wedding to attend this weekend (the card and hopefully some pics to come next week) and then fingers are crossed for a day at the cabin on the Sands. I also have ICAD’s to catch up on, some special guest blog posts to write, and an exciting scrapbook project to dive into. I’ll be back when I can come up for air!

S.

I just love me some Primary Elements!

Tags

, ,

I’ve mentioned here, just once or twice before, how much I love Luminarte products – Silks, Twinkling H2O’s, Modeling Creme. And I have something else to add to that list: Primary Elements.

Primary Elements are artist quality paint pigment, with the expected Luminarte shimmer. There are so many different ways to use them and I demonstrated several at the last Paperie Retreat, but I’m only going to highlight two here.

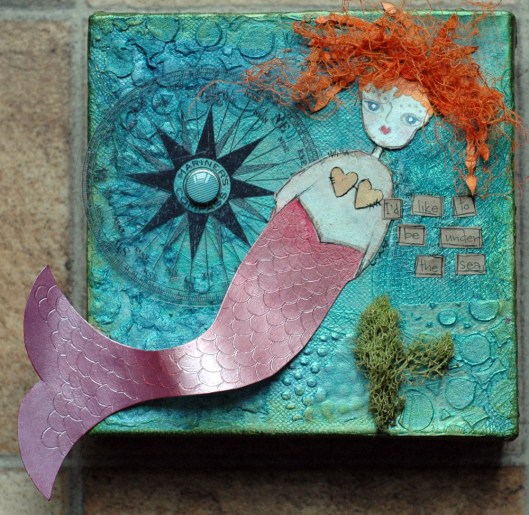
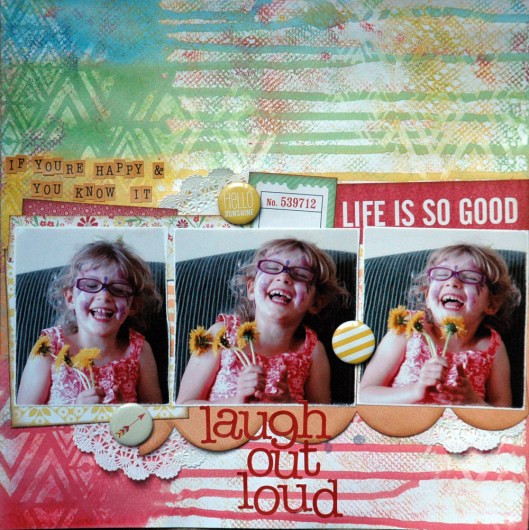
I made this first LO to promote the demo at the retreat:

colorful life

I went fairly basic, just one colour of Primary Elements mixed into Clear Medium, then painted on the cardstock to make a photo mat. The Clear Medium is acrylic paint base, with a built-in binder so you don’t lose any of that fabulous shine! It’s completely colourless until you add your pigment. You can mix your own colours and intensity of colours, and how much or how little you want, totally customizable!

I then blended a bunch of colours together and mixed that into some light molding paste which I smeared over the 6×6 Heart Confetti stencil:

colorful life - molding paste

It made a great purply/silvery colour which looks awesome.

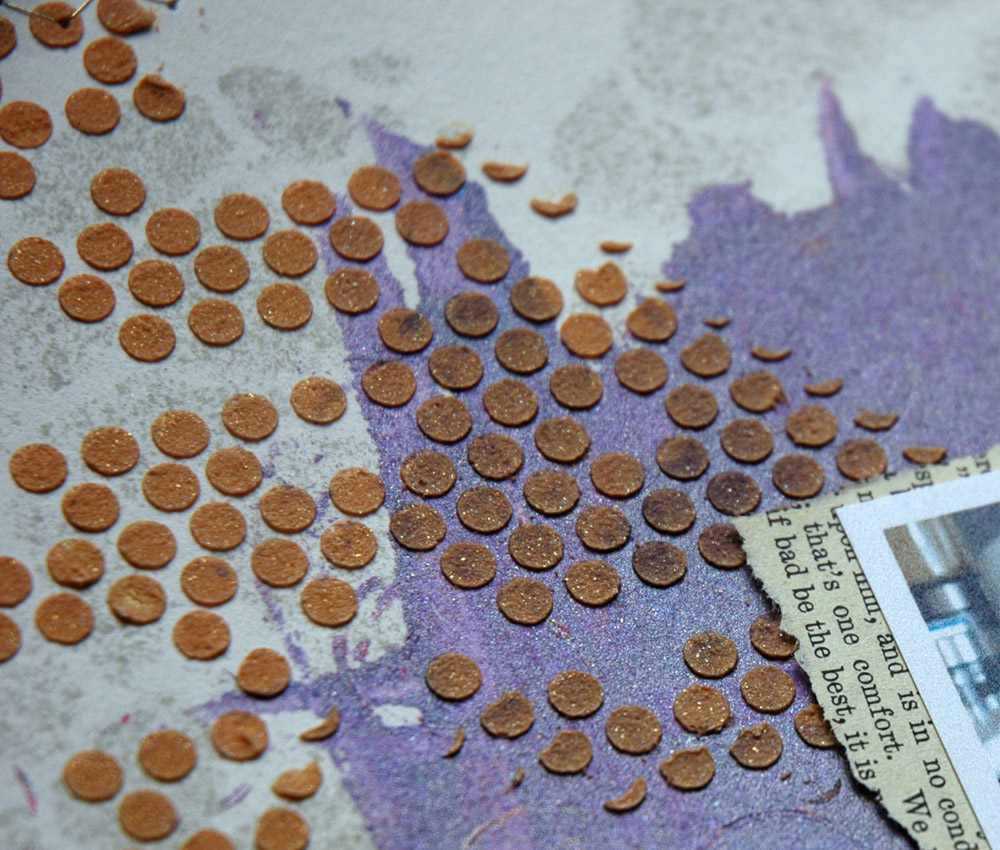
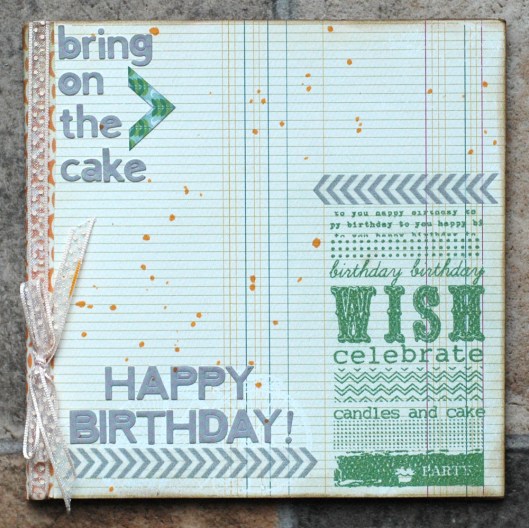
During the demo I showed how to mix the Primary Elements into the Clear Medium or Molding Paste, how to dilute or intensify the colour, and how to mix your own shades. These next two LO were the scratch papers I used and then decided to finish off.

The first one has a photo base of mixed colours:

fablious fairy

and then one colour for the paste:

fablious fairy - molding paste

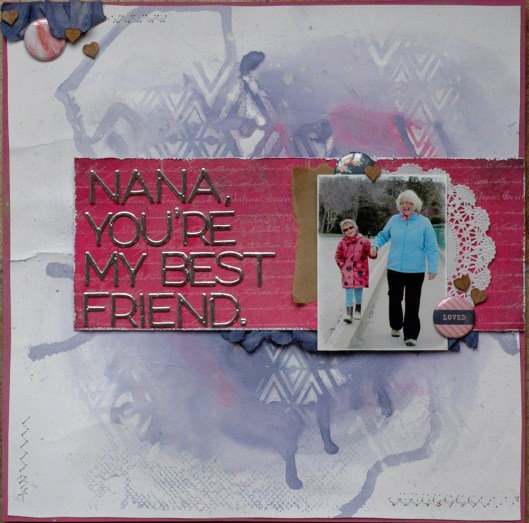
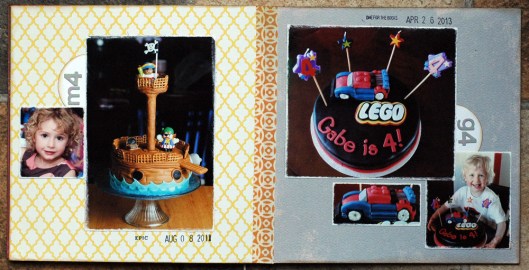
This final LO was actually the first demo page I made, showing how vibrant the base colours can be on their own:

buddies

I love the texture of the molding paste on this one!

buddies - molding paste

There are tons of colours in the Primary Elements line and they can all be mixed to make hundreds of other colours. The Paperie carries both the pigments and the Clear Medium plus they can order any colours you might like so go check out the website and then get some and go play!

If you want to see and touch these LO’s in person, I’ll be bringing them to the Paperie to display so pop by to check out their brand new location at 10 Pippy Place and take a look.

S.

Simple Scrapper | July 2013

Tags

, ,

team_2013_revised

We’re doing things a little differently at Simple Scrapper these days – no more monthly blog hops but there are other great things planned – like a Team Gallery! I’ll post that link as soon as it goes live. (Here it is!)

In the meantime, I’ll still post my LO’s here so you can see them.

(NOTE: click any of the photos to see them larger at my Two Peas Gallery)

I’ve already posted the Premium Member Sketch LO from this month since I also used it for my Year Long Album class:

May - best friend

I won’t go into details, but if you want to see how it was done, look at some close-ups, and get a mini tutorial, check out this post!

The second one was again using a new template but also my Story Starter LO and it was completely different for me:

superpowers

That’s a very hybrid LO, my friends. And it’s all one photo, no paper at all, just a few wood veneer embellishments to which I added some Stickles for a bit of Superhero bling:

superpowers - sparkle

In general, I left it pretty simple – this was all about the story. The title itself and a bit of the journaling came from a previous post I did, if you want to check that out again.

superpowers - title

Finally, if you want to see some other LO’s from the Team this month – and I know you do! – click any of the names over there —-> to go to the other member’s blogs or Two Peas Galleries.

And be sure to check out Aimee’s blog – I know she’s posting her LO’s this morning too so go take a look at her amazing work!

I’m hoping to be back tomorrow with some more LO’s from the last Paperie retreat – I’m waaaay behind on posting those for you!

S.

The Premium Membership at Simple Scrapper provides skills and shortcuts to help you simplify and find more meaning in your memory keeping.

Happy Canada Day! but also, take a moment to remember…

Tags

, ,

It’s Canada Day and there are loads of fun and exciting things happening all over the country so Happy Canada Day to all my local and mainlander friends!

canada flag

(note: Newfoundland is the island portion of the province of Newfoundland and Labrador. Since we are out here in the middle of the Atlantic we call the rest of the country the mainland!)

Here in Newfoundland July 1 is also Memorial Day.

Unlike Remembrance Day on November 11, Memorial Day is specific to Newfoundland and the First World War. At that time, we were a Dominion of the British Empire, not part of Canada at all. And on the morning of July 1, 1916, 780 Newfoundland men left to fight at Beaumont-Hamel during the Battle of the Somme.

90% of them perished. Only 68 men were able to answer roll call the next morning.

So today, here in Newfoundland, we remember, before we celebrate.

S.

Currently… | June 2013

Tags

listening: to Darrell’s iPod – he has it set up in the kitchen so it’s our daily playlist

eating: lots of fruit and cottage cheese

drinking: still water and wine – a mix of Moscato and Pinot Grigio

wearing: summer clothes – sometimes – but finally!

feeling: happy that it’s getting warmer and sunnier

weather: getting sunnier, warmer, and more like summer

watching: So You Think You Can Dance, Master Chef, and The Facts of Life

reading: old Nora Roberts books, nothing new on the list this month.

wanting: some beach time – Salmon Cove weekends are planned!

needing: more time, more inspiration, more time…

thinking: about Canada Day tomorrow and hoping for beautiful weather at Terra Nova Park.

enjoying: doing ICAD again; I’m already behind but it’s so much fun!

wondering: how to fit in all the summer things I want to do

wishing: the summer would go by slowly and with fabulous sunny days

S.

ICAD 2013 | June 23: infinity

Tags

, ,

A while back I made this card and said that the back was so cool I was going to  make another one and use the back as the front.

So I did!

Once again I used the Aboriginal Stencil but I pulled out the 6×6 this time. I stuck with the Graphite Ferro and used different colours of mist. Here’s the back:

infinity - back

Yes. Gorgeous and yummy and sparkly, though you can’t see that very well in the pics. And here’s the front:

infinity

Isn’t that the coolest? Love how this technique works; I think it’s going to have to be part of a class sometime soon.

I printed the sentiment on Sticky Back Canvas then stapled it to the card, the texture is awesome:

infinity - wordsBasically, you need molding paste, water reactive mist, and lots & lots of water. Another upside of this card? Fabulous paper towels to use on upcoming cards!

S.

Paperie Card Kit | June: Part 3

Tags

, , , ,

I have two LO’s left to share with you from the card kit, but I’ll only be posting one today. I have a couple of guest posts happening over on The Paperie blog through July and I’m holding onto one LO for those posts. I’ll let you know when to go check it out!

The card kit had a great sheet of pink cardstock in it that would make a fabulous card base but I couldn’t make it work for the picture  I wanted to use, though I did want the pink. So I altered it to suit – in my mind, being able to change product to suit you is the number one best thing about mixed media!

I used matte multimedium to adhere some Ranger Tissue Wrap onto the cardstock. Over that I painted some layers of white gesso. Although gesso is normally used as a base and primer, one of my favourite ways to use it is to tone down colours and patterns.

I left some areas brighter, with less gesso, than others on purpose, like the title area:

i'll always be your baby - title

I really wanted to focus to be the title and photo, so I grounded my pic with layered strips of Allison Kreft paper and some washi tape, with a bit of twine tied around the photo itself. I finished that section with a brad and a punched border, all to draw your eye into that area:

i'll always be your baby - layers & punch

And overall, it’s pretty subtle, with just the right hint of pink for my girl and I:

i'll always be your baby

This LO was about a conversation Molly and I had approximately three weeks before Gabe was born – see how I can’t get the bottom button of my coat fastened? – and she was only 20 months old. It was pretty easy to get her to promise to “always be my baby!”

S.

YLA 2013 | June class

Tags

, ,

A few days ago I showed you how I had an idea for these pages, went through an epic failure, and then found redemption on better and bigger paper.

Today, you get the final product!

The rainbow page is my favourite – I love the colours and the pictures so much:

May - laugh out loud

I first sponged glossy gel medium through a stencil, then added puddles of Distress Paint to the edge. I misted until I ran out of water (that’s only a slight exaggeration!) and let the colours run down the page. The texture is from rolling paper towels over to blot up the excess water. How cool is that?!?!

june - laugh out loud texture

This second page is based on a Simple Scrapper template from the July 2013 Premium Member templates:

May - best friend

Once again you start with glossy gel medium through a stencil, then add puddles of paint to the middle of the page. Mist with water and tip the paper to allow the paint to blend and then run in different directions.

The resist is fabulous and has a great shine in real life:

june - best friend resist

I used some Heidi Swapp fabric that I died with the paint and some new Studio Calico wood veneer to add dimension and layers to the top:

june - best friend top layers

So there you have it – a class LO all the way from idea to final product, with a mini tutorial to boot! Hope you enjoyed, I’ll be back later this week with more ICAD’s and the final LO’s from the June/July Paperie Card Kit.

S.

Paperie Card Kit | June: Part 2

Tags

, ,

Sorry for the long absence – I was fighting a cold last week and then had yesterday off so the kiddos and I spent some fun time together – but now I’m back with more from the June/July Paperie card kit!

(Click on any pictures for a larger size)

wish

Because there was so much amazing 6×6 patterned paper, I thought that a mini album wouldn’t go astray! I used almost all Authentique but there is a sheet of Allison Kreft thrown in there too. I didn’t want anything too complicated and since there’s a super cute birthday stamp from Unity Stamp Co. in the kit, I used that as my inspiration:

wish - cover

Birthday’s are something I normally hate scrapbooking but I always love getting pictures of the cake so I thought a mini dedicated to Molly and Gabe’s birthday cakes would be fun!

wish - 2

I kept it super easy and really basic with just a cake pic, another small photo of them or a closeup of the cake, and the date. I also added their initial and age they were at the time. As an aside, all the alpha stickers I used for four LO titles and an entire mini came from the one sheet included in the kit!

wish - 4

I left room so I can do pages for each of them up to their 6th birthday. The nice thing is that if I want to continue on after that, this is easy peasy to duplicate and small enough not to take up any of my precious little storage space!

wish - 5

I’ll be back later this week with the last two LO’s I did, but if you want to see them in person, the Paperie will have them up in their new location a week from today – I can’t wait to have fun in the new space!

S.