• About

sarathings

~ my art, my family, my life, my stuff…

sarathings

Tag Archives: Distress Ink

Technique Tag Class | Sneak Peek!

08 Friday Mar 2013

Posted by Sara in Cards, Classes, Techniques

≈ 6 Comments

Tags

card class, Distress Ink, Distress Stain, Dylusions Ink Spray, Gesso, Kelly Purkey, technique tags, The Paperie

It’s a bit late but I’m back with sneak peeks of three of the cards for next weekend’s Technique Tag Card Class during the Kelly Purkey weekend at The Paperie!

The first one will be made using Distress Inks and Perfect Pearls:

technique tag card class sneak peek - inks and pearls

Then we’ll do a pretty one with Distress Stains and Inka Gold:

technique tag card class sneak peek - stains

And the third is made with gesso, mist, and alcohol ink!

technique tag card class sneak peek - easter

We are actually making four cards but the last one uses a top secret and very fun product so no sneaks for that one – it will be an awesome surprise to the class goers!

If you haven’t signed up for this awesome weekend – and why haven’t you? – I think there’s still a couple of spots available! Kelly is teaching a LO class and a minialbum class, Krista will be doing an Amy Tangerine Daybook, and I’ll be doing a bunch of technique tags that we’ll make into cards! Plus, there’s a meet and greet with Kelly on Friday night and a crop night on Saturday! It’s going a be full and very amazing weekend!

S.

Share this:

  • Click to share on X (Opens in new window) X
  • Click to share on Facebook (Opens in new window) Facebook
  • Click to email a link to a friend (Opens in new window) Email
  • Click to share on Pinterest (Opens in new window) Pinterest
  • Click to share on LinkedIn (Opens in new window) LinkedIn
  • Click to print (Opens in new window) Print
  • Click to share on Tumblr (Opens in new window) Tumblr
  • Click to share on Reddit (Opens in new window) Reddit
  • Click to share on Pocket (Opens in new window) Pocket
Like Loading...

Tuesday Techniques and Tutorials – Distress Marker Resist

23 Tuesday Oct 2012

Posted by Sara in Tuesday Techniques, Tuesday Tutorials

≈ 12 Comments

Tags

Distress Ink, Distress Markers, Ranger, Specialty Stamping Paper, Tuesday Techniques, Tuesday Tutorials

Finally, I’m back with another technique, and it’s one of my faves – Distress Marker Resist!

For this one you’ll need:

Supplies

Distress Markers, Specialty Stamping Paper, Distress Ink, an Ink Blending Tool with foam, and a stamp (I prefer rubber).

That’s it! Pretty limited and simple supplies but the specific items are a must. I have tried this out with Stampin’ Up! markers and found that it didn’t work as well, plus, the paper it a definite – this won’t work on other surfaces!

First, colour your stamp with your markers:

This is why I like the Distress Markers and a rubber stamp – I find the rubber holds the ink better, and the Distress Markers don’t become muddy or cross contaminated, even if I decide I want to go in with a light colour after already doing the dark colours.

You can mist before stamping, but for this technique I like a crisp impression so this is one of the rare times where I will stamp without misting it first.

Huff (blow hot breath) on your stamp and press your image directly on the Specialty Stamping Paper:

Allow the image to dry. This only takes a minute but you don’t want to smear the image so make sure it is dry, even hit it for a second with your heat tool if you like.

Can you believe how sharp the impression is with markers? Great definition!

Then, take your Ink Blending Tool and ink the entire surface with the Distress Ink of your choice. You could use any colour you like, but my favourites are Pumice Stone and Weathered Wood, though the browns are nice too – I like how the colour of the markers pop against the greys and browns:

Can you believe how the markers resist the ink? Like magic to me every time!

Now, mist water into the palm of your hand to make a puddle and then flick it on the surface:

Blot away the water drops and you instantly have a multilayered background without lots of time and fuss!

Looks pretty cool, hey?

Finish off your tag and stick it to a card and call it done! Mine hasn’t made it to the card yet, but the tag itself is finished:

If you have Distress Markers and want to learn more fun things to do with them, or are on the fence about buying them, check out Wendy’s demo at The Paperie retreat if you’re lucky enough to be going. She’s going to be showing a bunch of tips and techniques with them and she’s always got something fun I never thought about up her sleeve!

Let me know if you try this one out – you know I love to see what you make so leave me a comment and a link!

See you tomorrow!

S.

Share this:

  • Click to share on X (Opens in new window) X
  • Click to share on Facebook (Opens in new window) Facebook
  • Click to email a link to a friend (Opens in new window) Email
  • Click to share on Pinterest (Opens in new window) Pinterest
  • Click to share on LinkedIn (Opens in new window) LinkedIn
  • Click to print (Opens in new window) Print
  • Click to share on Tumblr (Opens in new window) Tumblr
  • Click to share on Reddit (Opens in new window) Reddit
  • Click to share on Pocket (Opens in new window) Pocket
Like Loading...

Index Card A Day – #42 & #43

25 Wednesday Jul 2012

Posted by Sara in ICAD2

≈ 2 Comments

Tags

Archival Ink, Distress Ink, Hero Arts, ICAD, ICAD2, Ranger, Sakura

I’m very behind on posting my index cards and am very, very behind on the number of cards I should have – vacation pushed me back and I have a class this weekend to prep for so it will be a bit before I can catch up. I do have a couple of posts for you this week of the ones that are completed.

The two I’m showing you today were made the night before I left on vacation at a crafty night with Tina and Marg. Technically, since my flight was 6am, I should have been in bed, not making index cards! 🙂

#42 – Being happy…

This one has a lot going on. I first rubbed purple ink through a floral stencil and didn’t like how it looked – flowers and purple are not really me! Then I used molding paste through the Zinnia stencil and once it dried, misted and inked through some punchinella stencils, a nice little gift from my friend Marg!

I stamped the sentiment on another pre-made background – that seems to be my favourite thing to do lately – and cut it out before adhering to the card.

I love the mix of colours and texture, even the hints of purple flowers that show through!

#43 – let’s go for a ride

This is a flat one but with enough other interesting things going on that I felt leaving off the dimension was ok – strange for me!

I used my blending tool to cover the background with Distress Ink and then I flicked it with water to get the lighter spots. I used Metallic Paint Dabbers and ink with the punchinella templates, then stamped the bike, sentiment, and leaves with Archival Ink. I used a water brush on the interior of the leaves to lighten the colour and added accents with my Sakura Stardust pen.

I love the little bit of shine the pen and the metallic paint gives the card!

See you tomorrow for some more cards and maybe a sneak peek of this weekend’s Yearlong Album class!

S.

Share this:

  • Click to share on X (Opens in new window) X
  • Click to share on Facebook (Opens in new window) Facebook
  • Click to email a link to a friend (Opens in new window) Email
  • Click to share on Pinterest (Opens in new window) Pinterest
  • Click to share on LinkedIn (Opens in new window) LinkedIn
  • Click to print (Opens in new window) Print
  • Click to share on Tumblr (Opens in new window) Tumblr
  • Click to share on Reddit (Opens in new window) Reddit
  • Click to share on Pocket (Opens in new window) Pocket
Like Loading...

Index Card A Day – #40

12 Thursday Jul 2012

Posted by Sara in ICAD2

≈ Leave a comment

Tags

Distress Ink, Dylusions, ICAD, ICAD2, Ranger, Technique Tuesday, Tim Holtz

Only 3 weeks left to this fun venture! Can’t believe I’m this far along already! The problem is that my mojo went on vacation – argh! Vacation is next week, not this one!

Super simple here – I simply sprayed the card with Dylusions Ink Spray and stamped the pen nibs along the side. Then I left it for a couple of weeks! 🙂

I laid a couple of stencils over the top and rubbed in Distress Ink which I highlighted with white gel pen. I stamped a bunch of words from a Technique Tuesday set, then used Pumice Stone Distress Ink to stamp the script background. I was so fed up with it at that point that I dated the back and said enough!

Blerg. Oh well, they can’t all be masterpieces, right?

S.

Share this:

  • Click to share on X (Opens in new window) X
  • Click to share on Facebook (Opens in new window) Facebook
  • Click to email a link to a friend (Opens in new window) Email
  • Click to share on Pinterest (Opens in new window) Pinterest
  • Click to share on LinkedIn (Opens in new window) LinkedIn
  • Click to print (Opens in new window) Print
  • Click to share on Tumblr (Opens in new window) Tumblr
  • Click to share on Reddit (Opens in new window) Reddit
  • Click to share on Pocket (Opens in new window) Pocket
Like Loading...

Index Card A Day – #39

12 Thursday Jul 2012

Posted by Sara in ICAD2

≈ 4 Comments

Tags

Distress Ink, Dylusions, ICAD, ICAD2, Ranger, Tim Holtz

For this card I wanted to try a technique that I’ve used many times before, but it has a twist that Kristina Werner did in the newest Online Card Classes: Stretch Your Stamps Class.

I inked the background with the new Summer Seasonal Distress Inks, dried it, and then stamped a script background with VersaMark Ink. I heat embossed in clear and then rubbed black ink over the whole card. After wiping away the excess, I got this super cool look with the multicoloured text showing.

I inked a butterfly stamp with same colours and misted to blend, then stamped on a scrap card. I cut out the butterflies, wrapped coloured string around for the antennae, then adhered them with rolled glue dots.

I stamped the sentiment on a previously made background card, cut it out, stuck it on and the card was done!

Love how the multicoloured background turned out – I’ll be using this again for sure!

And the dimension of the butterflies with the shine of the embossing is great!

S.

Share this:

  • Click to share on X (Opens in new window) X
  • Click to share on Facebook (Opens in new window) Facebook
  • Click to email a link to a friend (Opens in new window) Email
  • Click to share on Pinterest (Opens in new window) Pinterest
  • Click to share on LinkedIn (Opens in new window) LinkedIn
  • Click to print (Opens in new window) Print
  • Click to share on Tumblr (Opens in new window) Tumblr
  • Click to share on Reddit (Opens in new window) Reddit
  • Click to share on Pocket (Opens in new window) Pocket
Like Loading...

Tuesday Techniques – Stencils, Part 1

05 Tuesday Jun 2012

Posted by Sara in Tuesday Techniques

≈ 4 Comments

Tags

Christy Tomlinson, Distress Ink, Ink Blending Tool, Pink Paislee, Ranger, Stamper's Anonymous, Stencil, Studio Calico, Tim Holtz

I love stencils and masks! So much fun to play and experiment with and they are so versatile! You can make your own, or buy more permanent ones, and there’s definitely something for every style.

I’ve had people say to me that they don’t like messy, or getting messy, so stencils are just not their thing. Wrong, I say! You don’t like the whole messy, art journally, painting covered, inky fingers stuff? Let me show how to cleanly use a stencil! 🙂

First, let’s talk basics…

1. I will not cover everything about stencils. First, I am no pro and don’t know it all, and second, there’s unlimited uses for stencils so there’s no way I can even touch the surface.

2. The things I will show you are totally buildable. For example, you like 2 or three different techniques? Then use them all – at the same time! But they’re also buildable in that you can start with the basic technique and build your own spin on it.

3. Stencils are not always stencils, sometimes they’re masks. Not a big deal, most people know what you’re talking about but just so you know the difference and can trot out your knowledge at the next dinner party you go to, here it is:

  • A stencil has open space – think those block letter stencils from grade school.
  • A mask covers something up – think the block letter itself.
  • So, you could use the mask to cover some paper, colour around it, and then reveal an uncoloured image:
  • And then the stencil to trace a border around it to further define the edges:

4. One big complaint I hear it that the image someone wants turns out messy. Here’s the easy reason why it’s messy – your medium was too runny. Dry medium (eg. ink, chalk) gives a more detailed image than wet medium (eg. mist, paint). The wetter your medium, the less precise your image as leakage under the stencil will occur. Both are great results depending on the look you want.

So, let’s start our stencil techniques with the neat and tidy stuff – dry mediums. I don’t have chalk, so we won’t be using that but if you have it I’d love to see what you do with your stencils!

If I want a crisp image, I always use Distress Inks. For one, I love them – great colours and very blendable. For two, I have them all and they’re always right next to me – easy access makes for well used tools!

As I said earlier, you can also use chalk for great results, and wet mediums, if you use them dry. Does that sound completely contradictory? It makes sense, but I’ll cover “dry” paint, when we get to paint! Today, it’s all about ink, detailed images, and clean hands!

Just lay your stencil on your tag (or layout, or card, or whatever) and use an ink blending tool to rub on the ink. You can do this on clean background or one that you’ve already painted, inked, prepped, etc.

If you only want certain areas, use sticky notes or computer paper to mask off the areas you want left as is – remember, a mask covers things so it can protect the areas you don’t want inked!

You could also just swipe the ink pad over the stencil, but this may make less than perfect images since direct ink to paper is wetter, and it’s messier since more ink is left on the stencil. I prefer to use the Ink Blending Tool and keep my fingers out of it!

Once you’re finished inking, lift off your masks and stencil and reveal the magic!

Awesome, huh? The reveal is my favourite part! 🙂

Now, complete your tag (or layout, or card, or whatever) and pat your self on the back for a job well done and clean fingers!

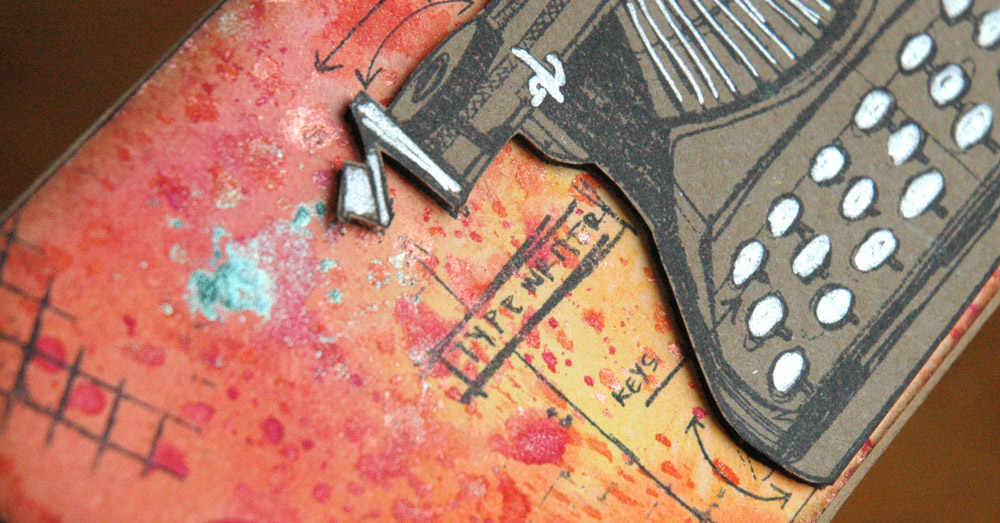
I added some shimmer to this one, and a little wooden bluebird 🙂

Try it out, then leave me a link where I can see your projects – you know I love that part too!

Check back later tonight for ICAD #4!

S.

Share this:

  • Click to share on X (Opens in new window) X
  • Click to share on Facebook (Opens in new window) Facebook
  • Click to email a link to a friend (Opens in new window) Email
  • Click to share on Pinterest (Opens in new window) Pinterest
  • Click to share on LinkedIn (Opens in new window) LinkedIn
  • Click to print (Opens in new window) Print
  • Click to share on Tumblr (Opens in new window) Tumblr
  • Click to share on Reddit (Opens in new window) Reddit
  • Click to share on Pocket (Opens in new window) Pocket
Like Loading...

Tuesday Techniques – Dry Embossing with Wafer Thin Dies

29 Tuesday May 2012

Posted by Sara in Tuesday Techniques

≈ 14 Comments

Tags

Cuttlebug, Distress Ink, Dry Embossing, Ranger, Spellbinders, Technique Tuesday, The Crafter's Workshop

It’s our final dry embossing day! I thought I’d show you how to use your wafer thin dies to emboss, rather than cut – use them for double duty and really get your money’s worth!

You will need:

Supplies

A die cutting/embossing machine, wafer thin dies (eg: Spellbinders, Hero Arts, Papertrey Ink, etc.), and a tag.

First, line up the die on your paper, cutting edge facing up. Next, I find it easiest to adhere the die to the paper. I normally use washi tape as it is low tack and there’s no problem removing it once the die has been run through your machine. I temporarily adhere it so it doesn’t move and I can be sure it will emboss right where I want it to!

Next, make your sandwich – for the Cuttlebug I use the A plate, B plate, then a piece of cardstock as a shim (and you can then get a die cut piece at the same time as you’re embossing!):

Then put your paper with the die facedown so the cutting edges go into the cardstock shim.

Over that goes a rubber mat and another B plate. If you want a really deep impression, you may want to use another thin shim for more pressure. Just be sure not to make the sandwich too thick or it won’t go through your machine.

After you roll it through, you get this:

Nicely embossed! I happened to use an open die here to get a frame, but you can use solid dies as well, and you can deboss if you prefer, just flip your paper over!

I like the subtlety of this embossing, and how it picks up ink really well to make it stand out more while still not being super dimensional. Excellent for cards you’re going to mail because they won’t be too bulky.

In the same vein, you can also use stencils and chipboard to emboss. I won’t cover those since they are very similar to what I did here today but if you want to see those in action check here and here. I used the stencil technique on the smaller red heart for my finished tag:

As always, leave me a link in the comments if you try this technique out – I’d love to see how you use dies for embossing!

S.

Share this:

  • Click to share on X (Opens in new window) X
  • Click to share on Facebook (Opens in new window) Facebook
  • Click to email a link to a friend (Opens in new window) Email
  • Click to share on Pinterest (Opens in new window) Pinterest
  • Click to share on LinkedIn (Opens in new window) LinkedIn
  • Click to print (Opens in new window) Print
  • Click to share on Tumblr (Opens in new window) Tumblr
  • Click to share on Reddit (Opens in new window) Reddit
  • Click to share on Pocket (Opens in new window) Pocket
Like Loading...

Tuesday Techniques – Dry Embossing: Faux Letterpress

22 Tuesday May 2012

Posted by Sara in Tuesday Techniques

≈ 2 Comments

Tags

Cuttlebug, Distress Ink, Hero Arts, Ranger, Sizzix, Stamper's Anonymous, Tim Holtz

One of my favourite ways to play with dry embossing is to do something called Faux Letterpress. All you need besides the regular supplies is ink!

supplies

Now, you all know my love of Distress Ink and how they are my go to ink for all things crafty, right? Well, I don’t normally use them for this technique… :0 I know, I know, it’s shocking but I do have my reasons!

Usually I will use an embossing folder for this that has a lot of white, or open, space and Distress Ink just doesn’t play nicely with that much area on a plastic folder. However, the Hero Arts Shadow Inks are a dye ink that are formulated to work well with stamps that require a large amount of coverage. They look a little splotchy a first but as they dry and soak into your paper they smooth out to a perfect finish. And they are awesome for Faux Letterpress!

I also like the Hero Arts/Sizzix Stamp&Emboss line for this since you get a coordinating stamp and embossing folder.

First, ink up your stamp and stamp away! (I used markers and a mist of water to do my impression and make it look like watercolour.)

Then, you do the Faux Letterpress. Ink up the solid side of your embossing folder, the side that has the most raised area. Another reason the Shadow Inks work well with this is because they have a firm, felt ink pad so the ink doesn’t press into the recessed areas of your embossing folder like it would with a foam ink pad.

Now, place your stamped piece in the folder, carefully lining up the image, then run it through your machine. All the inked areas on the folder will be pressed into your surface while the raised areas remain uncoloured.

Here’s a more basic example:

I just inked up my folder, stamped an image over the inked area, then embossed. The fun thing here is that it looks as though the stamped image is under the embossed area!

Finally, I did one tag with Distress Ink so you could see the difference in the inks.

It turns out really splotchy but I do like the Distress Ink look here because I’m using a less open design and the design lends itself to a grungier feel anyway. This would be perfect on the front of one of those always hard to do male cards!

And, so you can compare easily, the three tags together:

I finished off my original  tag with some twine, a stamped and embossed mini tag, and some Tim Holtz doodads.

Hope you enjoyed! I’ll have one more tutorial on embossing next week and then I’ll have to rack my brains for something new! If you have seen anything or have questions about a certain technique, let me know – maybe I can take that on some Tuesday!

As always, leave me a link in the comments if you try this out – I’d love to see your creations too!

S.

Share this:

  • Click to share on X (Opens in new window) X
  • Click to share on Facebook (Opens in new window) Facebook
  • Click to email a link to a friend (Opens in new window) Email
  • Click to share on Pinterest (Opens in new window) Pinterest
  • Click to share on LinkedIn (Opens in new window) LinkedIn
  • Click to print (Opens in new window) Print
  • Click to share on Tumblr (Opens in new window) Tumblr
  • Click to share on Reddit (Opens in new window) Reddit
  • Click to share on Pocket (Opens in new window) Pocket
Like Loading...

Love Cards that I Love!

11 Friday May 2012

Posted by Sara in Cards, ScrapBook, Techniques

≈ 5 Comments

Tags

Ali Edwards, Distress Ink, Hero Arts, Ranger, stamping, Technique Tuesday, The Paperie

And I love them because they are made with the brand spanking new Spring Seasonal Distress Ink Colours – Peacock Feathers, Squeezed Lemonade, and Shaded Lilac. Seriously though, don’t they sound awesome, even before you know what the colours are? Yup. They do!

I wanted to give the inks a test run, see how the colours dried and blended, so I made two super simple cards using the Hero Arts Lotus Background (one of my faves!) and an Ali Edwards for Technique Tuesday set – Love Always Wins.

For the first one, I simply added ink randomly to the stamp, misted with water to allow the inks to blend, and stamped onto watercolour paper. Once it was dry, I added the sentiment and some twine:

For the second, I wanted to see more of the true colour so I swiped each ink pad over the stamp to make three lines of colour. I lightly misted with water to get some slight blending and again stamped onto watercolour paper. Another awesome sentiment from Ali Edwards and some twine and I called it done:

So…. simple, but I love the colours and the texture of the watercolour paper added just enough interest!

Have a great weekend, see some of you at The Paperie tomorrow for the sale and Taffety’s baked goodies!

S.

Share this:

  • Click to share on X (Opens in new window) X
  • Click to share on Facebook (Opens in new window) Facebook
  • Click to email a link to a friend (Opens in new window) Email
  • Click to share on Pinterest (Opens in new window) Pinterest
  • Click to share on LinkedIn (Opens in new window) LinkedIn
  • Click to print (Opens in new window) Print
  • Click to share on Tumblr (Opens in new window) Tumblr
  • Click to share on Reddit (Opens in new window) Reddit
  • Click to share on Pocket (Opens in new window) Pocket
Like Loading...

Tuesday Techniques – Dry Embossing

08 Tuesday May 2012

Posted by Sara in ScrapBook, Tuesday Techniques

≈ 9 Comments

Tags

Distress Ink, Ranger, Texture Fades, Tim Holtz

Today’s technique is super simple but I will be expanding on it over the next couple of weeks. Let’s talk about dry embossing!

You will need:

Supplies

An embossing machine (I use a Cuttlebug), embossing folders, ink, and a blending tool.

First, put your tag or paper in the folder:

Before you ask, I cut a slit in the top of my folder so the tag would fit the way I wanted. Hey, Tim said it was ok so I’m going with it!

Second, run the tag and folder through your machine, using the sandwich specified in your user’s manual.

For the Cuttlebug you will need the A plate, B plate, embossing folder with paper, then another B plate.

And this is what you get on the other side!

Next, use your ink blending tool to add colour to the tag, concentrating on the embossed areas. As you can see below, the embossed pattern really stands out once you start layering colour:

Finally, finish up your tag and enjoy! I always make sure to add brown to the edges and blend colours for more definition and depth.

Pretty, hey? I think the embossing just adds another layer to the texture and interest of the tag.

Next week, I’ll show you some different materials that you can emboss!

Make sure you leave me a link if you try this out – I’d love to see what you make!

S.

Share this:

  • Click to share on X (Opens in new window) X
  • Click to share on Facebook (Opens in new window) Facebook
  • Click to email a link to a friend (Opens in new window) Email
  • Click to share on Pinterest (Opens in new window) Pinterest
  • Click to share on LinkedIn (Opens in new window) LinkedIn
  • Click to print (Opens in new window) Print
  • Click to share on Tumblr (Opens in new window) Tumblr
  • Click to share on Reddit (Opens in new window) Reddit
  • Click to share on Pocket (Opens in new window) Pocket
Like Loading...
← Older posts
Newer posts →

This is me!

  • Sara's avatar Sara

RSS Feed RSS - Posts

Enter your email address to follow this blog and receive notifications of new posts by email.

Join 778 other subscribers
Simple Scrapper Design Team

Simple Scrapper Creative Team

  • Alexa Gill
  • Allie Trumpower
  • Amy Melniczenko – Team Leader
  • Ann Tamimi
  • Arielle Gordon
  • Cathy Caines
  • Christy Strickler
  • Crystal Livesay
  • Delanie Wood
  • Jamie Leija
  • Jan Sowder
  • Jen Conlon – Social Media Manager
  • Jennifer Johnson
  • Jennifer Wilson – Owner/Editor
  • Jenny Larson
  • Kathryn Quintana
  • Kelly Sroka
  • Kimberly Kalil
  • Lisa Corbin-Polak
  • Lisa Hausman
  • Melanie Ritchie – Graphic Designer
  • Neisha Sykes – Graphic Designer
  • Nicole LeBlanc
  • Sandy Henderson
Scrapbook Steals Design Team

Flickr Photos

i ami am wordsfunny things title
More Photos

Twitter Updates

Tweets by saracees
Follow Me on Pinterest pinterest-5ef5b.html

Categories

Ronda Palazzari Designs
Balzer Designs

Blogroll

  • Artist Wanna Be
  • Confessions of a Twenty Something Artist
  • Darrell Strickland
  • day jobs and the night life..
  • driven to ink
  • For The Love Of Art
  • Gone to the Dogs
  • Graham Case
  • Graham Case Photography
  • It's About Time…
  • pieces of my everyday life…
  • Sit, Scrap, and Relax
  • The Paperie
  • with Coffee in Hand
  • {Every Day}
Art Class Workshop
Balzer Designs Stencil 101
UberMedia Canvas Class
UberMedia Gesso

Archives

  • April 2016
  • February 2016
  • December 2015
  • November 2015
  • October 2015
  • July 2015
  • June 2015
  • May 2015
  • April 2015
  • March 2015
  • February 2015
  • January 2015
  • December 2014
  • November 2014
  • October 2014
  • September 2014
  • August 2014
  • July 2014
  • June 2014
  • May 2014
  • April 2014
  • March 2014
  • February 2014
  • January 2014
  • December 2013
  • November 2013
  • October 2013
  • September 2013
  • August 2013
  • July 2013
  • June 2013
  • May 2013
  • April 2013
  • March 2013
  • February 2013
  • January 2013
  • December 2012
  • November 2012
  • October 2012
  • September 2012
  • August 2012
  • July 2012
  • June 2012
  • May 2012
  • April 2012
  • March 2012
  • February 2012
  • January 2012

Blog at WordPress.com.

Privacy & Cookies: This site uses cookies. By continuing to use this website, you agree to their use.
To find out more, including how to control cookies, see here: Cookie Policy
  • Subscribe Subscribed
    • sarathings
    • Join 307 other subscribers
    • Already have a WordPress.com account? Log in now.
    • sarathings
    • Subscribe Subscribed
    • Sign up
    • Log in
    • Report this content
    • View site in Reader
    • Manage subscriptions
    • Collapse this bar
 

Loading Comments...
 

    %d