Paperie Card Kit | January 2014: Part 1

Tags

, ,

Ok, go get a coffee, or tea, or hot chocolate, or something – this post is full to the brim with pics so you may need sustenance to get through it! 🙂


It’s Card Kit release time at the Paperie again and Wendy has already shown the beautiful cards she designed with the kit.

I know I say it every time, but this might be my favourite kit yet! It definitely netted the most projects and it contains one of my favourite stamp sets ever! To give you an idea of how good this kit is, I made 4 – 8.5×11 LO’s, a card, a mini album, some lunchbox notes, and a canvas. I’d say that’s pretty good value for a $24.99 kit!

I did give you a sneak peek a few days ago with my Simple Scrapper LO’s so today I’m going to show you the other 2 LO’s and the mini album. I’ll be back soon with the rest but if you want to check it all out now go to the Paperie to see it in person or online at their blog.

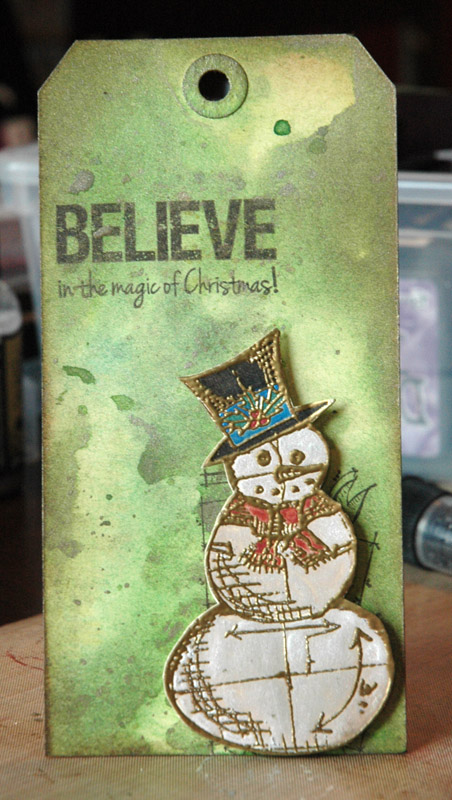
The mini album was the first thing I made – as soon as I saw the metallic envelopes I knew I had to use and highlight them!

all you need is love

I did pull out some washi tape from a previous kit, and used a stencil with mist for the cover, but everything else is from the current kit, including the sequins, ribbon, and stamp for the album title:

all you need is love - shine

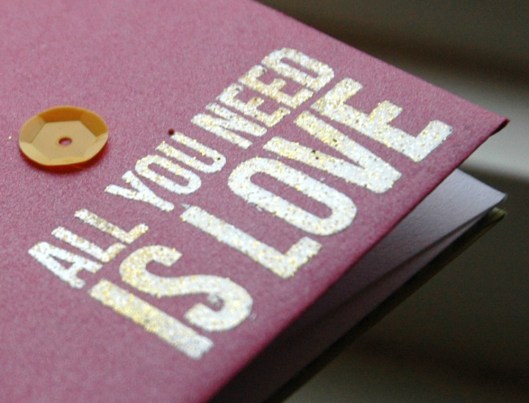
A fun note about the stamp – I heat embossed using a mixture of gold, silver, and glitter gold powder. The look in real life is very cool!

I kept it pretty simple with just a few words and washi, and the envelope pockets leave lots of room for extra Christmas pictures. I think this would be an awesome gift for a grandparent – small and easy to store with lots of photos!

all you need is love - joy
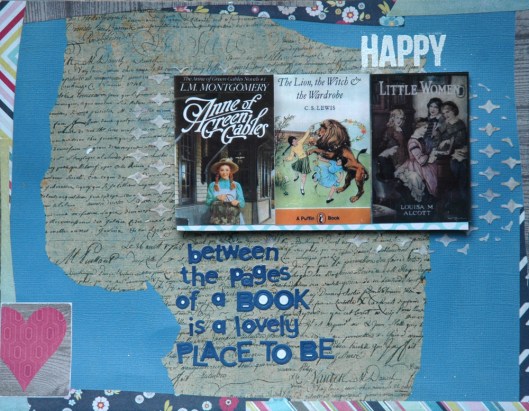
For this first LO I knew I had to use this out-take picture of Molly during our Christmas Card photo shoot. She’s so funny when she has to get her picture taken and it’s always a negotiation: “I’ll be good for two pictures if you’ll take this one.” And then she makes a crazy face or pose.

smilesI heat embossed the title again, printed the journaling on some of the included patterned paper, and scattered some sequins and doodles throughout:

smiles - titleThe only thing I added from outside the kit were those Basic Grey glitter enamel dots – I love them!

I did a little cluster at the top of the page with some more pieces I fussy cut:

smiles - top
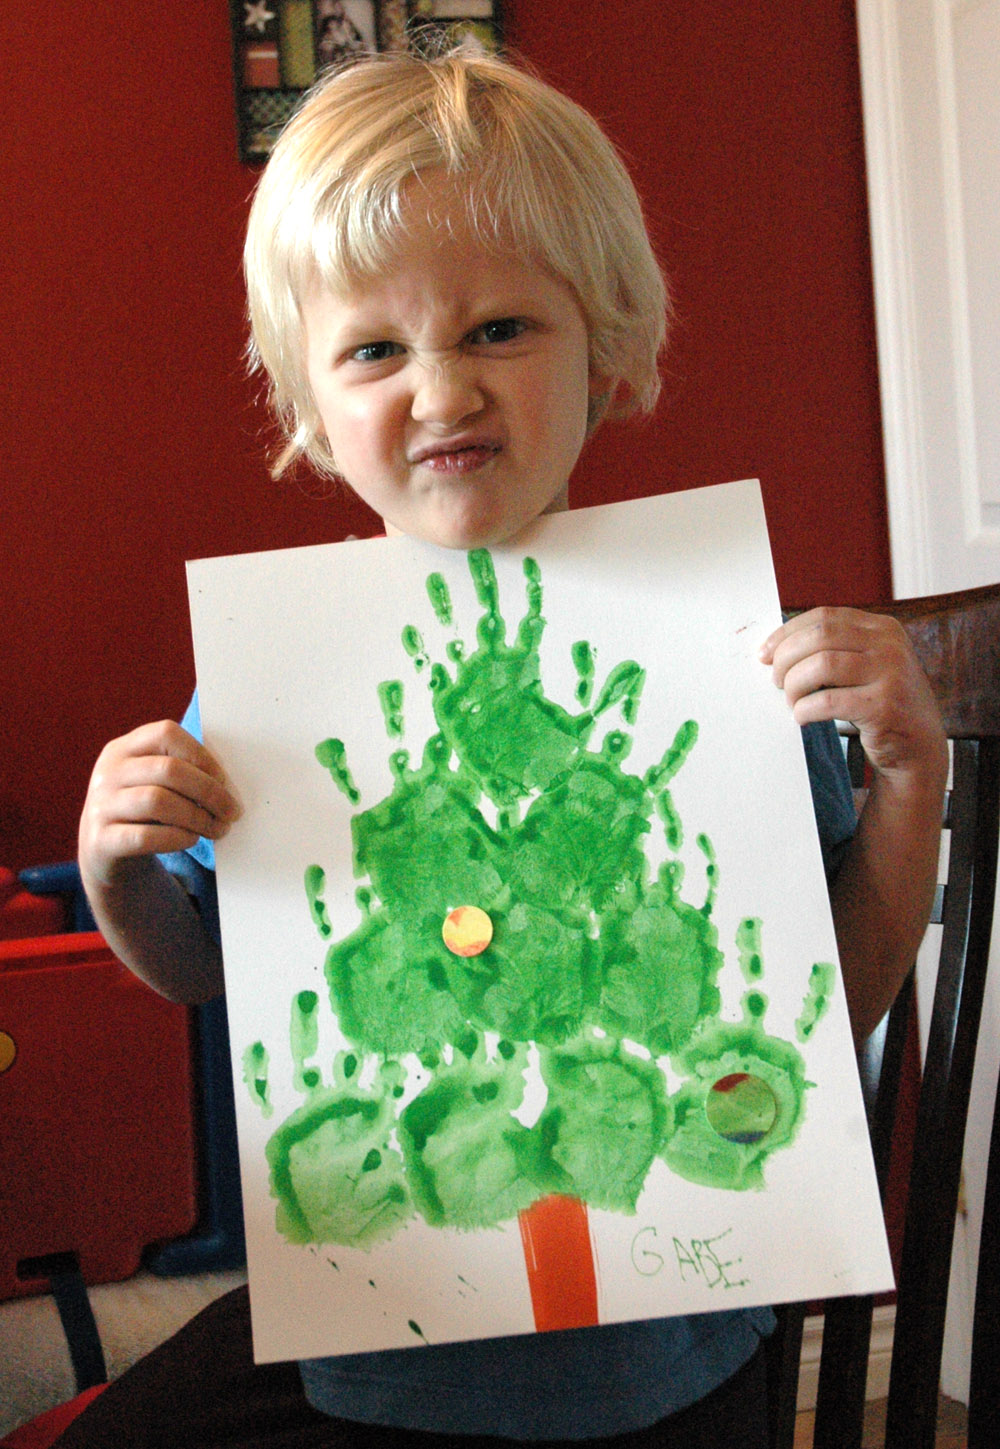
The last LO I made was a bit outside the box – literally!

hello
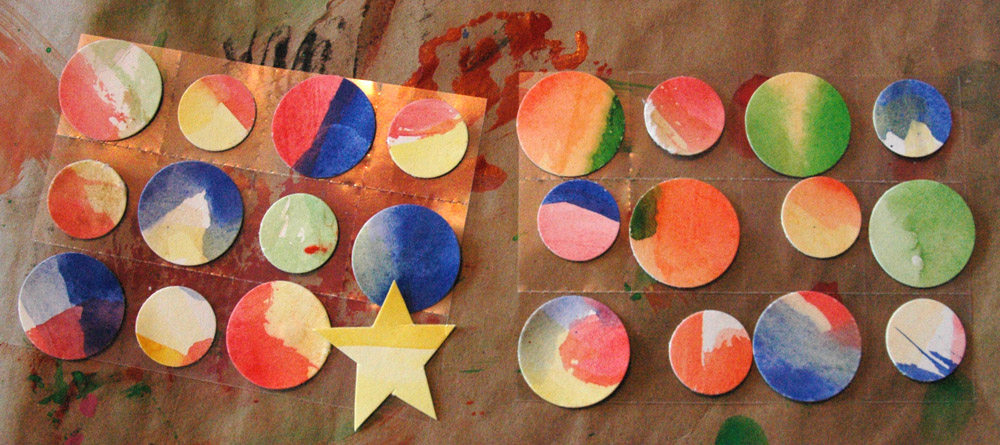
To fit this in my regular album I’ll simply cut down a 12×12 page protector and sew it shut with the same metallic thread I used to adhere the flags:

hello - flagsSince this was my idea of an abstract tree, I didn’t want to add journaling to the “trunk” so I simply added the title to a circle with the small Studio Calico alphas and journaled around that:

hello - titleAnd that’s it – finally! 🙂 I hope you enjoyed and got a few ideas for yourself and I really recommend you call in to get this kit. Truly, even after all the projects I did, I still have enough paper to make more cards and LO’s! It’s really chock full this month.

See you soon with the rest!

S.

Simple Scrapper Show & Tell | January 2014

Tags

,

Long time, no write! 😃 I did plan to take a bit of a hiatus over Christmas but my computer unexpectedly died and I’m still waiting for a replacement. Right now I’m stealing time on my husband’s computer so I can post my Show & Tell Lo’s for Simple Scrapper’s January content. I’ll be back blogging regularly within the next week or so (fingers crossed!). 

My Story Starter LO this month allowed me to reminisce a little and scrapbook a few of my favourite books. I loved being able to put these on a LO especially since it isn’t something I would normally do.

happy

I had fun playing with stencils and modelling paste, as well as adding more pictures using a flap design:

happy - open flap

My second LO features one of the pics I took of Molly and Gabe during our Christmas Card photo session:

you make me happy

I love the template I used for this one and it worked perfectly with the fence in the photo.

The shine from the silver and white embossing powder is great:

you make me happy - shine

And I had some fun with the modelling paste on the cloud too:

you make me happy - cloudMake sure to check out the Simple Scrapper blog and check out what the rest of the Creative Team has done as well as join in & post your own work – we love to see what you all do with the templates! Also, make sure you take a look at the Team Gallery – it’s pretty awesome this month!

S.

The Premium Membership at Simple Scrapper provides skills and shortcuts to help you simplify and find more meaning in your memory keeping.

Fussy Cutting | Scrapbook Steals

Tags

, ,

scrapbook steals

I love fussy cutting! I love cutting out all those little tiny shapes and building something up. I know, most of you think I’m crazy – but I’m going to show you how to do it and not hate it!

Go check out the Scrapbook Steals Blog for my post full of tips and techniques!

3

S.

Something exciting!

Tags

,

Several months ago I received a twitter message from Ronda Palazzari. And it was just a little bit exciting for me – I love her! I was over the moon when she asked if she could feature one of my projects on a blog post of work using her Crafter’s Workshop stencils. Would I mind, she asked?

Um… NO! You just go ahead and like my work Ms. Palazzari, I’m totally ok with that!

And then, a while later, she asked again! And this time my friend Cathie was featured too. 🙂

So when Ronda asked me to email her about a question,I didn’t think much of it. Until I read said email – three or four times to get over my shock!

She asked me to use her stencils and do a step by step Christmas project as a guest blog post! What!?!?! She likes me, she really likes me!

Excited might be an understatement…

So, long story longer, I did a guest post. And it’s live today.

Want to see what this turned out like?

rp canvas

And how about a larger view of this?

rp ornament

Go check it out and then come back and tell me what you think! Hope you enjoy them!

S.

A bit of a hiatus, of sorts…

Tags

So.

December has hit and has brought with it, apart from the regular December/holiday things, 4 different projects in the scrapping world. One is done – you’re going to want to come visit here on Wednesday! – but three others are still in the works. Which means that this blog has to take the hit.

I was going to post another craft today but it’s being done in stages and it’s turning out so cute that I think I’ll keep it as a gift from the kiddies to their parents (don’t you love that bit of teasing, parents?). And that leaves me with no craft and no time for another post.

I’ll try to get a few up here and there but for now I ready need to buckle down and get assignments done. That being said, local peeps are going to want to save some pennies because the Paperie January card kit is the bomb. And you Simple Scrapper Premium Members? January content is going to rock your scrapping world. Plus, one of my LO’s was the inspiration for one of the templates this month – very cool!

And again, stop by on Wednesday. What I’m going to share was so seriously exciting for me that I may just have jumped up and down and squealed like a teenage girl. Yup, good times!

And because I hate to leave a post pictureless I’ll give you one from today. I think Ella likes the tree I put up this morning!

ella_treeSee you all Wednesday!

S.

Simple Scrapper Show & Tell | December 2013

Tags

, ,

The December templates and Story Starters for the Premium Members at Simple Scrapper are fantastic! I had so much fun – I even got to scrap one of my favourite old TV shows. 🙂

I know I’m not the only person out there who spent part of the summer watching The Facts of Life on Netflix – it was definitely my go-to show during July and August – so I was thrilled when one of the Story Starters inspired me to scrap my love for it, cheesy and dated as it may be!

you take the goodI loved the template and the fun paper shapes, plus all the layers:

you take the good - layersMy second LO was made with my favourite template this month – I’ll be using it again for sure – and features some recent pics of Molly modeling her new hat:

smileLots of shimmer on this one between the gold thread for stitching:

smile - goldand the Heidi Swapp ColorShine in gold and seafoam:

smile - shineI made both of these LO’s at the Paperie’s Fall Retreat using the exclusive kit they released that weekend and it’s amazing! They may still have a couple left, plus I know there are a few odd page and card kits floating around too if you’re looking for a great Christmas gift!

For some more great inspiration, go check out what the rest of the Team did this month – we’re all linked up for Show & Tell, plus our favourites are in the Team Gallery. Once you’ve enjoyed all the eye candy make sure to set some time aside for scrapping and link up your own creations – we’d love to see them!

S.

The Premium Membership at Simple Scrapper provides skills and shortcuts to help you simplify and find more meaning in your memory keeping.


Handprint Advent Tree

Tags

, ,

Well, it’s the beginning of December and around here that means the beginning of Christmas crafts! We did a fun and easy one today that included some paint – always a winner with little kiddies!

First, I painted everyone’s hands green and stamped them on watercolour paper to make trees. I definitely recommend Tempera paints for this, they easily wash off surfaces, clothes, and skin!

advent tree - hand prints

Once the trees were done everyone got a paintbrush and were told to paint a bunch of colours without mixing them into mud – and they actually did it! Mud colour is the norm around here for some reason…

Although the paints dry quickly, a lot of water was flowing on these so I gave them a quick blast with my heat gun to speed up the process. Then, with “help”, I punched 1″ and 3/4″ circles from the paper to make ornaments.I also cut a star from some of the yellow painted sections. All in all, we had 23 circles and one star per child which they then stuck to a sheet of glue dots. We started with this:

advent tree - big thighs hannah

and this:

advent tree - big thighs gabe

And ended up with these:

advent tree - decorations hannah

And these:

advent tree - decorations Gabe

And now we’re all ready for the countdown! Since today is the second they got to pick out and stick on two ornaments, saving the star until Christmas Eve.

advent tree - finished

Cute, hey? He insisted on making a funny face – no way was I getting a reasonable picture out of him today!

There’s still plenty of time to make your own – it might even be fun for the whole family to have trees!

S.

Big Picture Classes | December Duos WINNER!

Tags

,

Hi all! Long day today so I’m just getting around to posting the winner and she is….

Gina Karas said:

December 1, 2013 at 4:17 am

My favorite Christmas tradition is ending the day at my mom’s house in front of the fire. It truly is the epitome of the old saying, “there’s no place like home.”

Congratulations, Gina! Email me at sarathings(at)gmail(dot)com and I’ll send you the code to join. Enjoy the class!

S.

PS. Didn’t win here? Check out Kimberly’s blog for another chance!

Big Picture Classes | December Duos GIVEAWAY!

Tags

, ,

Just in time for your December memory keeping projects, I have a fabulous giveaway from Big Picture Classes – the December Duos Class!

BPC DD sq

I can’t wait to do this one myself – it’s definitely going to add a fun piece to my December Daily. Want to know more? Here’s the info and a video from BPC:

The “December Duos” concept is easy, stress-free, and inspiring. Every day for the twelve days leading up to Christmas Day, two of our twelve instructors will share a scrapbook layout, video message, and a page prompt in the form of a duo (“warm & cold,” “give & receive,” “near & far”). That’s a total of two-dozen inspiring ideas!

You can follow the instructor’s lead or march in your own direction as you snap your photos for the day. Then, after printing our fabulously free journaling cards and title cards, you’ll either slip the cards and your photos into a Project Life mini album from American Crafts or use them on a traditional (or digital) scrapbook page.

12 Days of Christmas: December Duos makes it easy to capture all of your most important holiday moments—in a festive new format—while keeping up with all the parties, presents, and pageants that make the holiday season magical.

Learn more and register here

Doesn’t that look like fun? Just leave a comment here telling me your favourite Christmas memory or tradition to be entered to win. Contest closes midnight EST November 30 and I’ll post the winner on December 1.  *contest closed*

Good luck!

S.

Emergency Art Kit for Children of All Ages | Guest Post: Vicky

Tags

,

I’m on vacation for a few days to visit my brother and his lovely (and pregnant!) wife. While I’m away some of my favourite local artists and bloggers have agreed to do posts for you! Today, Vicky Taylor-Hood (with help from her daughter Katherine) shows you how to put together an awesome art kit. Enjoy!


When I was a little girl, visiting my grandmother, the best visits involved time in her studio. We would break out the paints and paper and she would show me the way in which she could make the picture in her head soar and land on the blank sheet before us, imprinted on paper with pencil or brush. Smelling new, cold-pressed watercolour paper still reminds me of her and those afternoons in her chilly studio working with real artist’s materials.

Maybe that’s why, when Katherine was growing up, I never really used kid materials for her once she was old enough not to eat them. Katherine quickly graduated to Winsor & Newton watercolour paints and used my good (but not best) brushes. We used real watercolour paper, not just white printer paper, whenever possible, even if it wasn’t the really good kind. Pastels, both chaulk and oil, were a messy afternoon of fun. We got Jones Tones Plexi glue everywhere and I learned how to get acrylic paints out of the hair of a four-year-old.

Working with children on a myriad of art projects has taught me many things. I can now grab and keep the attention of a herd of eight-year-olds with the wave of a brush. There’s a magic to art that enthrals them and an exhilaration in being a performing visual artist for a rapt audience. I have also learned that the results of children are dramatically improved when they are provided with decent-quality materials. While you don’t need to have the absolute best of everything (who could afford that?), buy the most decent quality that you can afford, especially of the basics.

Katherine and I have conspired to put together an Emergency Art Kit for you, designed for portability and suitable for any child from age 6 to about 96. Our criteria were that the contents had to be supremely versatile, compact, relatively low-mess and convenient to use when in travel; I often grab a large ziplock of supplies when we head out on a road trip or to the cabin and Katherine and I both use them.

Without further ado, here’s what Katherine thinks every good  Artist’s Kit ought to have for the artist and child in each of us (with my own refinements):

1. Paper. Specifically watercolour and sketching paper. Paper that is heavy enough to withstand glue and water. Paper you can stick things to and scribble on with impunity.

My sketch book, comprised of a combination Strathmore 400 Series Drawing Paper and Arches Cold-Press 300lb watercolour paper

While we often have a small tablet of watercolour paper with us, just as a convenient means of having the paper around, my choice method of making sure I have the right paper is to construct a book, like the one I made above, with removable pages, that contains a customized assortment of the different paper types that you like to use. Make it small enough to be portable and large enough to be a flat surface. You’ll always have the right paper with you, you can take out the sheets if they turn out to be good finished products, AND you can have a whale of a time making the book in the first place!

2. Glue. Practicality dictates a glue-stick, but my personal low-cost preference is for Elmer’s School Glue Gel. It’s blue, but dries clear. It can stick things, but also functions as a resist and a crackling medium in a pinch. If money is less of an object, go straight to the good stuff and buy yourself some Jones Tones Plexi Glue. That is the bee’s knees of PVA and can be used to create an embossed effect, with a little acrylic paint (as you can see in a post here)

3. Watercolour set & brushes. Do yourself a favour. Buy a good set of Cotman paints by Winsor & Newton. I still have and use the set I was given when I was twelve, as well as the set that my grandmother bought in art school in the 1930s. You can see them here:

Grandma’s paint set on left, mine on right.

Watercolours dry fast. They are versatile and compact. While I enjoy acrylics, transporting the results can be problematic, especially while camping.

Also make sure you have sleeves for the brush tips.

4. Watercolour pencils. These can be used as straight colouring pencils or wet and blended for use as a paint. Very handy.

5. Scissors. Just because sometimes things need cutting. I tote along my Leatherman tool (every mother should have one) and there are compact scissors therein.

Glue, pencils, erasers, Micron pigma pens and a newer incarnation of the afore-mentioned watercolour set.

6. Drawing pencils. A small set is fine. Go for graphite instead of charcoal and fixative doesn’t have to be added to your retinue.

7. Eraser. I’m still a fan of the gum eraser.

8. Bottle for water. Since you have watercolour paper, pencils and paint… Don’t use a drinking cup. Watercolour pigments are toxic.

9. Pencil sharpener. Blindingly obvious when you don’t have one and one is required. Pocket knives do not sharpen watercolour pencils well.

10. Pigma Micron pens, in a couple of diameters. These are light-fast and, once dry, waterproof. They’re excellent for sketching, adding text or simply jotting down notes on the fly.

And there you have it. Enough basics to keep creativity and soul together on the fly all compiled into a large ziplock bag.  Throw in a few paper towels and you’re good to go!

Vicky