ICAD 2013 | June 14: possible

Tags

, , ,

One of Molly’s today and the first of a two parter from me!

Molly drew a picture of a house, with a decoration on the door, and the people are Darrell and I when we were 5:

molly - house

Mine came from envying the texture Cathie got from drywall tape – I had to go buy some!

I stuck it unto my index card, rubbed Derwent Inktense pencils over it and misted to blend. Then the tape came off. Should have thought of that, hey? Anyway, while waiting for that card to dry, I stuck the tape to another card because it looked so pretty with all the colours on it.

To finish it off I simply adhered some Basic Grey rubons (thanks to Liz for the giant bagful!) and stamped the first part of a sentiment:

possible

Don’t  you love the texture of that drywall tape?!?!

possible - texture

The rubons are fabulous too – love that bird!

Ok, I’ll be back later with part two – the wet card that was left over!

S.

ICAD 2013 | June 13: change for no one

Tags

, ,

This started out as a test run for an upcoming class – it didn’t well especially well but I’m not discouraged; proper paper will probably make all the difference!

change for no one

I misted with my Dylusions again, threw down some mist spatters and made “Glitter Splats” – thanks to Cathie for that invention! Just tap splats of Goosebumps on your projects, sprinkle on some glitter (which I coloured myself with alcohol ink) and let it dry. Look at the awesome dimension and sparkle you get!

change for no one - glitter splats

The sentiment was stamped on leftover index cards from last year – note to self: make more sparkly paper for sentiments – and it’s specifically for my Molly. She’s been difficult lately but I keep telling myself that will hold her in good stead come the pressure filled teenage years. It will right? Someone out there tell me I’m not crazy and delusional! 🙂

I’m a day behind but I’m going to a friend’s house for a crafty night so I’m hoping to catch up!

S.

ICAD 2013 – June 12: Reach Up

Tags

, ,

I love my Dylusions Ink Sprays. The colours, the water reactiveness, the fun. But how would they act on an index card?

Not the greatest! 🙂 The card is just too thirsty and sucked up all the ink before I could even play – exactly what I expected so I wasn’t that disappointed, luckily. However, I made the card anyway:

reach up

Some mist, some water, a bit of stamping, then I tried the bleaching technique (major fail, as anticipated), some colouring, misting, more stamping. It’s done, another one under my belt, right?

I do love the movement from dark to light and the leaves growing up. And the shine from the silver ink is fabulous, of course!

reach up - shine

Back with another one soon!

S.

Paperie Card Kit | June: Part 1

Tags

, ,

Have you seen the news? I’m designing for The Paperie Card Kit and I’m loving it! Wendy does amazing cards so I’m using the kit  to show how it can be used in other ways, like to do LO’s.

Since I love doing 8.5×11 LO’s, this kit was great fun to work on – plus the colours and papers were amazing, a great mix of Authentique and Allison Kreft. There was so much product in the kit that I was able to do 4 LO’s and a mini album with a bunch of supplies left over to use on other pieces.

Rather than overload you with images, I’m going to just show a couple of LO’s now and I’ll post the others in the next day or so.

These first two LO’s have pictures of Molly from way back when she was just a wee little one – two of my all-time faves of her.

Almost everything I used was from the kit, the only exceptions being a Crafter’s Workshop Stencil, Weathered Wood Distress Ink, and a bit of Custard Mister Huey’s Spray.

sugar & spice

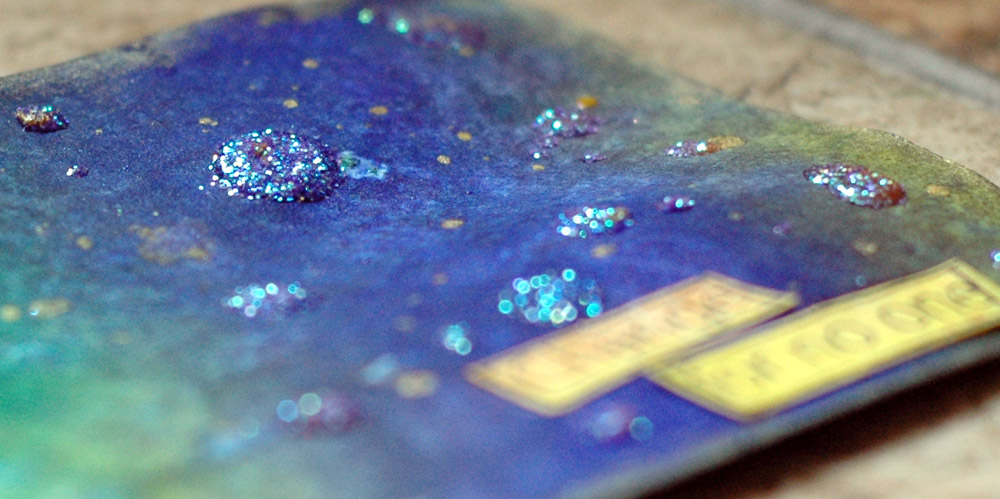
I inked over the stencil to create a background for my photo, then layered lots of the patterned paper for a burst of colour:

sugar & spice - layers & stencil

I finished up with some spray droplets, washi tape, and a brad near the top:

sugar & spice - washi & brad

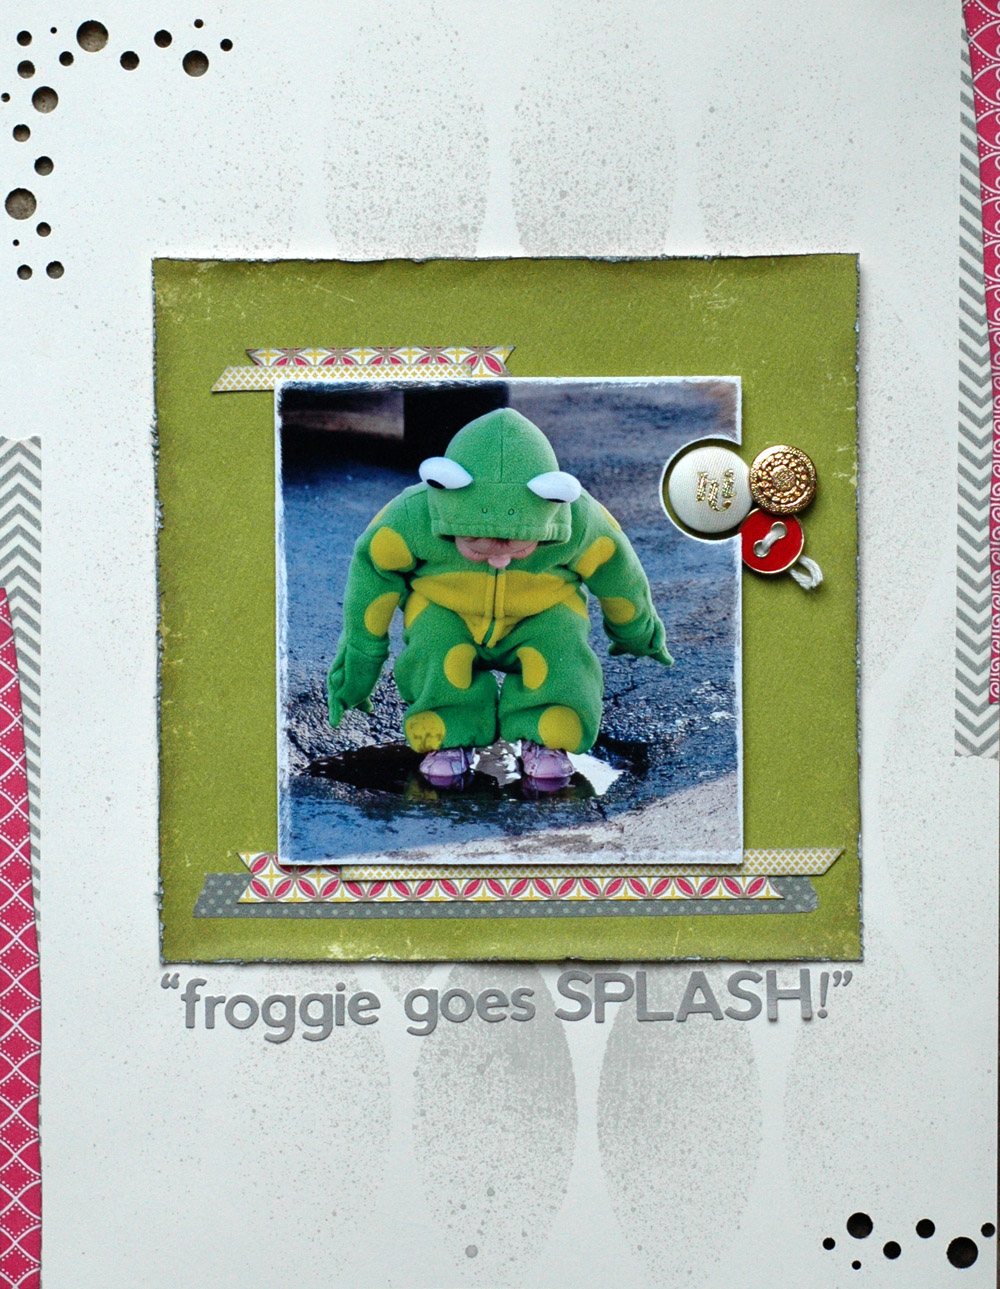
The second LO is Molly in a second-hand frog costume that she literally wore everywhere for months. It was her coat until she just couldn’t squeeze herself in any more!

froggie

The title was something she said as she was jumping in the puddles – I’m terrible at titles so this is a super easy way to get around that struggle!

Once again, I added very little to the kit – another stencil, Clay Mister Huey’s, and a border punch that mimicked the froggie spots. I lightly misted through the stencil to create some interest and a background and punched the circles to draw the eye down through the LO:

froggie - mist & punch

I punched half circle in the photo to nestle the “hi” button in and then added a couple more from the same pack. I also popped up the picture for some more dimension on the page:

froggie - buttons

As a side note, I try to upload everything to my Flickr account so if you ever want to see everything together, that’s the place to go. It’s also reasonably well-organized into sets too!

Back soon with another couple of LO’s – this is a limited kit so call The Paperie ASAP if you want one. They only do the card kit every other month and it’s well worth getting!

S.

Molly & Gabe and their funny sayings…

Tags

So earlier today Gabe came up to me asking to hear “baby king.”

Huh?

I was at a loss unless he brought forth the DVD Uncle Greg sent – One Shoe Blues with B.B. King!

one shoe blues

Haha! I’m sure that legend isn’t called “baby” very often!

On another note, the first time we played the DVD Molly piped up and said, “I can play that too.”

“Oh really?” I said, “Where did you learn that?”

“Well, ” she said, “I watched that man and now I can do it too!”

Watch out B.B. apparently I have a prodigy here!

S.

ICAD 2013 | June 11: I am perfect

Tags

, ,

I wanted to play with my Distress Paints a little and so had some fun blending, spraying, drying, adding – until I liked what I had. So then what?

I pulled out a stencil at random, an awesome Dina Wakley one, and smeared light molding paste over it. Since the paint had a couple of not-quite-dry spots, I ended up with this gorgeous tint in the paste. Much better than the stark white would have been!

perfect

A few flicks of a darker shade in mist and then I was stuck for a sentiment. As I looked around I found a scrap of sewing pattern tissue and that worked perfectly once it was adhered with multimedium. Just a hint of colour but still super translucent.

And the texture of the hearts once the molding paste dried is awesome sauce:

perfect - texture

Ah, molding paste, I really love you – I think you’ll be showing up on a lot of cards this year!

S.

ICAD 2013 | June 10:creativity

Tags

, , ,

This was a fun playing around, turned out better than I had hoped card.

I started with loads of Rock Candy Crackle Paint in the middle of the card. Once that finally dried I did layers of Distress Stain. Many, many layers!

Over that I smeared Viva Modeling Creme and had to wait again while that dried. I finally stamped the sentiment and walked away – too much waiting around for this one!

creativity

I love the texture of the crackle paint mixed with the shine of the crackle paint and the Modeling Creme:

creativity - crackle and shine

Love the final product but, since I’m not the most patient person, the waiting made me crazy!

Molly did the best card ever today:

Molly - 5

S.

ICAD 2013 | June 9: life is celebration

Tags

,

This may be my favourite one so far this time around – it’s like a magic one!

I traced the shapes from the 6×6 Blazonry stencil and cut them out, then sprayed the card with Amethyst ColorShine. Once that was dry I adhered a layer of paper towel to the back. I love the colours!

life is celebration

I stamped a great sentiment from Ali Edwards:

life is celebration - words

Look at that awesome texture and shine!

And now the magic – when you hold the card up to the light, you get this amazing translucency!

life is celebration- light

Love! Plus, the ragged edges make me happy too. 🙂

S.

ICAD 2013 | June 8: kapow!

Tags

, ,

Not sure why I went with the cartoon-like kapow! for this card but I like it! 🙂

I started with Viva Ferro in Graphite through the 12×12 Aboriginal stencil. Once that dried I pressed Distress Stain (Barn Door, Mustard Seed, Peacock Feathers) over it and misted the heck out of it with water to blend.

kapow

I sprayed Blizzard Mister Huey’s on another index card, sketched out the letters and cut them out, then adhered them to the card. Done, with an extra bit of shimmer to go with the Ferro sparkle.

kapow - shine

The back of this card looks so cool that I think I’m going to do another one and use the back as the front – stay tuned for that one!

S.

ICAD 2013 | June 7: meh

Tags

,

You know how with mixed media the rules are: don’t get attached because you’re going to cover it up, and don’t worry if you hate because you’re going to cover it up?

Yeah, well, the covering up and layers and extras just didn’t add up in this case.

meh

I used Distress Paints and Distress Stain, then collaged on a piece of tissue wrap, then some pieces of paper towel. Some paint and modeling creme through stencils and punchinella. Really, I just threw everything at it.

And when I was finished all I could think was, “Meh.” So I stamped it everywhere in gold and black ink.

meh - shimmer

Oh well, at least it has a nice shimmer with the gold and the modeling paste!

Molly made a card again! Stamping, stickers, and glitter – what more could a girl ask for? 🙂

molly - butterfly

S.