We’re at the end of the stencil techniques and today is my favourite way to use stencils – with modeling pastes!
I love texture and dimension on my work, especially little pieces like tags. On a small surface, it’s hard to add lots of embellishments so extra texture adds interest without overwhelming the piece. Today, I’m going to show you some of the pastes and gels I use and the difference between letting them air dry or heat drying them.
First, here are the supplies I’ll be using:
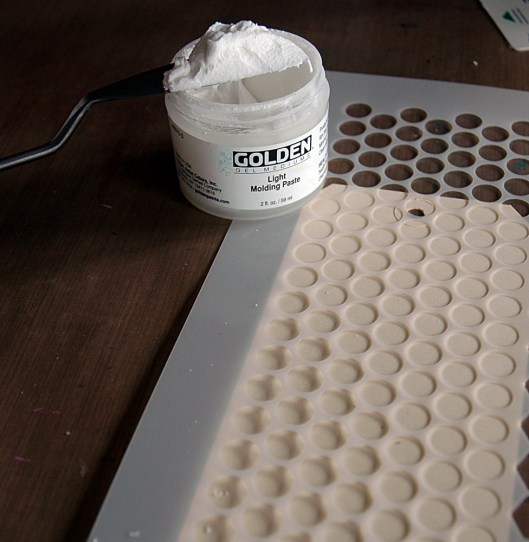
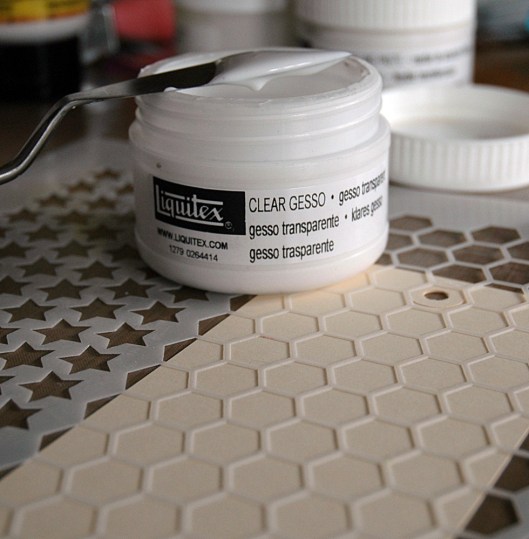
Either a stiff card (like an old bank card or hotel key), a palette knife, Light Molding Paste, Flexible Modeling Paste, Coarse Texture Gel, Coarse Pumice Gel, and Clear Gesso.
First take whichever medium you want to use and spread it over the stencil. I like to go heavier in some areas and lighter in others for extra texture but it looks great all flat too.
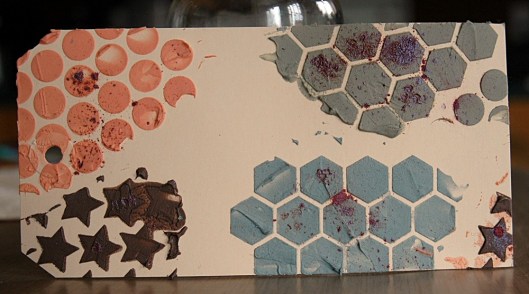
I chose to work with the pastes from lightest to heaviest so light molding paste is up first:
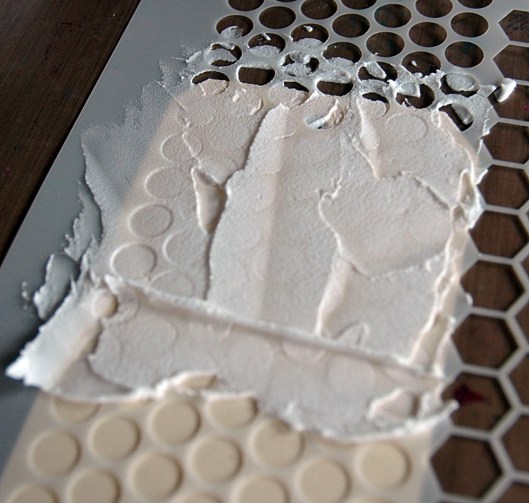
I heat set the left side and let the right dry on its own. You can see that the left is puffy and a more even looking layer:
The second paste I tried was flexible modeling paste:
I again heat set the left and allowed the right to air dry, and again, the left is puffier and smoother:
Next up was Coarse Texture Gel:
It was really hard to get a good picture of this one, but the left side, which was heat set, went translucent and although it puffed up during heating, flatten when it cooled. The air dried right side is more opaque in colour and less shiny:
Finally for the pastes, I used Coarse Pumice Gel which is so thick it’s almost not spreadable:
It’s very cool though, and the difference between heat setting and air drying was minimal. The heat set left side was slightly lighter in appearance:
Finally, I used clear gesso, which is much runnier than black or white gesso, just to see what it did:
Once heat set, it puffed up but then, instead of falling flat, it fell down all wrinkly (kind of cool), while the air dried side was clear and rough:
Finally, I misted them all:
I found that the mist did soak into the air dried pastes more, whereas I noticed I could get more ink off the heat set side, almost like it was a resist. I didn’t do this with the Coarse Pumice Gel for two reasons: 1. It wasn’t dry, that stuff takes hours! and 2. I’ve tried it before and it always looks awful. I have been told that mixing colour in first works well though.
Speaking of mixing in colour, I’ve been trying to find a pigment to mix with pastes so they’re coloured without getting runny. Remember, the drier the better for stencils and clean designs! The best colour I had found so far was Golden Heavy Body Fluid Acrylics, and it was just ok for me, maybe I need more colours to experiment with. Today I tried my Perfect Pearls Powders – in a word, awesome!
All you have to do with any pigment is take some paste out and plop it on your craft sheet, then add (or sprinkle!) the pigment and use your palette knife or card to mix it up. Then smear it over the stencil like usual. My only complaint about the Perfect Pearls? Once mixed in they’re not shimmery! But the colours are great and because they’re a powder there’s nothing to liquify the paste.
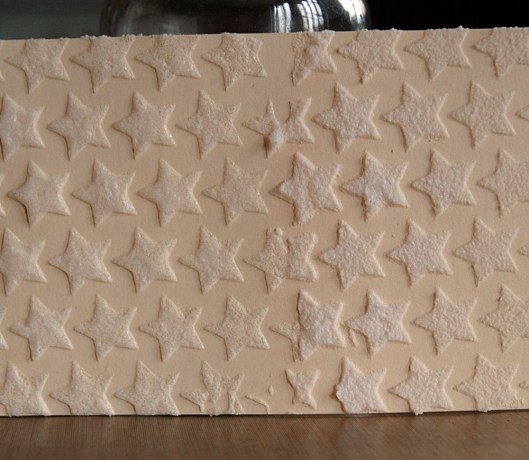
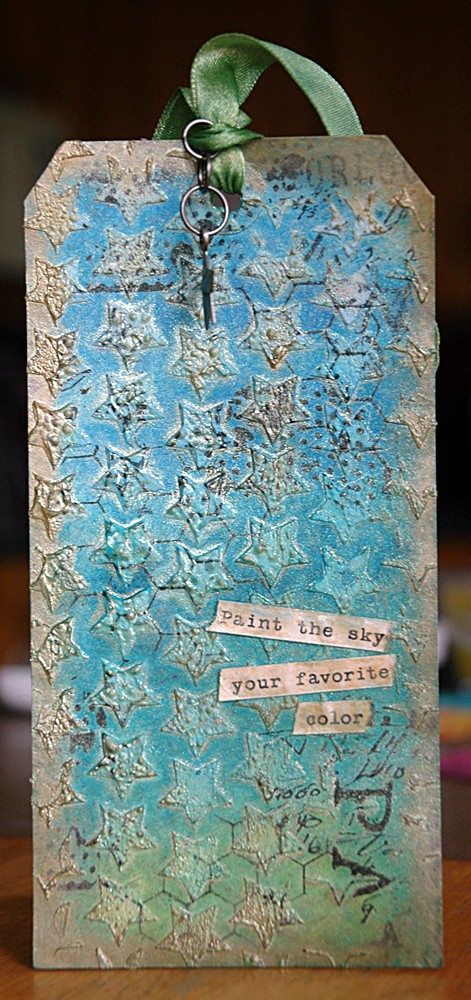
For my finished tag, I used Flexible Modeling Paste which I air dried almost completely, then heated to get fine little bubbles on the surface – more texture! 🙂
And see that quote? I had the card done, then found that on a sticker sheet – perfect!
Love the texture…
If you have any questions – let me know. If you try out modeling paste in a project, link me up in the comments – you know I love to see them!
S.









I have used brusho watercolor crystals they are dry have many colors that are art quality. Gorgeous. They work well.
The white paste may make some colors to be more pastel colors. But they are pretty to.
I love to play. Have fun.
LikeLike
Very informative. Thank you!!
LikeLike
hopefully this isn’t a repeat of another comment, but have you tried using the hi-flow acrylics to color your pastes? They are so concentrated that you would only need a couple of drops! ( I have only tried the Golden ones & they’re great:)
LikeLiked by 1 person
I haven’t tried that Courtney, thanks for the suggestion!
LikeLike
I’ve been contemplating trying a paste. After reading your tutorial, I’m definitely going to start using a medium in my card and tag making. Thank you for sharing on Pinterest and taking the guess work out of it for me!
LikeLiked by 1 person
Thank you Deeann! I’m so glad it was helpful to you and that you’re excited to try something new!
LikeLike
Thank you for sharing, this is very helpful! Saved me a lot of time…. THANKS!
LikeLike
great blog post. It’s so inspiring when people show how they use popular products.
Sarah
LikeLike
Thank you Sarah!
LikeLike
Thanks, so much! I’ve been trying to learn about the various modeling pastes. It never occurred to me that heat drying over air would impact the final results! Your article expanded my tool bag.
LikeLike
That’s fabulous! Thank you for your comments – I’m so glad you learned something new!
LikeLiked by 1 person
Sara, I already tried one of your techniques with great results. The heat gun use really made a difference in how the paste dried. I just bought resin sand paste to try out, too. Looking forward to reading more on your site!
LikeLike
That’s great! Thanks for sharing – I’d love to see what you make!
LikeLike
thanks for a great tutorial I have been wanting to try some of these and it’s nice to know what they do.
I’ll have to go back and look at some of your other posts too. I found you on Pinterest!
LikeLike
Thank you! I hope you have fun trying them out and I hope you’ll let me know what you think. I’d love to see what you make!
LikeLike
Thank you, I’m so glad you liked it and it was helpful. Let me know what you think once you try them out – I’d love to see what you create!
LikeLike
This is a great reference, Thanks!
LikeLike
Thanks Jackie! You’re welcome!
LikeLike
I love what you’ve done here! I got modeling paste yesterday and I love it! I found your blog by searching modeling paste on cards…and we both use WP! Small world! I’ll be following your blog now! Here’s my blog post on modeling paste: http://mrsstephanieseelye.wordpress.com/2014/09/17/modeling-paste-is/ let me know what you think when you have a chance to have a look!
LikeLike
Thanks Stephanie! Heading over to check out your work now!
LikeLike
These are soooo cool!!! Did you try any metallic sprays? These are seriously awesome.
LikeLike
Thanks Megan. I didn’t use metallic sprays here but I am a wee bit obsessed with shimmer and normally do use them!
LikeLike
I wonder if you can use paste food colourings. A tiny amount on the end of a toothpick colours a bowl of icing very nicely. It should work with the pastes. Just a thought….
LikeLike
Good idea! Definitely worth a try – thanks!
LikeLike
Very cool tutorial on the different pastes. Lots of fabulous texture! Karen.x
LikeLike
Thank you Karen!
LikeLike
I have been using DAP Fast n Final Lightweight Spackling and coloring it with Ranger alcohol ink. I just put some spackle in a plastic, throwaway cup and add a few drops of ink and mix it in. Works great and is very easy to spread. I even used some Dylusions ink as well.
LikeLike
Great tip! Thanking for sharing!
LikeLike
Stucco patch works really well if you can’t find the pumice gel.
Sandy from Az.
LikeLike
Thanks!
LikeLike
Love all your tips Sara and the photos demonstrating all the differences are awesome. I REALLY loved that coarse texture gel! Where did you buy it? Gotta have me some of that! 🙂 I also add a drop or two of re inker dye { distress inks} or even bang a splotch of distress ink pad down on my non stick sheet and use a knife to mix it in to color my paste{ have tried the perfect pearls too…its lovely }
LikeLike
Thanks Michelle! I’m pretty sure the coarse texture gel came from Urchin, but you can also but it at large arts and crafts stores.
LikeLike
Thank You!! I’m still learning about all the mediums!! Love your tips!!
LikeLike
Thanks Rina! Have fun playing!
LikeLike
I recently bought some stencils, was googling how to use them with gesso and came across your technique series for stencils. What a wonderful and timely find for me. I am having so much fun learning how to do use them. Thank you, thank you, Cathy Basinski
LikeLike
Thanks Cathy, I’m glad the series was helpful to you! Please send me an email if you have any questions at all – I’d be happy to answer them! And let me see what you do, I always love seeing other people’s artwork! Also, have fun! sarathings(at)gmail(dot)com
LikeLike
🙂 You have been busy! I love playing and experimenting with my art supplies, so much you can do with the mediums when you set out to play and experiment. I have a texture bible on the go, that is filled with experiments.
LikeLike
That’s a great idea – I may need to start one of those! Thanks, Natasha!
LikeLike
great idea!
LikeLike
Wow! How did you manage this in the middle of yesterday/today?…..you continue to amaze and it looks fabulous. I finally have a handle on these pastes you have been referring to – 5 stars!
LikeLike
Thanks! I did a little mini album today too – that’s yet to come! 🙂
LikeLike