• About

sarathings

~ my art, my family, my life, my stuff…

sarathings

Tag Archives: Mixed media

All puzzled out…

24 Monday Feb 2014

Posted by Sara in Mixed Media

≈ 2 Comments

Tags

Mixed media, puzzle pieces, Puzzle swap

A while back I posted a few puzzle pieces that I had altered for a swap. After those I completely lost track of time and just finished up all the rest this past weekend. They’re now in addressed envelopes waiting to be mailed. Hopefully, that will take me less time than the actual making of the pieces did but don’t hold your breath – I’m a slacker when it comes to mailing things!

First, the one that I said was a mess in the last post is completely redone (and forgive me for the terrible picture):

happyI’m not going to go through each piece, that would be too boring for you altogether, so here are a couple and you can find all the rest at my flickr account here.

On this one I love the colour:

inspiration

and glitter!

inspiration glitter

This flower stamp is one of my faves:

be bold

And the gold Ferro molding paste is fabulous:

voice

Go check out the rest and enjoy!

S.


Share this:

  • Click to share on Twitter (Opens in new window)
  • Click to share on Facebook (Opens in new window)
  • Click to email a link to a friend (Opens in new window)
  • Click to share on Pinterest (Opens in new window)
  • Click to share on LinkedIn (Opens in new window)
  • Click to print (Opens in new window)
  • Click to share on Tumblr (Opens in new window)
  • Click to share on Reddit (Opens in new window)
  • Click to share on Pocket (Opens in new window)

Like this:

Like Loading...

Seasonal Canvas | Winter

12 Wednesday Feb 2014

Posted by Sara in Canvas, Mixed Media

≈ 4 Comments

Tags

Canvas, Classes, Mixed media

At the last Paperie Spring retreat I taught a canvas class where we made a Spring canvas. It was a hit and so for in store classes this year the owners and I decided I would teach a set of four seasonal classes. The first one was this past Saturday.

We had a great group, about 6 of us, which is a nice size for a mixed media canvas class. This time the canvas was winter so of course, I needed a snowman:

winterOne of the problems most people had to work through was covering the layers. One person, after we had the first layers of items down said, “I love it! I’m done.” And then we added about 5 more layers on top of that! The number one thing I tell students in canvas and mixed media classes is this: Don’t get attached to it – we’re covering it up!

I love to add rub-ons to my canvases and the Tim Holtz remnant rubs worked great for this one, especially to spruce up the top of the snowman’s hat:

winter snowman hat

My favourite part of this canvas is the texture of the snowman himself:

winter snowman texture

I think he turned out just right!

To make this class even better, we had an awesome mix of people who all had great ideas and fun products. One person had fabulous shimmery stuff that we all added to our snowbank to make it sparkle. Someone else had a swirl stencil to mimic the look of swirling snow. And yet another person had a bunch of different quotes to share. I love classes that gel like that so thank you to all the canvas peeps!

Next up, a new spring canvas – want to join us? ๐Ÿ™‚

S.

Share this:

  • Click to share on Twitter (Opens in new window)
  • Click to share on Facebook (Opens in new window)
  • Click to email a link to a friend (Opens in new window)
  • Click to share on Pinterest (Opens in new window)
  • Click to share on LinkedIn (Opens in new window)
  • Click to print (Opens in new window)
  • Click to share on Tumblr (Opens in new window)
  • Click to share on Reddit (Opens in new window)
  • Click to share on Pocket (Opens in new window)

Like this:

Like Loading...

A bit of this, a bit of that….

30 Thursday Jan 2014

Posted by Sara in Card Kit, Classes, Mixed Media

≈ 2 Comments

Tags

Classes, Mixed media, Simple Scrapper, The Paperie Card

I know I’ve been pretty quiet around here but I’ve been a busy bee behind the scenes designing and making and playing! My goal for this year is to have classes, kits, and creative team work designed, prepped, and ready in advance – and not to be doing it at the last second. That being said though, I seem to work well under deadline pressure!

Right now I’m getting ready to post my work using the February Simple Scrapper Members templates:

love you to jupiter texture

and story starters:

how do i love thee doilyPlus I’m working my way through The Paperie‘s March Card kit:

DSC_2247

And I just finished designing the canvas for The Paperie’s first ever Canvas Class: Junior Edition!

superstar title

I’m so excited to see what all the kids do with the instructions – I know none of their canvases are going to look even remotely like mine and that’s the really awesome part of this class!

On top of that I’m mulling ideas for the new Yearlong Album class while waiting for my supplies to come in and I’m trying out things for my Seasonal Canvas: Winter class. Here’s the Spring canvas from last year’s retreat class, no peeks available yet for Winter though!

spring canvasAnd that’s it – for now! I still have more card kit projects to do and a little something fun for Scrapbook Steals so there will be lots more eye candy soon.

S.

Share this:

  • Click to share on Twitter (Opens in new window)
  • Click to share on Facebook (Opens in new window)
  • Click to email a link to a friend (Opens in new window)
  • Click to share on Pinterest (Opens in new window)
  • Click to share on LinkedIn (Opens in new window)
  • Click to print (Opens in new window)
  • Click to share on Tumblr (Opens in new window)
  • Click to share on Reddit (Opens in new window)
  • Click to share on Pocket (Opens in new window)

Like this:

Like Loading...

Paperie Card Kit | January 2014: Part 2

16 Thursday Jan 2014

Posted by Sara in Card Kit, Mixed Media

≈ 3 Comments

Tags

Canvas, Mixed media, The Paperie Card Kit

I’m back to show you the rest of my projects from the Paperie’s January Card Kit (see the others here and here).

First up is a card that would hold a gift card. I used the 7 Gypsies tag included in the kit for the focal point – I think t his would make an awesome gift for those people you’re a little stumped about when it comes to gift giving times, like the postal carrier, or garbage man.

happy card

I simply folded one of the 6×6 pieces of patterned paper in half, keeping the top strip attached. This gave me a half circle on one side so I punched another on the other side and had a perfect place to rest my ribbon.

I then cut another piece of patterned paper to fit inside, cut a couple of notches for a gift card, and stamped a sentiment. Easy, quick, and done!

happy card - openAnother quick project were the lunch box notes. I just cut small pieces of patterned paper, folded them to resemble a matchbook, and stapled the bottom to keep the flap tucked in.

lunchbox notes

A fun heat embossed stamp inside and they’re perfect for Molly’s lunch!

lunchbox notes - open

Finally, my favourite, a canvas.

to the moon

As I mentioned before, I love the stamp set that came with the kit and as soon as I saw it I knew I had to make this canvas. Pretty much everything came from the kit except the basics – the canvas, multimedium, paint, mist, and vintage book paper. I love the shine from the mix of gold, silver, and gold glitter embossing paper:

to the moon - shine

And of course, the title rocks!

to the moon - title

And that’s it – lots of projects and I still have lots of product left to play with! There may still be one or two kits left if you want to pick one up, just give the Paperie a call to reserve it!

S.

Share this:

  • Click to share on Twitter (Opens in new window)
  • Click to share on Facebook (Opens in new window)
  • Click to email a link to a friend (Opens in new window)
  • Click to share on Pinterest (Opens in new window)
  • Click to share on LinkedIn (Opens in new window)
  • Click to print (Opens in new window)
  • Click to share on Tumblr (Opens in new window)
  • Click to share on Reddit (Opens in new window)
  • Click to share on Pocket (Opens in new window)

Like this:

Like Loading...

Gelli Plate Printing |Guest Post: Karen

26 Tuesday Nov 2013

Posted by Sara in Guest Post, Mixed Media, ScrapBook, Tutorials

≈ 4 Comments

Tags

GelliPlate, Guest Post, Mixed media, Scrapbook Layout

I’m on vacation for a few days to visit my brother and his lovely (and pregnant!) wife. While I’m away some of my favourite local artists and bloggers have agreed to do posts for you! Today, Karen shares her newfound love of the Gelli Arts Gel Printing Plate. Enjoy!

ย  ย  ย  ย  ย  ย  ย  ย  ย  ย  ย  ย  ย  ย  ย  ย  ย  ย  ย  ย  ย  ย  ย  ย  ย  ย  ย  ย  ย  ย  ย  ย  ย  ย  ย  ย  ย  ย ย 

I was honoured when Sara asked me to guest post for her blog while she is vacationing. Hope you are having a great time Sara!

Last week, I bought a Gelli Arts Gel Printing Plate and I have been having a blast learning and experimenting with different kinds of prints. I have created lots of fun backgrounds for art journal pages, but I was even more delighted when I realized the great backgrounds I could make for my scrapbook pages!

Today I am sharing my very first gel print scrapbook layout. Hooray!

For my print I used two colours of Silks Acrylic Glaze- Watermelon Mist and Carmen.

First I did a very simple layer of Watermelon Mist (pink). I just spread the glaze on the plate, put the paper on and pulled it off.

1

For my second layer, I spread on some Carmen (red). I pressed down a stencil and while the stencil was on the plate I used a roller dots stamp over the plate for extra texture.

2

Then I lifted the stencil before applying the paper.

3

Here’s what it looks like after the pull! Love it!

4

What a great base for a page right?! Next I chose some paper from the Simple Stories I {Heart} Summer line, which I just love, by the way. And once I added a few embellishments it was done.

5

So it’s official – I am in love with the Gelli Plate! How about you?!

Karen

You can check out more of my stuff on my blog at http://sitscrapandrelax.wordpress.com

Related articles
  • Create Daily: Gelli Arts Monoprinting (rondapalazzari.typepad.com)
  • Brother ScanNCut: Gelli Prints (balzerdesigns.typepad.com)
  • Round prints on a rectangle Gelli Plate (scrappystickyinkymess.wordpress.com)

Share this:

  • Click to share on Twitter (Opens in new window)
  • Click to share on Facebook (Opens in new window)
  • Click to email a link to a friend (Opens in new window)
  • Click to share on Pinterest (Opens in new window)
  • Click to share on LinkedIn (Opens in new window)
  • Click to print (Opens in new window)
  • Click to share on Tumblr (Opens in new window)
  • Click to share on Reddit (Opens in new window)
  • Click to share on Pocket (Opens in new window)

Like this:

Like Loading...

Art Book | Guest Post: Marg

25 Monday Nov 2013

Posted by Sara in Guest Post, Mixed Media

≈ 6 Comments

Tags

Guest Post, Mixed media

I’m on vacation for a few days to visit my brother and his lovely (and pregnant!) wife. While I’m away some of my favourite local artists and bloggers have agreed to do posts for you! Today, Marg shares a fun Art Book she taught to a group of young girls. Enjoy!ย  ย  ย  ย  ย  ย  ย  ย  ย  ย  ย  ย  ย  ย  ย  ย  ย  ย  ย  ย  ย  ย  ย  ย  ย  ย  ย  ย  ย  ย  ย  ย  ย  ย  ย  ย  ย  ย ย 

Thanks, Sara for asking me to be a guest blogger.

On November 11, four wonderful nine-year-old girls came over to my house and we had so much fun making an Art Book.

This is my Art Book:

1

Here is the inside of my book:

2

In making these books we used Watercolour Paper, Golden Reg Matte Medium, Claudine Hellmuth Sticky Back Canvas, Stencils, Tissue paper,Tattered Angels Chalkboard Mist, Maya Road Chipboard pieces, Studio Calico Mistables, Basic Liquitex acrylic paints, Dylusion Stamps, Inka Gold, Permaopaque pens, Sizzix and Magazines.

I showed the girls my book and they proceeded to make their own. All were so different and they were all so wonderful! It was so nice watching their imaginations at work.

Here are two of the girl’s books:

Claire’s Book

3

Jordan’s Book

4

I love working with children because they get so excited and have so much imagination which they are not afraid to follow. We should be so lucky.

If you have young children make sure they have time to experiment with art. Sit back and enjoy their inhibitions when they are creating.

Take Care

Marg

Share this:

  • Click to share on Twitter (Opens in new window)
  • Click to share on Facebook (Opens in new window)
  • Click to email a link to a friend (Opens in new window)
  • Click to share on Pinterest (Opens in new window)
  • Click to share on LinkedIn (Opens in new window)
  • Click to print (Opens in new window)
  • Click to share on Tumblr (Opens in new window)
  • Click to share on Reddit (Opens in new window)
  • Click to share on Pocket (Opens in new window)

Like this:

Like Loading...

Pan Pastels | Guest Post: Tanya

22 Friday Nov 2013

Posted by Sara in Guest Post, Mixed Media, Tutorials

≈ 8 Comments

Tags

Guest Post, Mixed media, PanPastel

I’m on vacation for a few days to visit my brother and his lovely (and pregnant!) wife. While I’m away some of my favourite local artists and bloggers have agreed to do posts for you! Today, Tanya shares her love and amazing use of PanPastels. Enjoy!

ย  ย  ย  ย  ย  ย  ย  ย  ย  ย  ย  ย  ย  ย  ย  ย  ย  ย  ย  ย  ย  ย  ย  ย  ย  ย  ย  ย  ย  ย  ย  ย  ย  ย  ย  ย  ย ย 

Iโ€™m excited to guest blog for Sara and share my new favorite thing โ€“ pan pastels! Iโ€™ve been eyeing them for ages, but resisted buying until I took a class at The Paperie by Cathie Reed. After that, I had no choice but to buy them, I was hooked. I love to make backgrounds for projects with pan pastels.

You can read more about pan pastels here.

The first project is so simple and fast to make and you just need one pan pastel – thatโ€™s right โ€“ just one, so if you are interested in experimenting with them, you donโ€™t need to spend a lot to try it out.

1

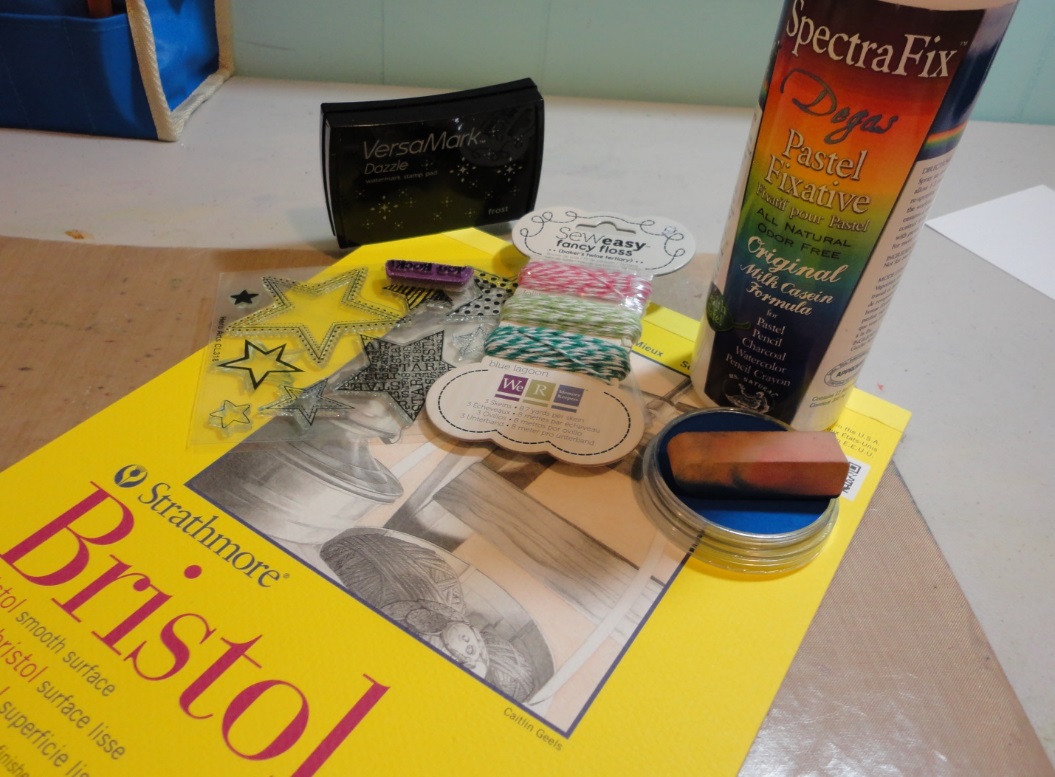
Gather your supplies. Here is a list of what I used:

  • Ultramarine blue pan pastel and sofft sponge
  • Spectra fix
  • Bristol paper (You can use whatever you have on hand, this was the closest for me to grab)
  • Stamps
  • Versa mark
  • tape
  • Some embellishments (of course!)

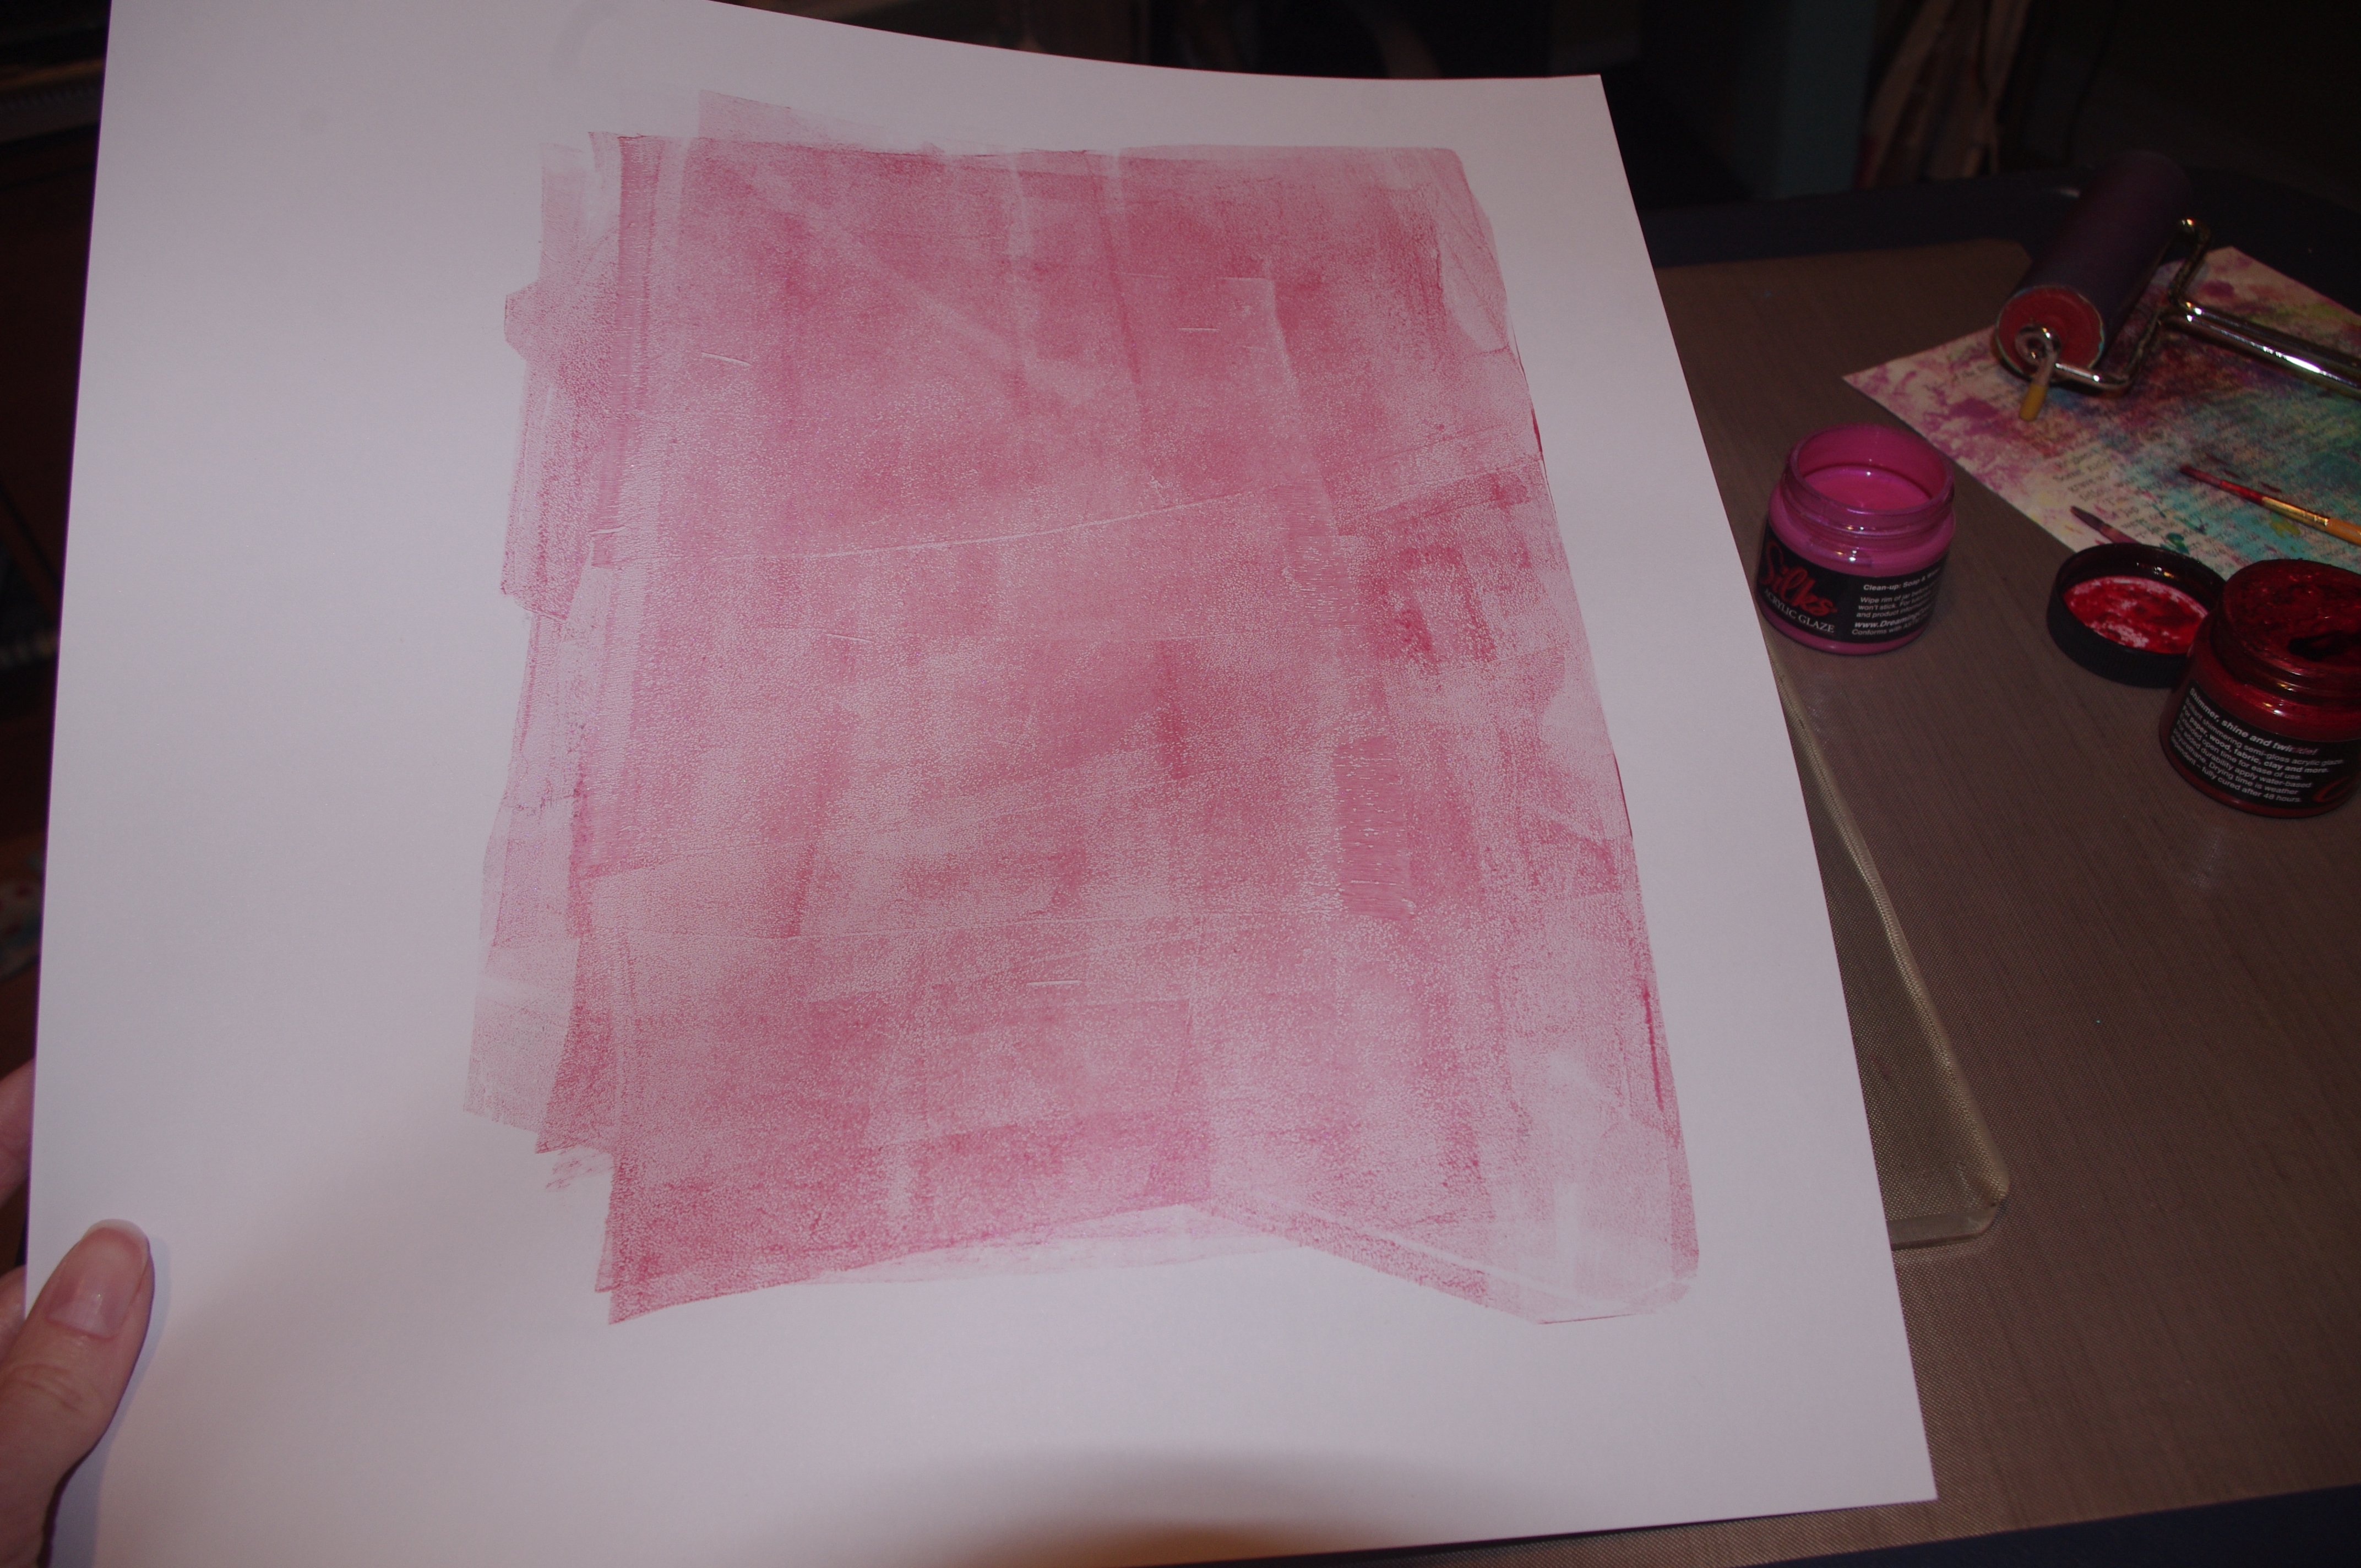
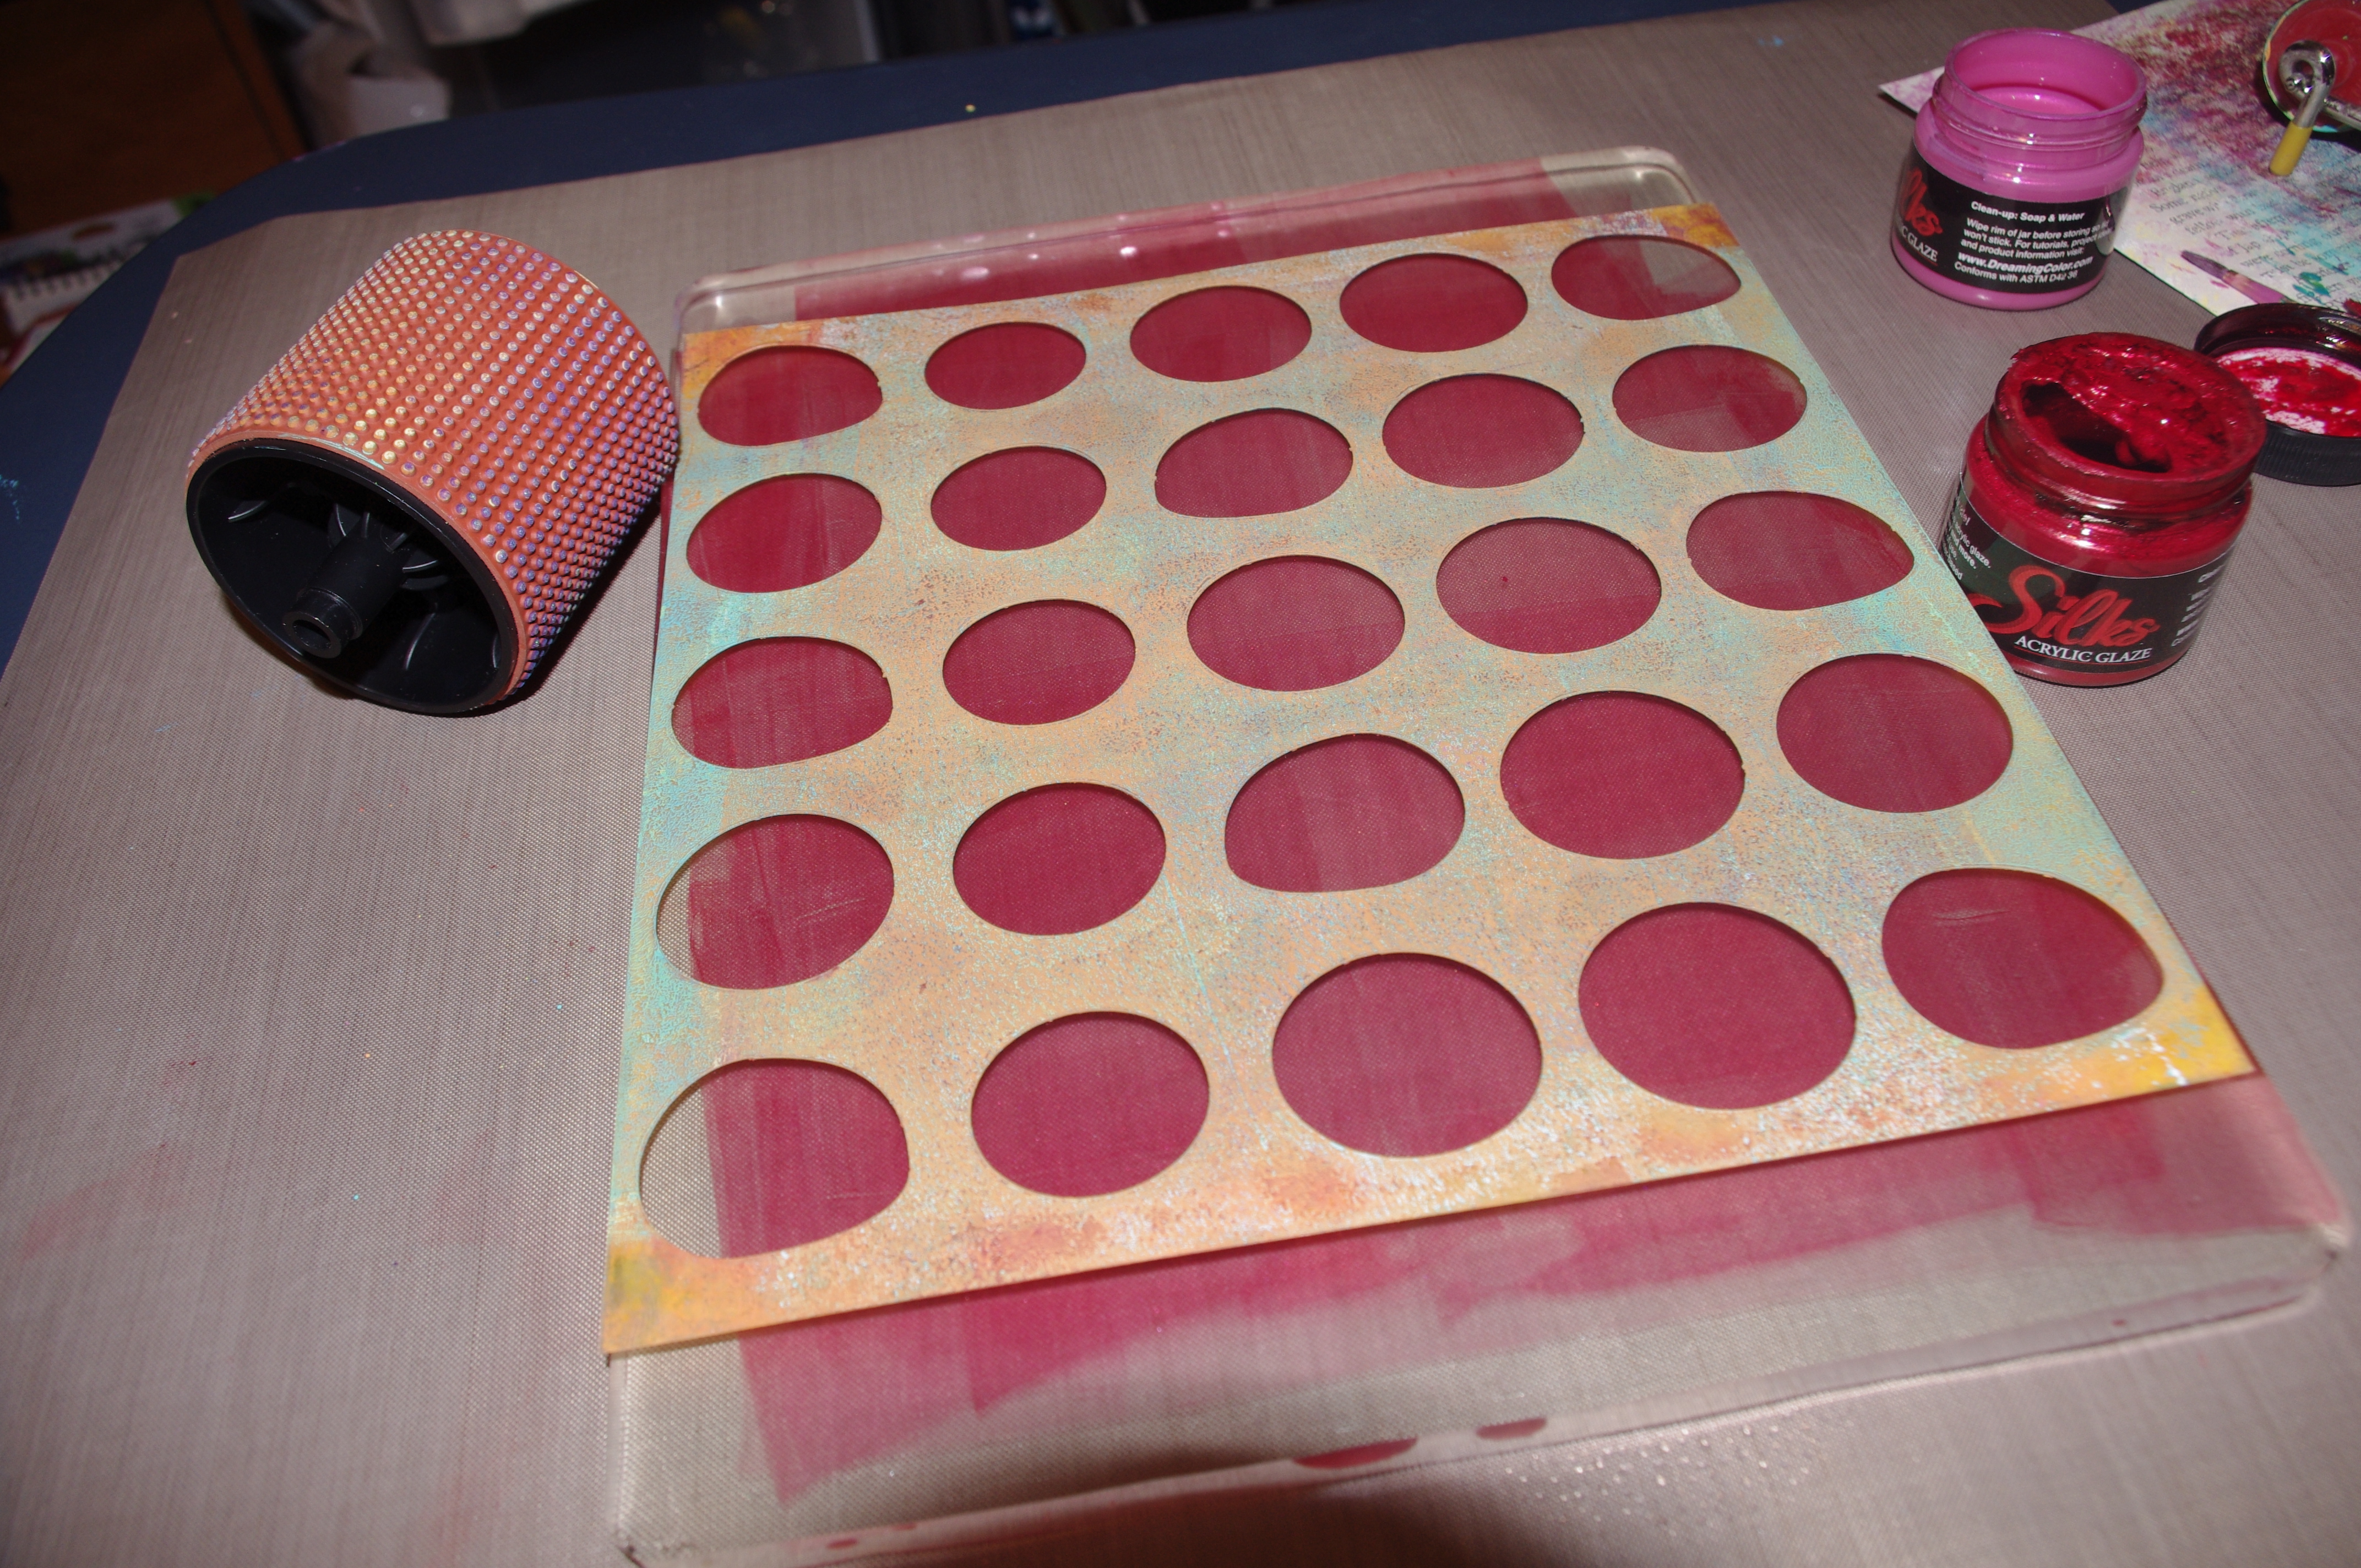
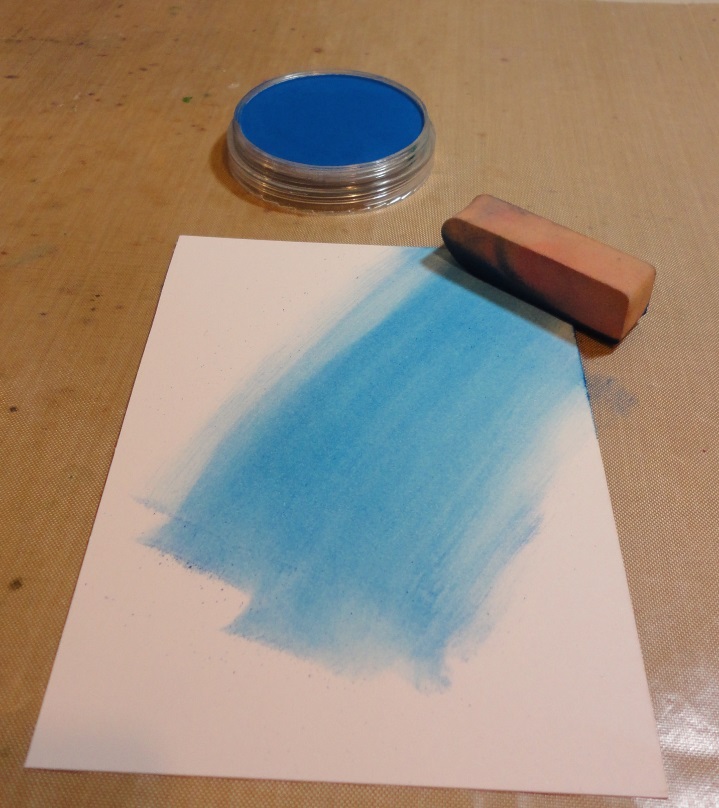
Cut your paper to the size of the card you want to make. Gently swipe the sponge over the pan pastel two to three times and color in the paper with swiping motions, like using a paint brush. If you have loose pastel powder on the surface of the pan pastel, then you are using too much pressure when swiping up the color.

2

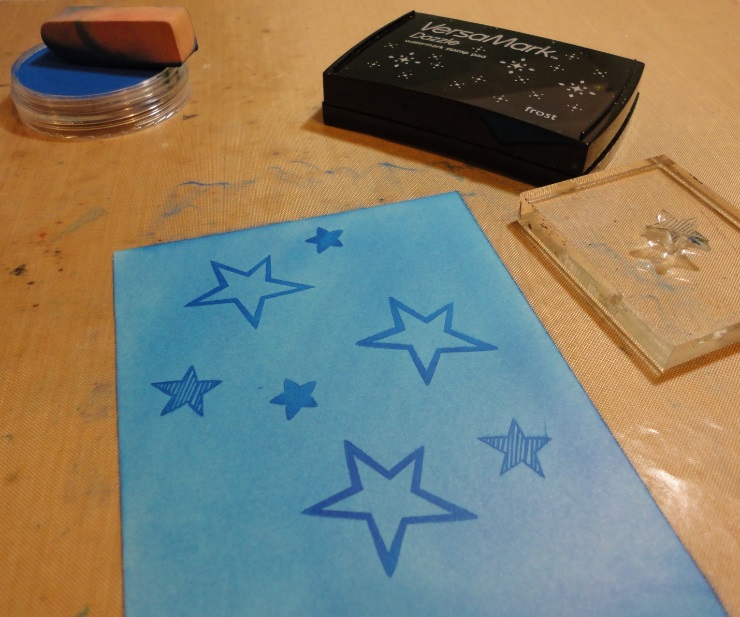
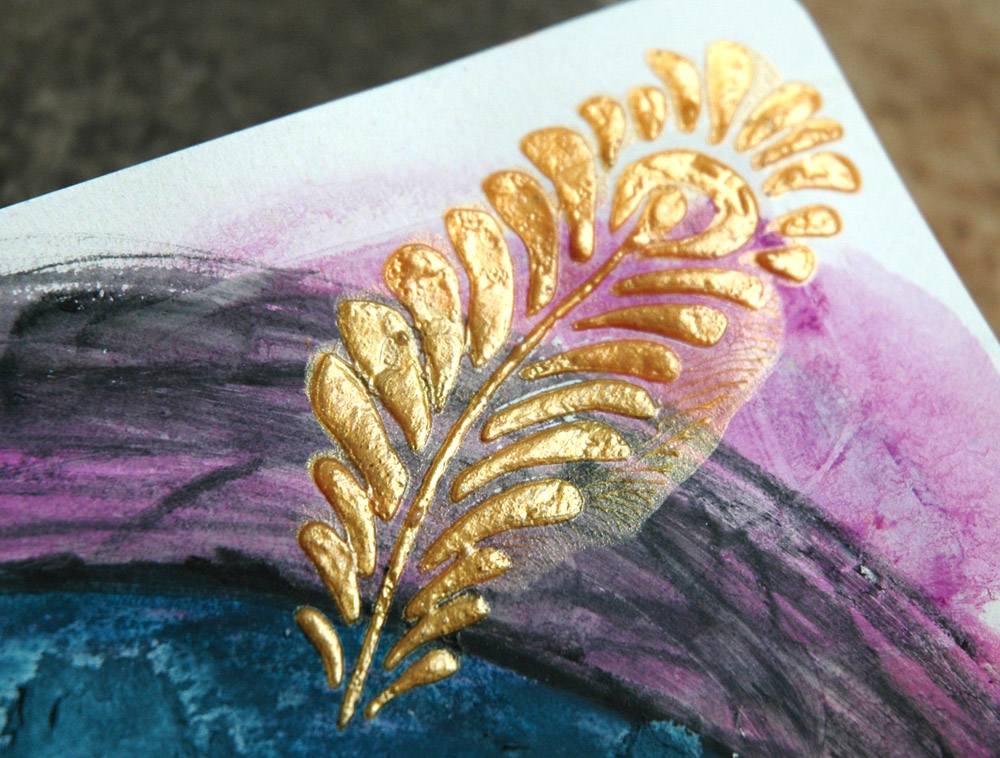
Once you have it all colored in and at the shade you like, ink up your stamp with versa mark and stamp. It wonโ€™t be very visible. Add some more pan pastel. Ta da – the magic happens!

3

You then have to spray it with a fixative so it will set. I like the spray spectra fix, safe and no odor. It takes about 1-2 minutes for it to evaporate and dry.

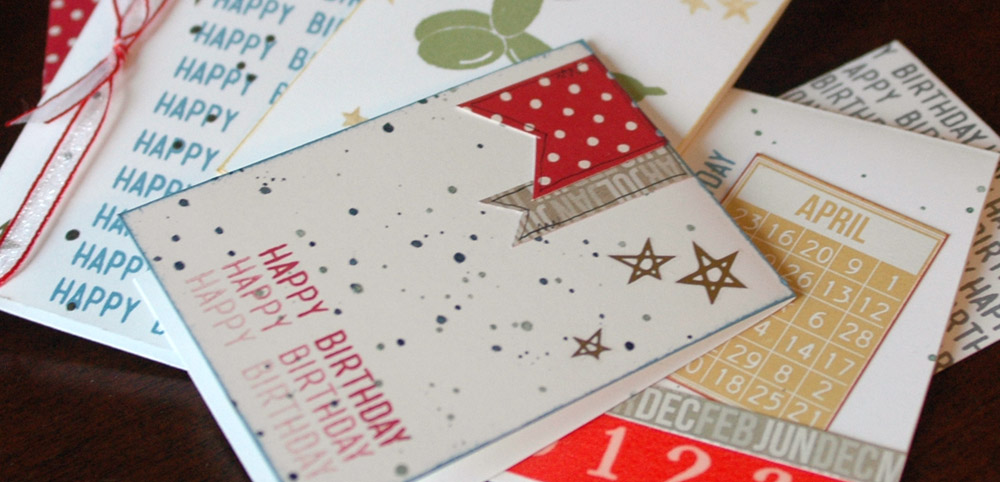
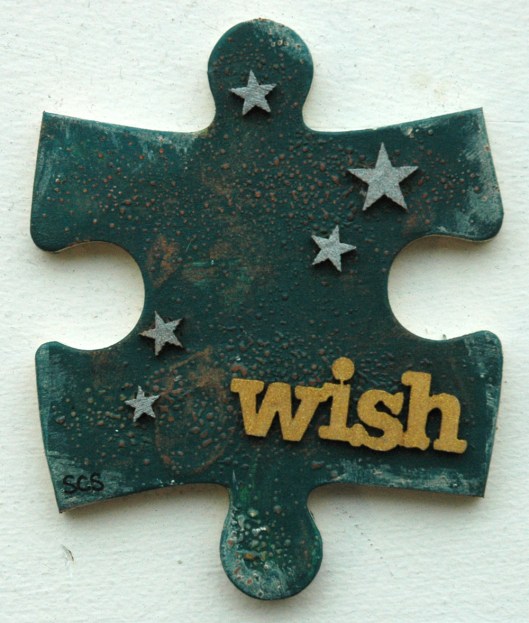
Add your sentiment stamp, embellishments and adhere it to a card base. Easy peasy, you are done.

4

This technique would work fabulously on a 12x 12 layout or canvas.

The next background I want to show you is on a canvas. For this project I used:

  • Canvas
  • Tissue paper
  • Cheese cloth
  • Matte multi-medium
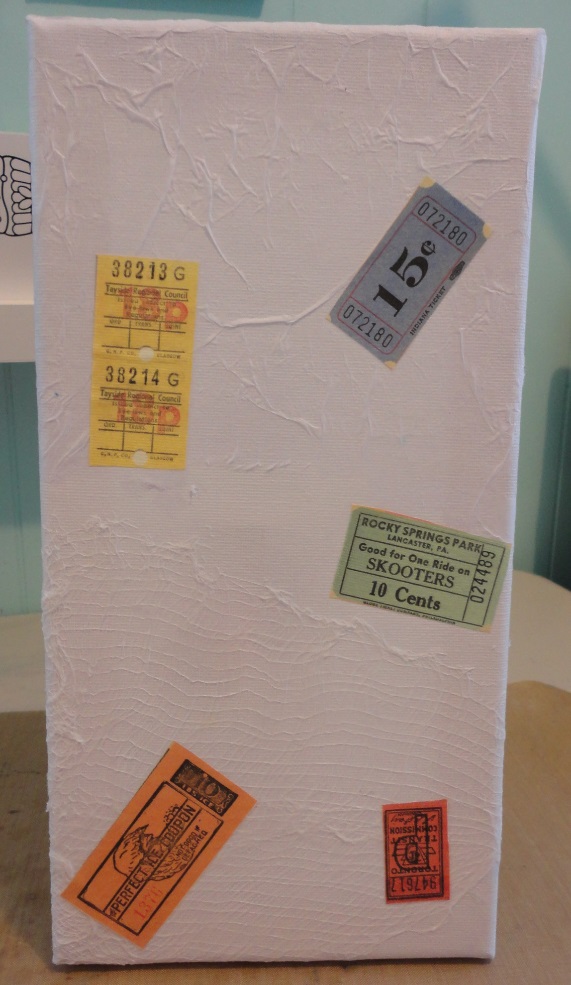
  • Various papers ( I used cut up gift wrap that looked like tickets)
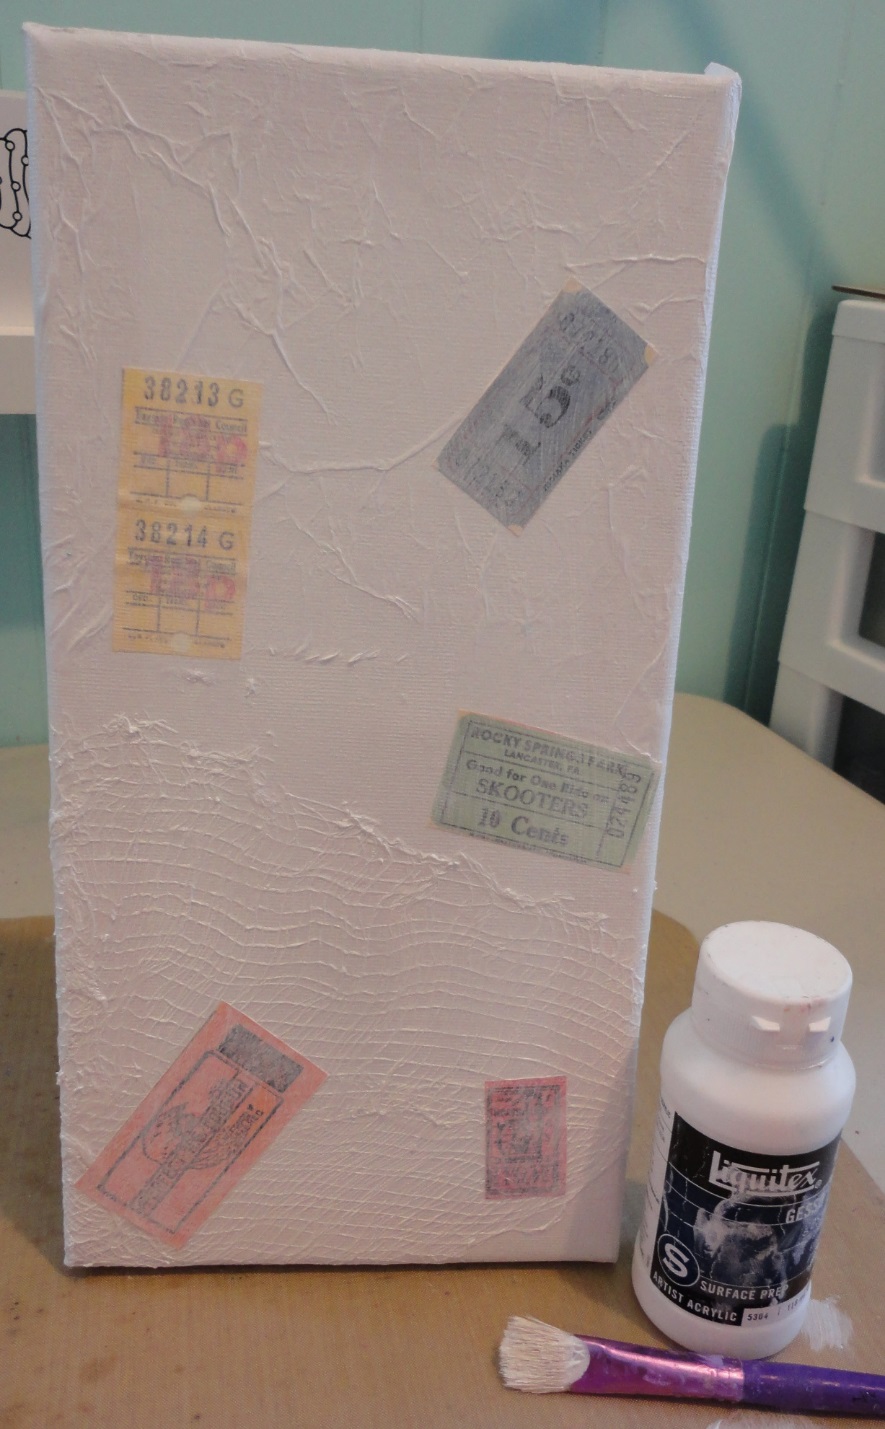
  • Gesso
  • Pan pastels and sofft sponges
  • Fixative spray

5

I crumpled up some plain white tissue paper and adhered it on the canvas with the multi medium. I did the same with the cheese cloth and paper. Remember to put the multi medium under and over what you are putting on the canvas.

6

Once that was dry, I put a thin coat of gesso over the whole canvas with a paint brush. The gesso helps the pan pastels go on so smooth and tones down your paper colors a little.

7

That layer dries much more quickly than the multi medium. Now you are ready to add the color goodness of pan pastels.

8

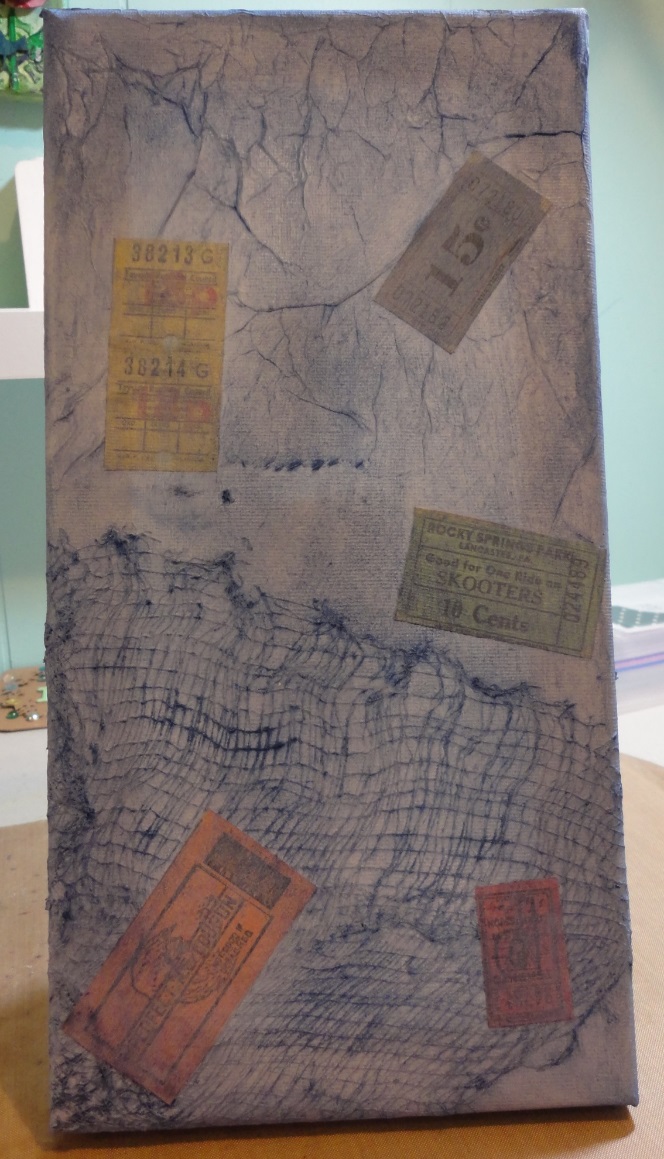
I used ultramarine blue shade all over the canvas the same way I did the paper for the card.

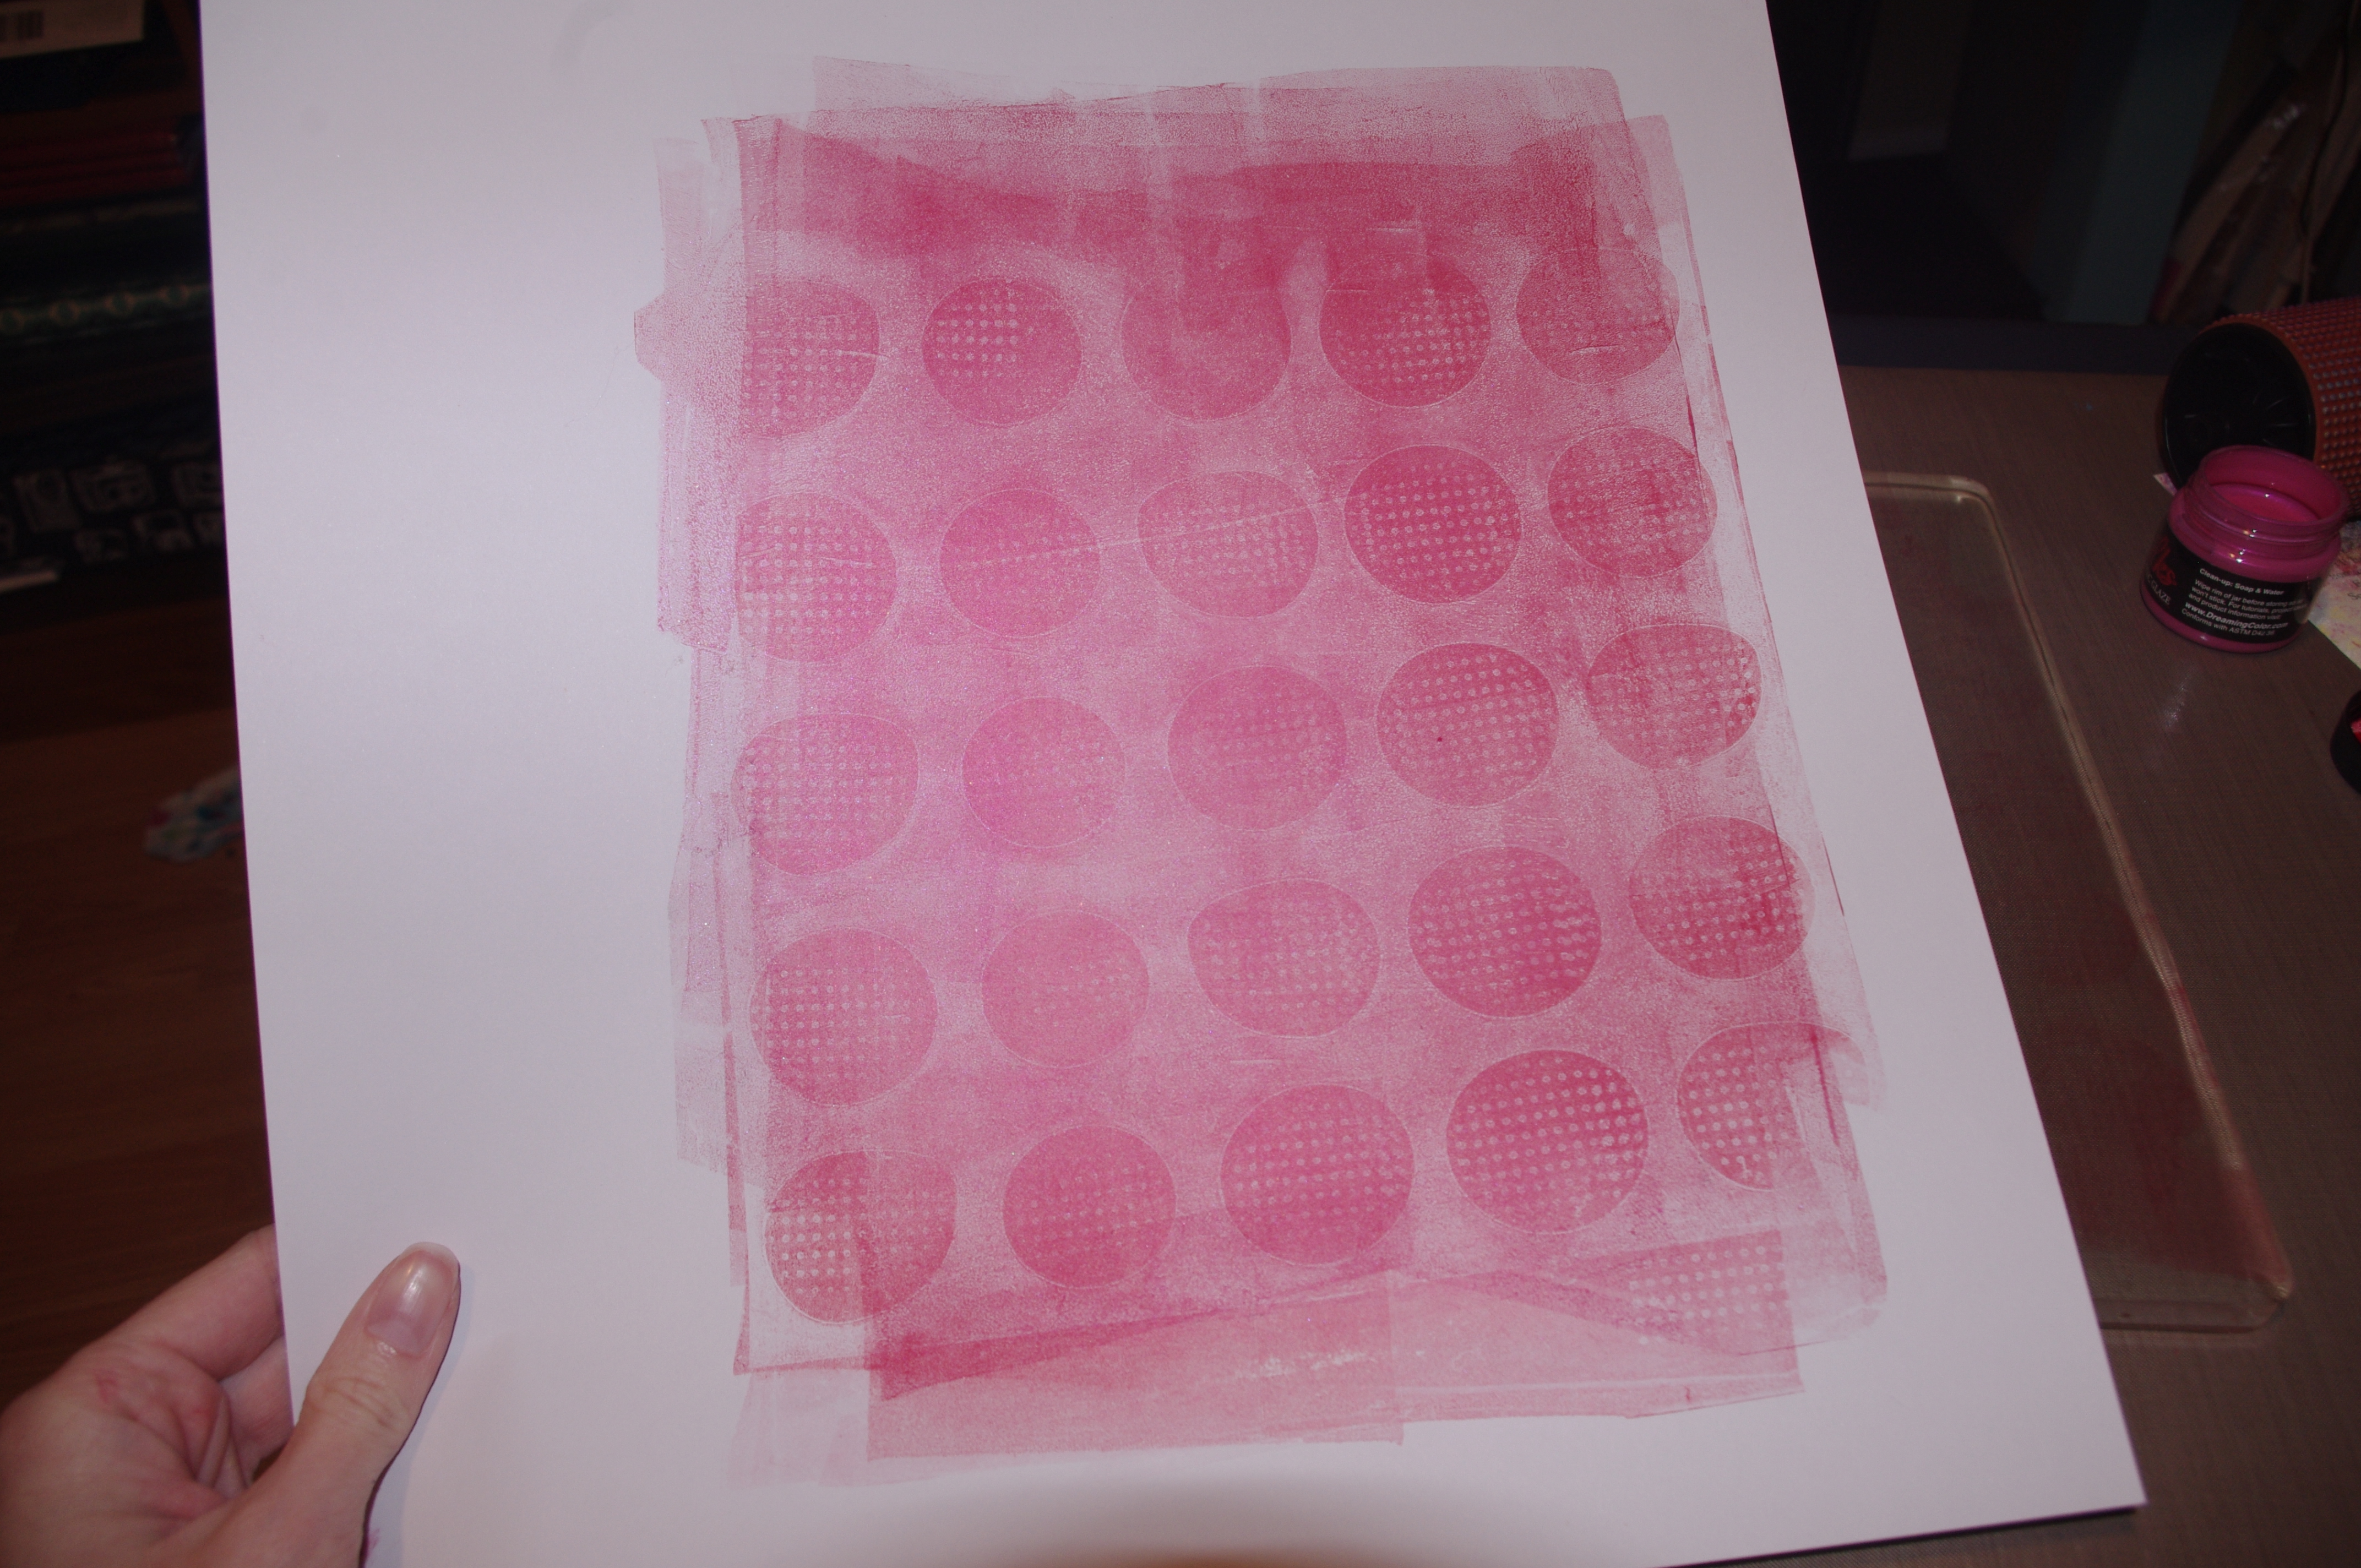
I love how the texture of the tissue paper:

9

and cheese cloth:

10

picks up the color.

I then sprayed with the fixative and once it was dry, I added more color. This time I used phthalo blue to shade and paynes grey for the edges. Of course, I sprayed with the fixative again.

11

Now you have a great background complete. I will admit, I did have a lot of backgrounds done on canvas, but I used them all up at the retreat. It seems so much faster to work on a canvas without having to do the background prep.

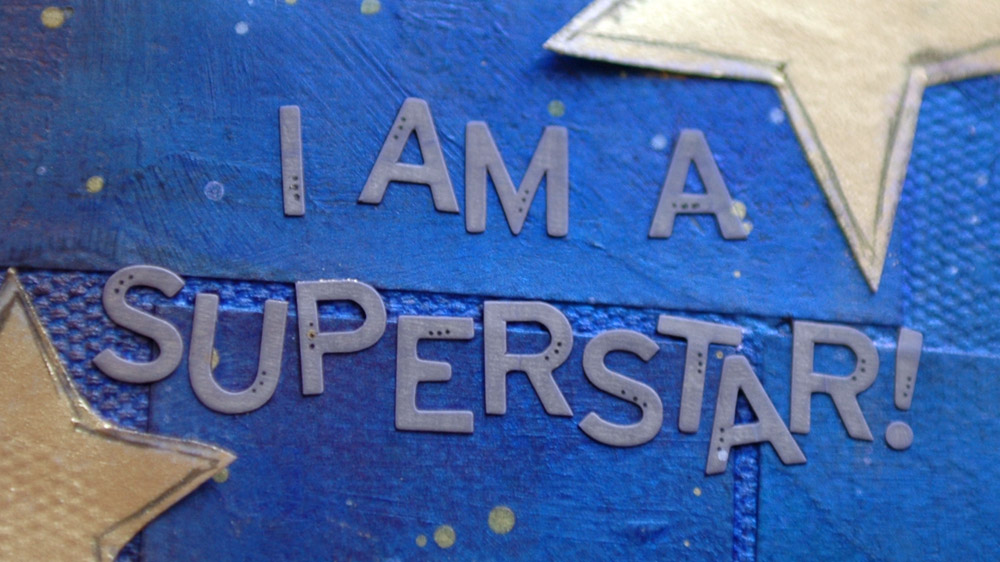
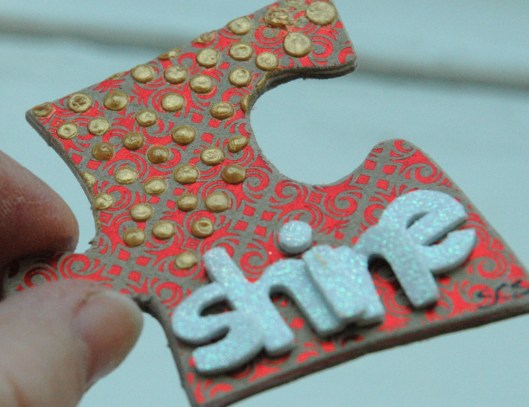
This is what I did with this background:

12

Thatโ€™s all folks, and thanks for letting me share my new love, Sara!

Tanya

Related articles
  • so many ways to be inspired… (donnadowney.typepad.com)
  • Pan Pastels (itsacreativeworld.typepad.com)
  • The Grass is Greener Where You Water It or…PanPastel Metallics (nathaliesstudio.com)

Share this:

  • Click to share on Twitter (Opens in new window)
  • Click to share on Facebook (Opens in new window)
  • Click to email a link to a friend (Opens in new window)
  • Click to share on Pinterest (Opens in new window)
  • Click to share on LinkedIn (Opens in new window)
  • Click to print (Opens in new window)
  • Click to share on Tumblr (Opens in new window)
  • Click to share on Reddit (Opens in new window)
  • Click to share on Pocket (Opens in new window)

Like this:

Like Loading...

A little bit puzzled…

20 Wednesday Nov 2013

Posted by Sara in Mixed Media

≈ 3 Comments

Tags

Mixed media, Puzzle swap

A while ago I posted that I did an altered puzzle with some friends at a crop. Just after that, a group I’m a part of decided to do a larger version and almost 20 of us signed up. We have until the end of January to get the pieces altered and back to the original owners so I’m taking my time getting them done. That being said, I do have a few completed and I though I’d share them!

A bit of floral:

beautiful

A bit of shimmer:

shine

Especially in the light!

shine - shimmer

A bit of dreaming:

wish

A bit of encouragement:

believe

A bit of a mess:

be yourself

I’ll be changing and fixing that one so be on the lookout for the revamped version!

I’m having a blast making and receiving these. For those ladies who have sent theirs back to me already – I really love them, my puzzle is already starting to look awesome! To those ladies who want their pieces back – they’re coming. Eventually. Before the end of January anyway. ๐Ÿ™‚

On another note, Gabe and I are flying to Ottawa with my mom tomorrow to visit my brother, sister-in-law, and the baby girl bump! While I’m away I’ve lined up a few of my very talented friends to blog for you. You’re in for a treat over the next few days, they have some awesome posts done so enjoy and hopefully you’ll find some fun new blogs to follow!

S.

Share this:

  • Click to share on Twitter (Opens in new window)
  • Click to share on Facebook (Opens in new window)
  • Click to email a link to a friend (Opens in new window)
  • Click to share on Pinterest (Opens in new window)
  • Click to share on LinkedIn (Opens in new window)
  • Click to print (Opens in new window)
  • Click to share on Tumblr (Opens in new window)
  • Click to share on Reddit (Opens in new window)
  • Click to share on Pocket (Opens in new window)

Like this:

Like Loading...

Simple Scrapper | September 2013

03 Tuesday Sep 2013

Posted by Sara in Mixed Media, ScrapBook, Simple Scrapper

≈ 15 Comments

Tags

Mixed media, Simple Scrapper

DT badge - simple scrapper

It’s the first Tuesday in September and that means I’m showing you all the DT LO’s I made for Simple Scrapper this month!

You’ve already seen this one:

home

It’s inspired by one of the September Story Starters – if you want to get more info on the exclusive sketch and see the detail shots, check it out here. That will also tell you about Paper Issues; Simple Scrapper is the sponsor for this month’s Issue and there are some great prizes to be won!

My second LO for the month isn’t really a LO at all – it’s a full calendar. I’ve been looking after this sweet boy for three years and Friday was his last day coming here. Every Christmas I make a calendar for the parents but I’ve started this one early, with the help of a September Premium Members Sketch!

july

I love how Jennifer’s templates can even work for non-layout pieces and mixed media!

Plus, it’s easily switched up for portrait and landscape photos.

august

Aimee and Arielle are also posting their LO’s today so be sure to check them out and while you’re at it, leave them a little love! Then come back here for the list of the whole team (on the right over there!) and check out the work they have posted on their blogs and in their 2Peas Galleries.

I promise to post the last of my July Paperie Card Kit in the next day or so; be sure look out for that – it’s a super sweet mini album! And on Friday, I’ll start sharing the September Card Kit, it’s awesome!

S.

The Premium Membership at Simple Scrapper provides skills and shortcuts to help you simplify and find more meaning in your memory keeping.

Share this:

  • Click to share on Twitter (Opens in new window)
  • Click to share on Facebook (Opens in new window)
  • Click to email a link to a friend (Opens in new window)
  • Click to share on Pinterest (Opens in new window)
  • Click to share on LinkedIn (Opens in new window)
  • Click to print (Opens in new window)
  • Click to share on Tumblr (Opens in new window)
  • Click to share on Reddit (Opens in new window)
  • Click to share on Pocket (Opens in new window)

Like this:

Like Loading...

Imperfection…

28 Wednesday Aug 2013

Posted by Sara in Art Journal, Mixed Media

≈ 17 Comments

Tags

Art Journal, Face Sketch, Mixed media

I was playing in my Art Journal this morning, trying out gelatos (fun times!) and making a watery mess. Usually, once my background is done, I’m stuck.

Not so this morning, my friends!

I went to work on a face. And she was going really well…

Then, I messed up the mouth. And in trying to erase it a little, all the paper tore off. Now, let’s be honest here; if I was the patient type (I’m not) and if I had waited for the background to dry properly (I didn’t) I would have had some nice, dry cardstock to work on and none of this would have happened.

If trying to fix the mess of the mouth and torn paper, I destroyed her nose. Sigh. Seriously world? Come on already!

So I threw up my hands, grabbed a tag I had made, and stuck it over her mouth and nose. Problem solved! ๐Ÿ™‚

A Donna Downey stamp, a line of journaling under that, and a bit of Payne’s Grey Golden paint (totally in love) over a stencil and I called it fixed and done!

imperfection - tag

Oh, and since I ripped her face apart, I gave her a fancy hair piece to kind of make up for it – do you like her golden feather? ๐Ÿ™‚

imperfection - feather

I had an interesting conversation with a friend the other day and she said she didn’t like colourful backgrounds behind faces – she couldn’t get past the non-flesh colour. Making this I completely realized that what I like is the unusual colours, I don’t want flesh colour – I like the interest the background work gives the face. What do you all think? Do you prefer the norm or the oddball colouring?

imperfection

I did make a double background so hopefully, when I go to work on the next page, the wet factor shouldn’t be an issue!

S.

Share this:

  • Click to share on Twitter (Opens in new window)
  • Click to share on Facebook (Opens in new window)
  • Click to email a link to a friend (Opens in new window)
  • Click to share on Pinterest (Opens in new window)
  • Click to share on LinkedIn (Opens in new window)
  • Click to print (Opens in new window)
  • Click to share on Tumblr (Opens in new window)
  • Click to share on Reddit (Opens in new window)
  • Click to share on Pocket (Opens in new window)

Like this:

Like Loading...
← Older posts
Newer posts →

This is me!

  • Sara

RSS Feed RSS - Posts

Enter your email address to follow this blog and receive notifications of new posts by email.

Join 997 other subscribers
Simple Scrapper Design Team

Simple Scrapper Creative Team

  • Alexa Gill
  • Allie Trumpower
  • Amy Melniczenko – Team Leader
  • Ann Tamimi
  • Arielle Gordon
  • Cathy Caines
  • Christy Strickler
  • Crystal Livesay
  • Delanie Wood
  • Jamie Leija
  • Jan Sowder
  • Jen Conlon – Social Media Manager
  • Jennifer Johnson
  • Jennifer Wilson – Owner/Editor
  • Jenny Larson
  • Kathryn Quintana
  • Kelly Sroka
  • Kimberly Kalil
  • Lisa Corbin-Polak
  • Lisa Hausman
  • Melanie Ritchie – Graphic Designer
  • Neisha Sykes – Graphic Designer
  • Nicole LeBlanc
  • Sandy Henderson
Scrapbook Steals Design Team

Flickr Photos

i ami am wordsfunny things title
More Photos

Twitter Updates

  • @berncoad @VOCMNEWS @PeterCBC @NTVNewsNL @KellyAnneNTV @CMOH_NL Drives me crazy!The moderator should put a stop to it. 1 year ago
  • #mistergabe repping the rainbow all around today and stealing my @target #targetpride hoodie. #pride๐ŸŒˆโค๏ธ๐Ÿงก๐Ÿ’›๐Ÿ’š๐Ÿ’™๐Ÿ’œ @ Mounโ€ฆ twitter.com/i/web/status/1โ€ฆ 3 years ago
  • Flowers from Evan. ๐Ÿ˜ #awesomeevan #sarathings robertpmendoza @ Mount Pearl, Newfoundland and Labrador instagram.com/p/BzF9AVDh37d/โ€ฆ 3 years ago
Follow @saracees
Follow Me on Pinterest pinterest-5ef5b.html

Categories

Ronda Palazzari Designs
Balzer Designs

Blogroll

  • Artist Wanna Be
  • Confessions of a Twenty Something Artist
  • Darrell Strickland
  • day jobs and the night life..
  • driven to ink
  • For The Love Of Art
  • Gone to the Dogs
  • Graham Case
  • Graham Case Photography
  • It's About Time…
  • pieces of my everyday life…
  • Sit, Scrap, and Relax
  • The Paperie
  • with Coffee in Hand
  • {Every Day}
Art Class Workshop
Balzer Designs Stencil 101
UberMedia Canvas Class
UberMedia Gesso

Archives

  • April 2016
  • February 2016
  • December 2015
  • November 2015
  • October 2015
  • July 2015
  • June 2015
  • May 2015
  • April 2015
  • March 2015
  • February 2015
  • January 2015
  • December 2014
  • November 2014
  • October 2014
  • September 2014
  • August 2014
  • July 2014
  • June 2014
  • May 2014
  • April 2014
  • March 2014
  • February 2014
  • January 2014
  • December 2013
  • November 2013
  • October 2013
  • September 2013
  • August 2013
  • July 2013
  • June 2013
  • May 2013
  • April 2013
  • March 2013
  • February 2013
  • January 2013
  • December 2012
  • November 2012
  • October 2012
  • September 2012
  • August 2012
  • July 2012
  • June 2012
  • May 2012
  • April 2012
  • March 2012
  • February 2012
  • January 2012

Blog at WordPress.com.

Privacy & Cookies: This site uses cookies. By continuing to use this website, you agree to their use.
To find out more, including how to control cookies, see here: Cookie Policy
  • Follow Following
    • sarathings
    • Join 317 other followers
    • Already have a WordPress.com account? Log in now.
    • sarathings
    • Customize
    • Follow Following
    • Sign up
    • Log in
    • Report this content
    • View site in Reader
    • Manage subscriptions
    • Collapse this bar
 

Loading Comments...
 

    %d bloggers like this: