Tags
First, let me say big Thank You to everyone for the great welcome! I felt pretty special! 🙂
I participated in an online crop this weekend and, in the process, rediscovered an old technique that I love. And so Tuesday Techniques was born! On most Tuesdays (you’ll notice I didn’t say all!) I’ll show you a technique that I love to do. It may be an oldie but goodie, or it may be new to me. Whichever, I hope it will inspire you to try it out, play, and have fun!
Today, we’re pulling out our Glossy Accents!
What??? You don’t have Glossy Accents??? Run, run I say, to the nearest Scrapbooking store and buy it up! And if you’re here in Newfoundland, head on over to The Paperie and support our local LSS! Go on, I’ll wait…
Have you got it now? Good! This will become one of your favourite liquid adhesives (I may or may not have glued together everything from chipboard to children’s toys to broken appliances with it…) and, my favourite part, it’s an amazing dimensional glaze. With Glossy Accents, just about anything can be made to look like an epoxy embellishment. The way I use it the most? Little letter stickers. They just pop right off the page when they’re raised and shiny.
Ok, here goes…
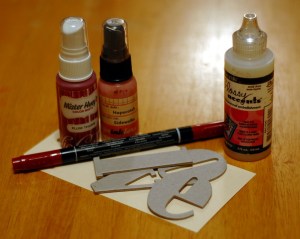
Get your supplies together. I like altering basic chipboard so I started with old Maya Road chipboard letters and some Studio Calico Mister Huey’s.
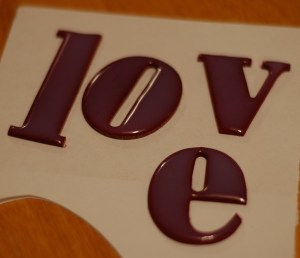
Mist away, let the letters dry a but, then cover each one in Glossy Accents. Just squeeze a generous layer on there and smear around with the tip of the bottle. It stays where you put it so no worries about a big mess. Also, it will look cloudy but don’t worry about that either because it dries completely clear.
Now go away. Leave your letters alone, don’t even think about touching them. Just be sure that little children and cats cannot get anywhere near them – I suggest the microwave. Really.
Come back again in a hour or so. My letters are pretty big, and I put a heavy layer on, so they did take quite some time to dry. Little letters or embellishments with a lighter layer will dry pretty quickly.
Finally, use your Glossy Accents to adhere them to whatever project you’re working on (great glue, remember) and you’re done!
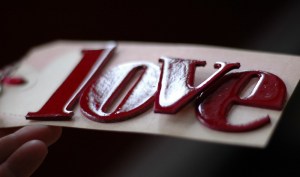
Look at that shine!
And you can add more layers, if you want the letters to be even more dimensional.
Easy, but what an effective step to add. Enjoy, and let me know if you try it. I’d love to see how you shine up your next project!


I love Glossy Accents !!!!!!!
LikeLike
Thanks Sara for reminding about the glossy accents
LikeLike
LOVE glossy accents! And thanks for the reminder that I need to get some more. 🙂
LikeLike
This is a technique that I love!
LikeLike
Yes, an oldie but a goodie! Thanks for the reminder!
LikeLike
Thanks Sara ,cant wait to try this today!!!
LikeLike
Thanks Sara ,I will be doing this later!!!
LikeLike
Love this Sara….thanks for reintroducing us to the wonderful world of glossy!
LikeLike
Thanks for the reminder of how to spruce chipboard up!! Love glossy accents. I even fixed the hem of a pair of pants in a pinch with that stuff! LOL!
LikeLike