
From time to time I get questions regarding how I shoot my LO’s to make them square. I have a pretty very low-tech set-up around here so I thought I’d take today to share. Trust me, if I can do it, so can you!
First up, here’s my photo booth:
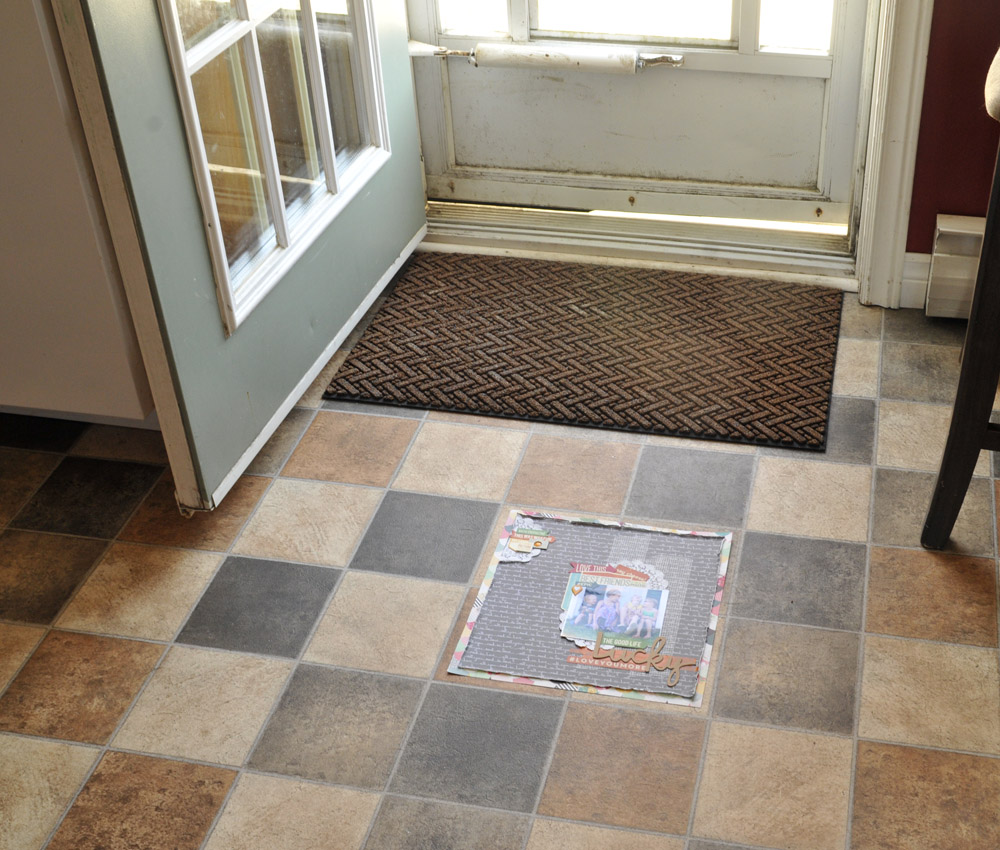 Yup. That’s my kitchen floor. I’m lucky in that it has square tiles to help with keeping everything straight. In the morning, all the light comes through here so I just open the back door and voila! Good lighting! On the rare occasion I shoot in late afternoon I take my LO’s to the living room at the front of the house. The hardwood floor gives me straight lines to use as a guide and the light is perfect there. Better than the kitchen but 90% of the time I need to take pics in the morning (because I’m slack and don’t think about it in time to do it the day before – truth. Total slacker.).
The trick to getting a straight photo, and thus, a square picture, is your stance:
 Gabe was nice enough to take this picture for me. He thought it was pretty funny that I wanted a picture of me like this!
Basically, stand right over the LO, and shoot straight down. Most cameras have guidelines you can line up with the edges of your project but if yours doesn’t, just eyeball it. You can usually easily tell if the sides are square of if they taper off at the top. The problem most people tell me they have is that the pictures of their LO’s are narrower at the top than the bottom – that simply means you aren’t directly over the LO, you’re getting the “tapering into the distance” effect.
Also, to get the best quality picture, shoot at the highest resolution you can and get as close to the item you’re photographing as you can. Here’s the picture I took, straight out of the camera (SOOC). All that means is there’s been no editing, no cropping. If this was film, this would be the picture I got back from the developer:
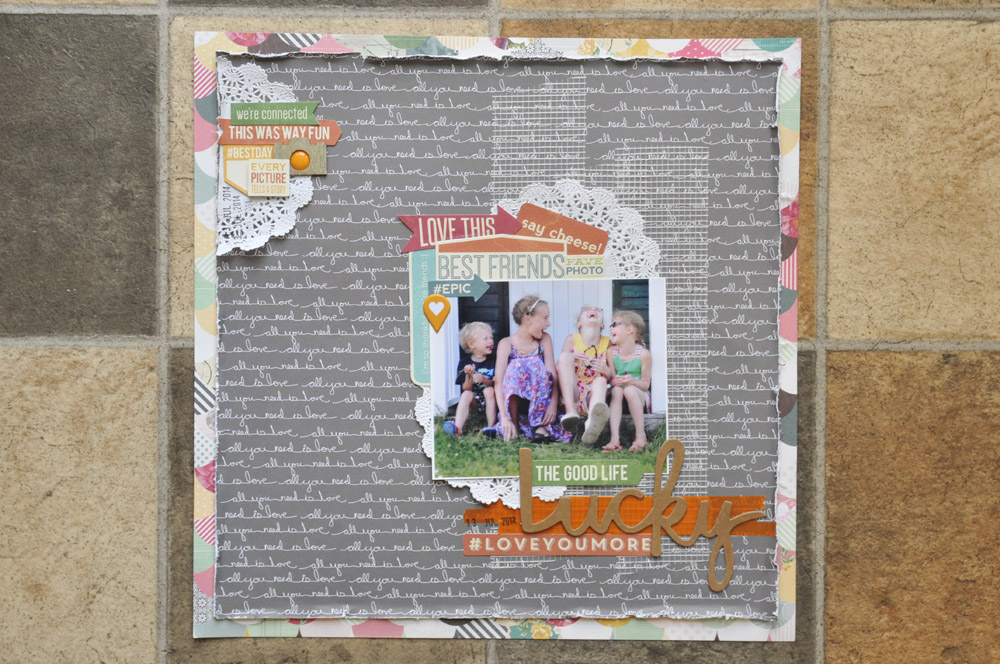 See? Very little left to crop and generally square and true. It’s not exact, of course, but once I edited for white balance and cropped (I use Photoshop Elements 11), I lost very little of the actual LO:
 You can see the white is a little brighter, as are the colours, but with good lighting coming in from the door, it was pretty good to begin with. It’s always better to have good lighting to start with than to try and fudge it too much.
This page was made for a LO tag I did with a bunch of friends. I love these because it’s so much fun to see how it changes as it’s passed from person to person. If you’ve never done this before it’s a simple concept – one person makes a LO and shows it to the next person who scraplifts it. They then show their own LO, but not the original, to the next person in line who scraplifts that, and so on until you’re all done. The difference from the first to the last LO’s are always amazing! If you don’t have a group of friends close by, there are groups online who do this as well. Since you only need a picture, participants can be anywhere in the world!
Hmmmm, maybe I should start one here!
Moving on….
Lots of dimension with foam adhesive, wood veneer, roughed up edges, and layers:
 And texture with doily elements and drywall tape (love that stuff!):
 So that’s it, you too can take straight and square pictures, I promise! And you can always ask if you have any questions or if I just completely confused you! 🙂
Cheers!
S.
P.S. Don’t forget about Photo Crush, the FREE class over at Simple Scrapper! It starts on the 11th and you don’t want to miss out!


Yeah, I should post the layout tag stuff… ugh. hassle. hassle.
LikeLiked by 1 person