Tags
American Crafts, Amy Tangerine, Distress Ink, LilyBee, Papertrey Ink, Ranger, Scor Bug, Scor Pal, techniques
I thought I would do something a little simpler the next few weeks for Tuesday Techniques – Finishing Touches. Sometimes it’s that last little thing that holds us up but is the perfect thing to finish off a project when we do figure it out. Over the next few Tuesdays, I’ll show you a couple of quick, easy things that work for me!
Today, one of my Mom’s favourites when she sees it – Scored and/or Perforated Lines.
You need:
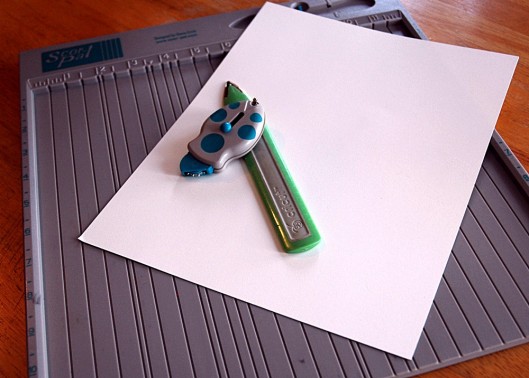
A scoring board, a bone folder, a perforating tool, and cardstock. If you don’t have these items, you can use the ridge in your paper trimmer, your finger nail, and a thumbtack – I just like collecting supplies!
Put your cardstock in the upper left corner, making sure everything is straight, then press the bone folder firmly on the cardstock, letting it run down in one of the grooves; I went 1/2″ in for this step…
…and 1/4″ in for the perforating.
Then I did some masking, inking to pick up the perforations, and I was finished!
And a closeup of the details:
I like how the scoring and perforating, with a little inking, makes it looks like a stitched luggage tag – perfect for this one!
To give you some more ideas of how this technique would finish off a card, here are a Sympathy and Birthday card I made using the same Papertrey Ink set and the ScorBug:
And finally, a card with scored lines and another Papertrey set:
I scored over the drawn lines to give them a little something more. It’s hard to see here, but adds a lot IRL – just a little oomph!
As always, I’d love to see what you do with this, or any technique I’ve shared. Leave me a link in the comments where I can view your project and I’ll take a look!
I’ll be back tomorrow with my 12 on 12 pictures!
S.


May be a silly question – but how did you get the dots on the paper? They don’t look exactly symetrical or perfectly round – is it the paper or is your pinkie? Or what? The eternally curious…..
LikeLike
It’s the ScorBug, a perforator. You can use a thumb tack for a similar effect!
LikeLike
I mean the red dots….did you stamp them on or what?
LikeLike
Sorry! They’re stamped with an Amuse tree stamp.
LikeLike
Great idea here! Never thought to try that before! Love.
LikeLike